
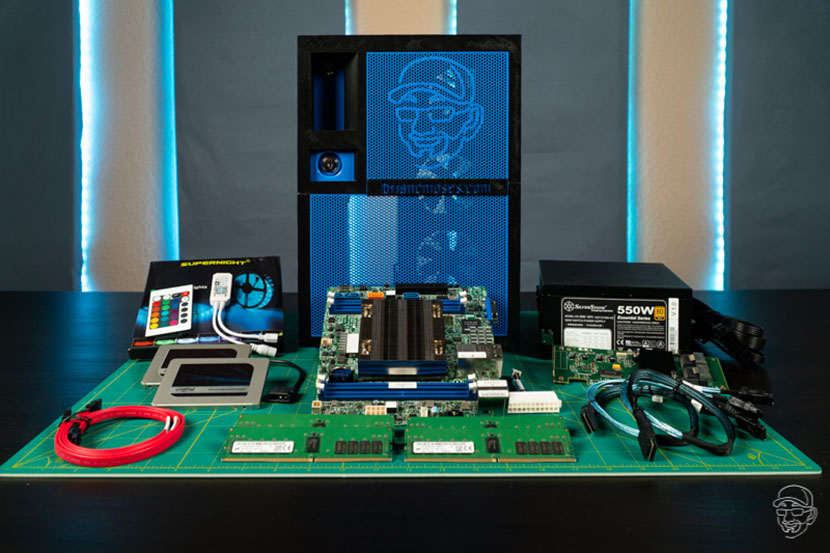
Early on in 2021, I started thinking about my own DIY NAS. I had 3D-printed a case, the MK735, a year or so earlier and I had been waiting for a good excuse to transplant my NAS into this awesome case.

As my DIY NAS kept reliably functioning, I decided that I would stop being patient and I would force the issue via upgrades. I calculated that the best upgrade for my NAS would be to max out the RAM. At the time, I was operating under the assumption that there would be all sorts of inexpensive secondhand DDR3 UDIMMs on eBay. But much to my chagrin, there was none to be found–especially inexpensively. Buying the four 16GB DDR3 UDIMMs to upgrade to 64GB of RAM (from 32GB) was going to cost me $800!
I wasn’t opposed to spending $800 (or more!) to upgrade my NAS, but I would need to get more value out of the upgrade then just doubling the amount of RAM, so I decided that the purpose of this DIY NAS build would be to replace and upgrade what has served me so well the past few years.
Update (01/13/2022): Pat and I devoted an episode to the DIY NAS: 2022 Edition on the Butter, What?! channel on Youtube. Check it out!
Affiliate Disclaimer: Some of the links on this website are affiliate links, meaning, at no additional cost to you, I may earn a commission if you click through and make a purchase. I only recommend products that I believe will add value for my audience. Please understand that I have experience with all of these companies' products, and I recommend them because they are helpful and useful, not because of these small commissions.
Motherboard and CPU
Every year, I spend a ton of time searching for the ideal motherboard for a DIY NAS build–and every year it is a challenge. Once I decided that I would be keeping DIY NAS for my personal use, it became almost impossible to find the perfect motherboard. I spent hours trawling through manufacturers’ websites, online vendors’ advanced search functions, and staring at my bank balance, looking for a motherboard that met this criteria:
- Mini-ITX form factor
- Integrated CPU, preferably passively cooled
- Onboard support for at least 9 SATA drives
- A substantial processor upgrade over my old Avoton C2550
- No felonious assault of my bank account
 I was searching for a unicorn. After trawling through every single MiniITX motherboard from 5–6 manufacturers, I concluded that my ideal motherboard doesn’t exist. My criteria narrowed it very quickly down to motherboards that were prohibitively expensive or would’ve required considerable concessions to my criteria. To make matters worse, the motherboards that were closest to meeting my criteria simply could not be found in stock anywhere.
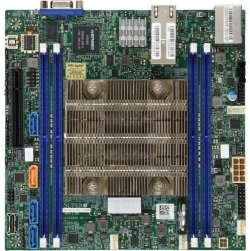
Ultimately, I wound up choosing the Supermicro X11SDV-4C-TLN2F (specs), as it checked off most of the boxes for my criteria:
- Mini-ITX form factor
- Intel Xeon D-2123IT (4-cores, 8 threads, 2.2GHz, 8MB cache, and 60W TDP)
- Up to 512GB ECC LRDIMM
- Up to 8 SATA devices (4 onboard, 4 with OCuLink)
- 1x PCI-E 3.0 X8
- Vendors had listed it as low as $599
Unfortunately, the Supermicro X11SDV-4C-TLN2F would not support all 9 of my HDDs/SSDs. However it did carry a feature my current motherboard doesn’t have–two onboard 10Gb network interfaces–which freed up the PCI-e slot for an HBA, which kept a viable candidate. The integrated Xeon D-2123IT was quite a bit more powerful than my current Atom C2550, and the CPU is passively cooled. The fact that a few vendors had it listed at a somewhat reasonable price ($550–$600) encouraged me to place an order.
 If finding the motherboard was difficult, actually buying it at a reasonable price was damn near impossible. Everywhere I found it listed either had an exorbitant price tag or the vendors with a reasonable price tag wanted you to wait for them to custom order it from Supermicro.
At first, I went the special order route–but chose to cancel my order after weeks went by with no updates and the supposed estimate kept incrementally going up the more time went by. I wound up finding the Supermicro X11SDV-4C-TLN2F listed on eBay and decided to buy it from there for about $650, but that listing has since climbed up up to nearly $800!
Case
 Most years, shopping for the case for the year’s DIY NAS build blog is as much of a challenge that the motherboard is. Not because good options don’t exist, but because I seem to have used most common NAS cases already. When a manufacturer makes a good design, it will continue to be popular for years to come without much (or any) refinement.
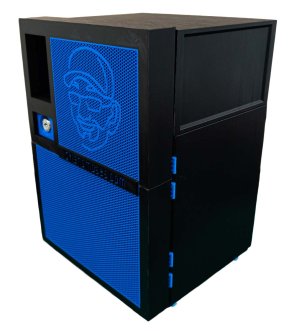
The minute that I decided that I’d be keep this year’s DIY NAS to replace the DIY NAS I built back in 2016, I knew right away what case I’d be using: the 3DWebe.com MK735. The MK735 is so perfectly suited for my personal NAS that I printed my own MK735 and have been waiting for a chance to use it. Among the MK735’s many features, here are my favorite:
- It is 3D-printable!
- 7x 3.5” drive bays
- 2x 2.5” drive trays
- Drives under motherboard design
- 3 independently cooled chambers, motherboard, hard drives, and power supply.
- Case’s grill-laden design allows for excellent airflow.
Don’t have a 3D printer? Or don’t want to spend the time (and money) to manufacture and build your own DIY NAS case? I don’t blame you, 3D-printing a DIY NAS case is no small feat! If it is helpful, I wrote a blog about my favorite DIY NAS cases that contains a few ideas of other cases you might want to try.
Power Supply
 Picking out a power supply for this year’s DIY NAS build was easy, too! Thanks to all of my DIY NAS building over the years, I’ve accidentally bought one or two ATX power supplies when I actually needed an SFX power supply instead. I have been saving those extra power supplies, assuming I’d eventually be able to use one of them.
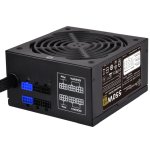
In this case, I had purchased a SilverStone ET550-HG (specs) for a prior DIY NAS build. The 550 watt power supply should be more than ample to power my current DIY NAS which, is currently being powered by a 300 watt power supply.
I’m hopeful that the SilverStone ET550-HG’s 80 Plus Gold certification will be an upgrade in terms of power efficiency and that its fans run quieter than the 1U Power supply that I’m currently using today.
RAM
 The whole reason I decided to keep the DIY NAS: 2022 Edition for myself can be found in RAM. Originally, I wanted to upgrade my DIY NAS from 32GB of RAM up to 64GB. As part of doing that upgrade, I decided I’d swap my NAS into the MK735.
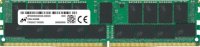
As part of the new NAS build, I still wanted to reach 64GB of RAM. I achieved this by using 4 of the Micron 16GB DDR4-2666 ECC RDIMM (specs). While 2666MHz RDIMMs are supported by the Supermicro X11SDV-4C-TLN2F, they will only operate at the fastest speed supported by the motherboard, 2400MHz. It just turned out that when I was shopping, 2666MHz RAM was priced more competitively than its 2400MHz counterparts.
Host Bus Adapter and Cables
Because I had nine SATA drives that I wanted to bring over into the DIY NAS: 2022 Edition, a Host Bus Adapter (HBA) card was going to be required. If I were building my own NAS from scratch today, I probably would not have gone this route. Instead, I probably matched up a pair of SSDs with 6x 12TB (or larger) HDDs to achieve the same amount of storage that I currently have.
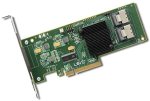 To achieve what I wanted, I was going to need to buy a HBA. In the DIY NAS: 2020 Edition, I purchased an IBM M1015 HBA and used it to make sure that every possible drive bay of its case could be filled. In order to use the IBM M1015 with TrueNAS, it is suggested that you reflash it in IT Mode to give the filesystem unfettered access to the drives themselves. Flashing that firmware wasn’t a tremendously difficult task–but it was challenging enough that I searched for something that had already been flashed for use with ZFS and I found this on Amazon: LSI 9211-8i P20 IT Mode for ZFS FreeNAS unRAID 6Gbps SAS HBA (specs). Spending $10–20 more than I spent on the IBM M1015 was an easy decision when it took me two to three hours just to flash the IBM M1015.
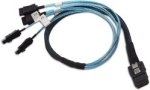 To go along with the LSI 9211-8i, I picked up a pair of Mini SAS to SATA cables (SFF-8087 to SATA Forward Breakout). All seven of my data drives would be plugged into the HBA, the motherboard’s SATA ports would be used for the OS drives, and between the HBA and motherboard there’d be 7 empty SATA ports for potential future use.
Storage
TrueNAS Scale Drives
Up until last year, I’ve been running the OS on USB flash drives (often mirrored across two thumb drives) on all of my DIY NAS builds. For a while now, this has been in contradiction to the suggested hardware recommendations. There’s apparently enough being written to the OS drive now that USB drives are likely to wear out, especially inexpensive flash drives.
Inexpensive SSDs are not difficult to find–but the really inexpensive ones are selling out and never being sold again, which makes it a challenge for me to recommend a particular model. Equally challenging is that SSDs are increasing their capacity and value. Assuming you can find an appropriately sized SSD (32-64GB) or SATA DOM, you’re not really getting the best value when buying it.
 For me, that was just too much potential value in buying a pair of Crucial MX500 1TB to store the operating system on. At the time I bought the SSDs, I figured that I’d try and maximize their value by pre-partitioning the SSDs to use for the OS, ZFS cache (L2ARC or SLOG), and/or some fast storage on the NAS.
Do think this will work out? Or do you think these drives will wind up being 99.97% wasted? Keep on reading to find out!
NAS Hard Disk Drives
The most important part of your NAS build are the hard drives. Regardless of your budget, your storage will likely wind up being the most expensive component of your DIY NAS. It’s also impossible to make a one-size-fits-all recommendation to every prospective DIY NAS builder. Rather than make specific recommendations of what hard drives to purchase, I like to make suggestions:
- Measure and project your storage needs: How many hard drives you need for your DIY NAS ultimately depends on how much storage you currently need and how much you project that will increase over time. Oftentimes, spending more money now will be cheaper in the long run.
- Understand your data’s importance: Knowing the importance of your data is critical to choosing how many HDDs. Ask yourself, “What happens if someone steals my NAS?” Your answer to this question should help you understand what your hardware redundancy and backup plan should be. If your data is critical to you, your budget should include both hardware redundancy and some sort of off-site backup.
- Buy CMR Hard Drives for use with ZFS: Many Western Digital customers were shocked when their so-called “NAS-grade” drives were unreliable in their NAS systems as a result of Western Digital surreptitiously sneaking SMR technology into their Red products. Typically, the easy way to avoid this is by purchasing NAS-grade hardware, but the better advice is to buy drives using Conventional Magnetic Recording (CMR). Personally, I don’t really care if my HDDs are NAS-grade or not; if I find consumer-grade CMR HDDs, I’d happily store my data on them.
- Consider Shucking External HDDs: Usually the most cost-efficient method of buying hard drives is by buying external USB hard drives and removing the hard disk drive from inside the enclosure.
Here are a few recent deals that I’ve seen which have been compelling. I’ll be maintaining and updating this throughout as I learn about good deals on hard drives:
A few recent sub $14-per-terabyte hard drive deals:
| Hard Drive | Price | |
|---|---|---|
| HGST Ultrastar He10 (HUH721010ALE600) 10TB (Renewed) | specs | $77.50 $7.75/TB |
| Western Digital Ultrastar DC HC520 (HUH721212ALE600 ) 12TB (Renewed) | specs | $118.99 $9.92/TB |
| 2-pack Seagate Exos X16 16TB ((ST16000NM001G) | specs | $433.99 $13.56/TB |
I purchased some hardware you probably won’t need, too!
Once I decided to keep this DIY NAS for my own use, I knew I would be buying a few components that I wouldn’t necessarily recommend that others buy.
RJ45 to SFP+ Transceivers
Five years ago, I built out an inexpensive 10Gb network using some secondhand 10Gb SFP+ network cards and setting up a point-to-point network between my desktop, my Homelab machine, and my NAS. About a year ago, I added a 10Gb SFP+ to my network, which simplified things quite a bit.
![]() Unfortunately (for me) the Supermicro X11SDV-4C-TLN2F’s 10Gb interfaces are both RJ-45. As a result, I bought a 2-pack of iPolex 10G SFP+ RJ45 Copper Transceivers to allow the DIY NAS: 2022 Edition to work with my network.
Unfortunately (for me) the Supermicro X11SDV-4C-TLN2F’s 10Gb interfaces are both RJ-45. As a result, I bought a 2-pack of iPolex 10G SFP+ RJ45 Copper Transceivers to allow the DIY NAS: 2022 Edition to work with my network.
LEDs
I’ve been impressed with putting LEDs inside computers. I think, when done well, they look pretty awesome. But I have never been tempted to do it myself. I don’t think a computer should be a focal part of your office’s decor. My preference has always been that computers are black or beige boxes, preferably out of view. But ever since starting The Butter, What?! Show with Pat–I’ve been looking for ways to make the background of my office a bit more interesting to look at and to try and feature my enthusiasm for DIY NAS topics. As a result, I had a brainstorm and asked myself “What if I put LEDs into my DIY NAS?”
We livestream the recording of The Butter, What?! Show on the first Tuesday of every month at 9 p.m. Central Time. What we wind up recording gets broken up into weekly episodes that are published to YouTube on Mondays. Come join us!
 Naturally, there’s no hardware on Supermicro X11SDV-4C-TLN2F for controlling the LEDs, so I picked out the Nexlux WiFi Wireless LED Smart Controller to drive the LEDs. I purposefully picked something that I thought would work well with my Home Assistant server and began thinking of ways that I could incorporate my NAS into my Home Automation.
 I bought the same LEDs that I’m currently using on the back of the sound-absorbing panels in my “recording studio.” I’ve been happy with how the SUPERNIGHT LED Strip Lights have worked out so far. I’m pretty certain that I’ll have quite a few feet of LEDs left over. What sort of LED lighting projects should I incorporate into my Home Automation? Let me know in the comments below! To round out my LED product purchases, I picked up a 4-pin molex to 2.1mm barrel jack to power the LED controller and LED strip from the computer’s power supply.
Final Parts List
| Component | Part Name | Qty | Cost | |
|---|---|---|---|---|
| Motherboard | Supermicro X11SDV-4C-TLN2F | specs | 1 | $775.00 |
| CPU | Intel Xeon Processor D-2123IT | specs | N/A | N/A |
| Memory | Micron 16GB DDR4-2666 ECC RDIMM (MTA18ASF2G72PDZ-2G6E1) | specs | 4 | $67.98 |
| Case | 3Dwebe.com MK735 | specs | 1 | $19.99* |
| Host Bus Adapter | LSI 9211-8i P20 | specs | 1 | $89.00 |
| Power Supply | SilverStone SST-ET550-HG | specs | 1 | $64.63 |
| OS Drive | Crucial MX500 1TB 2.5" SSD | specs | 2 | $99.99 |
| SAS Cable | Internal Mini SAS SFF-8087 to Mini SAS High Density HD SFF-8643 | N/A | 2 | $11.99 |
| Misc. Network | 10G SFP+ RJ45 Copper Transceiver | 2 | $50.98 | |
| LED Controller | Nexlux WiFi Wireless LED Smart Controller | 1 | $10.99 | |
| LED Lights | SUPERNIGHT LED Strip Lights, 5M SMD 5050 | 1 | $14.99 | |
| Molex to 12V Power Cable | CRJ 4-Pin Male Molex to 12V DC 5.5mm x 2.1mm | 1 | $5.99 | |
| TOTAL: | $1,565.41 | |||


Hardware Assembly, BIOS Configuration, and Burn-In
Assembly
Normally, when describing the assembly of a DIY NAS build, I strive to be really detailed for people who might choose to build their own DIY NAS using some of the parts from my blueprint, especially the case. 3D-printing and building the MK735 has been one of my favorite projects, but it took a lot of time, effort, and materials. I don’t expect that many people reading this blog will be using the MK735, so I am keeping the assembly notes a bit brief.
The two most difficult parts of assembling my DIY NAS in the MK735 was mounting the motherboard itself and the HBA. The trouble that I ran into in mounting the motherboard was twofold. First, it fits like a glove–there’s very little play for the motherboard once it is down in its tray. Second, you wind up threading the holes as you drive the screws into them for the first time. That makes putting the motherboard’s screws in pretty challenging–if I had to do it all over again, I’d remember to pre-thread each of these holes. However, it’s important to not over-tighten the screws too. Otherwise, you might strip the hole itself.
There’s enough room for the HBA, but I found that I couldn’t connect the cables when the HBA was installed. This is due to the MK735’s very compact nature–and I always expect these kinds of challenges when working with a small form factor case. Removing the HBA, installing the cables, and then bending the cables 180 degrees around the edge of the HBA allowed me to install the HBA.
I wound up deciding that I would save the installation of the LED controller and LED lights for a future blog. I think there’s an entire blog’s worth of content between installing the LEDs, incorporating them into my home automation via HomeAssistant, and automating some NAS-specific tasks. Plus there’s some exciting overlap with our Ooberlights project too!
Here is a time-lapse video of the hardware assembly, TrueNAS installation, and the configuration I did to set up a simple share on the DIY NAS: 2022 Edition. And if you’re really interested, I also made a nearly real-time version of the assembly video too after a few people had requested it previously.
BIOS Configuration
In the DIY NAS builds of the past, I seem to recall a sneaky BIOS configuration change that needed to be made in order to get the DIY NAS to function. I noted that and said to myself, I need to remember this when I write the blog! Every year since, I’ve kept this heading in the blog for similar sneaky configurations, but I’m still relieved that pretty much the only change I ever make in the BIOS is to change the order of which devices it’ll boot from–and this year’s NAS build was no different.
Burn-In
Typically, my DIY NAS builds aren’t in my possession for very long, so I like to torment the hardware a little bit to make sure there’s nothing wrong with it. However, since I’m planning to use the DIY NAS: 2022 Edition as a replacement for my current NAS, I can be a little more relaxed with my burn-in. I plan to run the DIY NAS: 2022 Edition (using some old drives) next to my current NAS for an extended period and evaluate its performance. Once I’m fully confident in the new machine, I will migrate my drives and settings over to the new NAS.
Regardless, I always burn-in any computer I build by running Memtest86+ for three single-threaded passes, and this year’s NAS build was no exception.
TrueNAS SCALE
I have been excited about TrueNAS SCALE since its announcement. What is TrueNAS SCALE and how does it differ from TrueNAS CORE (formerly known as FreeNAS)? I haven’t really used TrueNAS SCALE enough to pretend to have any expertise, but here’s a really high-level at stab some important features from my point of view (a DIY enthusiast):
- Maturity: TrueNAS CORE (FreeNAS) has been around for a long time and TrueNAS SCALE just recently produced its first release candidate.
- Operating System: TrueNAS CORE is built atop FreeBSD and TrueNAS SCALE is built atop Debian
- Both use ZFS: OpenZFS is at the root of both CORE and SCALE. In my opinion, that makes them both pretty interchangeable for my usage.
Personally, I’m excited about TrueNAS SCALE for a few reasons:
- SCALE’s “hyperconverged” approach seems ideal for what many DIYers–myself included–are hoping to do with their NAS and/or Homelab builds.
- I’m less incompetent using Linux than I am using FreeBSD.
- SCALE should allow me to retire my separate Homelab server
- Migrating KVM VMs over to my TrueNAS SCALE box
- Replacing existing VMs (Plex, HomeAssistant, Nextcloud) with Linux Containers

Installing TrueNAS SCALE
In picking out components for the DIY NAS: 2022 Edition, I chose to buy a pair of Crucial MX500 1TB SSDs because the value of larger SSDs couldn’t be passed up. But in its current form, TrueNAS SCALE partitions and uses 100% of the OS drive’s space–which negates that potential value.
When I decided to use a pair of 1TB SSDs to act as the OS drive, I was determined to try and find a method that would allow me to create an appropriate-sized partition the SSDs for TrueNAS SCALE and then partition the remaining space to use for fast storage and/or ZFS caching (L2ARC and SLOG).
At any rate, I found this guide to partitioning a SSD as part of the TrueNAS Scale install in the /r/truenas sub-Reddit. Effectively, you modify the TrueNAS installation script to constrain the size of the boot partition created during the installation. After installing TrueNAS, you use the command-line to partition the remaining space, create a ZFS pool from those new partitions, export the pool, and finally import the pool using the TrueNAS SCALE web-interface. Following this guide worked perfectly for me, with one wrinkle: the specific line which needed editing. In the 9 months since this post was shared on reddit, the contents of /usr/sbin/truenas-install have changed. The author probably predicted this would change and shared the script’s location in the source code repository–so it was easy to go figure out where that line could be found in the current version of the script.
 I named the pool made out of partitions on the SSDs “fast” and then created a new pool out of 7 high-mileage spare HDDs left over from my upgrades to larger hard drives. I created a RAID-Z2 pool named “slow” out of these old drives. After that, I created a new Local User for myself, created a Local Group called shareusers, and added my account to that new group. On each pool, I created datasets (fast-share and slow-share) and set the datasets’ permissions so that the shareusers group could read, write, and delete files contained in that dataset.
Finally, I opened up each share in Windows explorer, created a file, renamed that file, and then deleted that file to confirm that the share and file permissions had been set up correctly.
Just like that, my very first TrueNAS SCALE machine was up and running and ready to meet some network-attached-storage needs!
What’s Next, Brian?
In most years, I’d spend the end of the blog sharing some of the conclusions that I’ve reached based on the performance of the DIY NAS build, its cost, and its comparison to other products like it. I’m every bit as confident in making these declarative statements with the DIY NAS: 2022 Edition, but I’d rather take the opportunity to show it in 2022. So what’s next? More DIY NAS blogs, that’s for sure! I’m going to be running the DIY NAS: 2022 Edition in parallel alongside my current NAS for a while. Typically, I rush to do some throughput testing in an effort to demonstrate the performance of the new machine for prospective buyers. But because I’m keeping the DIY NAS: 2022 Edition for my personal use, I’ve got a few ideas for new blog topics:
- Comparing/contrasting the performance of my old NAS and the new one.
- My migration from TrueNAS CORE to TrueNAS SCALE
- Using TrueNAS SCALE’s “apps” to retire Virtual Machines
- Consolidating my NAS and Homelab onto the same hardware
- Incorporating my NAS into my Home Automation
What other kinds of DIY NAS/Homelab content would you be interested in? If you’ve been interested in building your home server, what’s been holding you back? I would love to hear about your own DIY NAS and Homelab journeys in the comments below. Even better, come join the Butter, What?! Discord server and share your thoughts in the #diynas-and-homelab channel!