
Update (06/12/2024): Unfortunately, it seems to be impossible to obtain the MK735. The creator’s website and the listing for the MK735 have gone dark for quite some time. I recently reviewed two new 3D-printable DIY NAS cases for my blog. Anyone who wants to 3D-print their own DIY NAS case should check it out!
Prior to my DIY NAS builds, I mostly tried to hide my computers under or behind desks because I didn’t really want them to be seen. However, when I embarked in the blogs I wrote around building my first DIY NAS, I knew I’d want to build something I’d be showing off in pictures on my blog. The consequence to this shift in thinking was that choosing a case became much more important to me than it had been in the past. For that first NAS, I wound up picking the Lian Li PC-Q25B.
Affiliate Disclaimer: Some of the links on this website are affiliate links, meaning, at no additional cost to you, I may earn a commission if you click through and make a purchase. I only recommend products that I believe will add value for my audience. Please understand that I have experience with all of these companies' products, and I recommend them because they are helpful and useful, not because of these small commissions.
 In the subsequent years, I found that I was envious of the Silverstone DS380B that I used in the DIY NAS: 2015 Edition and then even more envious of the U-NAS NSC-800 which I used the following year in the DIY NAS: 2016 Edition. I decided in 2016 that if in the process of building one of my DIY NAS machines that I became impressed enough by the hardware, I’d upgrade my own NAS to match what I was envious of. Subsequently in 2016, I upgraded my own NAS with my primary intention being to put it all inside the U-NAS NSC-800.
Since my upgrade in 2016, the U-NAS NSC-800 has been hands-down my favorite DIY NAS case. But when Toby K. sent me his 3D-Printed NAS case, the MK735, I knew that was all about to change!
What’s the MK735?
The MK735 is a 3D-Printed DIY NAS case that can hold up to a standard ATX power supply, up to seven 3.5” hard disk drives, two 2.5” SSDs (or 2.5” hard disk drives, probably), a MiniITX motherboard, and two half-height PCI-e cards. And as far as I’m concerned, it is a work of art. Beyond its artistry, it’s also something that I’d be able to make my own mark on with my own crude 3D-design skills. At first, something simple like vandalizing it with my site’s logo. But in the future? I’d like to incorporate the OoberLights as part of the MK735. I’m more than capable of finding a way to incorporate the Ooberlights right into the grill making up the door on the MK735 case.
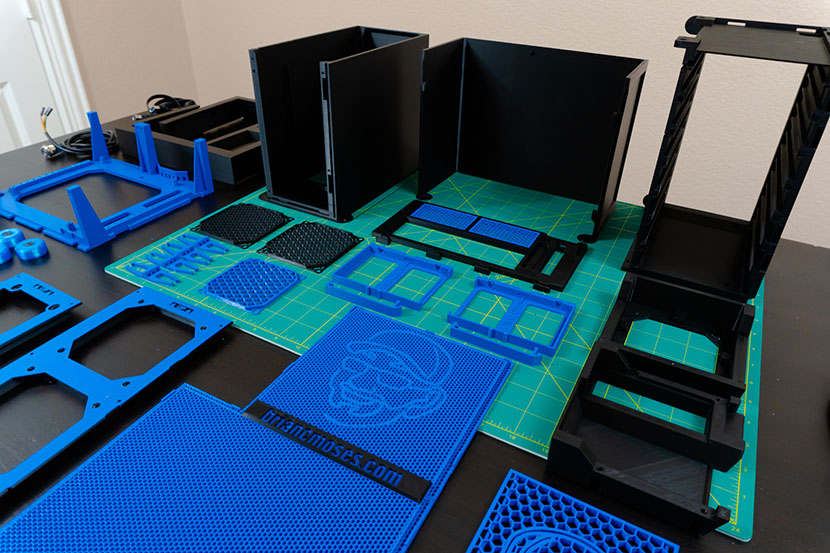
Printing the MK735
There are no two ways around this, printing the MK735 took a really long time. A number of the prints were well over 24 hours long, with the longest print taking nearly 48 hours. Altogether, it took 227 hours, 11 minutes, and 44 seconds of printing time. And this figure only accounts for the successful prints–along the way there were a number of failed print jobs thanks to some power outages and carelessness on my own part.
However, my success rate on printing these parts was surprisingly high! Primarily, I have Toby K. to thank for that. Included with all the files for the 3D objects was a set of documentation and print settings matrix for each of the objects. The documentation was top-notch, and for each object it made suggestions on how to make sure that the object printed successfully. Without that documentation and those suggestions, I’m certain there would’ve been many more failed prints than I wound up experiencing.
Video of 3D-Printing the MK735’s Parts
Assembling the MK735
Again, thanks to the wonderful documentation that accompanied the MK735, assembly was really pretty simple–with a couple minor gotchas and one pretty big one! Nearly all of my troubles were self-inflicted. Everything was fitting together incredibly well right up until I had to assemble the door.
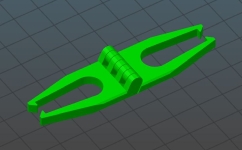
The first tiny, minor problem that I ran into is that the brilliant dovetail which is used to join the two grills together to form the interior of the case’s door did not fit together smoothly. I simply hadn’t paid enough (or any?) attention to cleaning the three objects up after they printed. They didn’t fit together well enough that I couldn’t even take them back apart to try and clean up the surfaces where the three different objects were coming together. Faced with the prospect of reprinting each of the objects, I gambled that I’d be able to apply a lesson I’d learned from one of my uncles, who taught me: “I’ve never met a problem that a big enough of a hammer can’t fix.”

To my eventual discredit, using the hammer here surprisingly worked! I was gentle, but firm enough that tapping the three pieces with the hammer slowly moved the dovetail and two grills to exactly right where they needed to be. This allowed me to finish assembling the door. I then tried to get the hinges mounted to the case and found out that they were equally stubborn, despite my best efforts trimming and filing the hinges down. I gambled again that I’d be able to install the hinges with the assistance of my hammer and began tapping them into place on the drive chamber. All four of the hinges snapped into place, and when I went to install the door, I noticed that on one of the hinges, there seemed to be some blue plastic fragments falling out of the hinge. Thinking that it was just leftover bits from what I’d trimmed, I shrugged my shoulders and kept working, trying to get the door-side of the hinges installed when all of a sudden, one of the hinges crumbled apart and broke into two pieces!
My brutish hammering had damaged the hinge and it fell apart! To make matters worse, I couldn’t remove the broken hinge. Not by using the clever hinge removal tool that Toby designed, not by using my favorite pair of pliers, and not even by trying to use a drill and a tiny drill bit in an effort to break apart the hinge. None of my efforts bore any fruit at all and it pretty quickly dawned on me that I’d need to start a new 48-hour print to replace my ruined drive chamber. Moreover, I’d have to disassemble nearly everything and start all over from scratch with the assembly.
Then bad turned into worse. In removing the butterfly pins that conjoined the power supply and drive chambers, I heard a sickly creak and crack as one corner of the power supply chamber came apart along with one of the layers of the 3D Print. Now I was in the hole two different 40+ hour prints, plus I needed to find a solution for my hinge problem! That same night, I set off on beginning my new prints and ordered new spool(s) of filament out of concern that I didn’t have enough (I didn’t) and that I’d break something again!
That week, I printed a new drive chamber, a new power supply chamber, a couple sets of new hinges, and a test object which included a hinge pocket to test-fit the hinges in before I risked putting them into the drive chamber again. I hit the reset button and on that Friday night, I set to assemble the case again. That’s when I ran into a new problem: these two objects came from the same roll of filament, but the butterfly pins I had used to join them before wouldn’t fit any longer! For some reason, this new roll of filament seemed to be over-extruding a tiny bit and I had to file down both the butterfly pins and their pockets before everything would fit together nicely.
When it got to the point of assembling the door and attaching it to the frame, I started off by using the test object which included a hinge pocket. My goal was to install and remove each of the hinges before I even attempted to install them in either the door or the case itself. I spent what seemed like hours using my deburring tool, some precision files, and my Xacto Hobby Knife set working on whittling the hinges down to the right size. After quite a bit of sweat and muttering of four-letter words, I finally was able to get 3 out of 4 hinges trimmed down far enough that they could be installed and removed from the test object. But on the fourth hinge, it eventually got stuck exactly the way a hinge got stuck in the case before! On the one hand, I was thankful it was stuck in a test object and not the chamber itself, but on the other hand it meant I was still no closer to having completed the case’s assembly.
 Following some discussions with the case’s designer, Toby K., and then also with my fellow beta testers, we all concluded that the hinges might be a bit too snug. I learned that I’d done well filing down how wide the hinges were, but I didn’t think to do anything about their height, either. Other testers had to scrape off some of the height to get them to fit nicely. Having learned about this and removing and reinstalling his own hinges, Toby decided that he’d redesign the hinges by making them a touch shorter and then to also add a chamfer to reduce the friction.
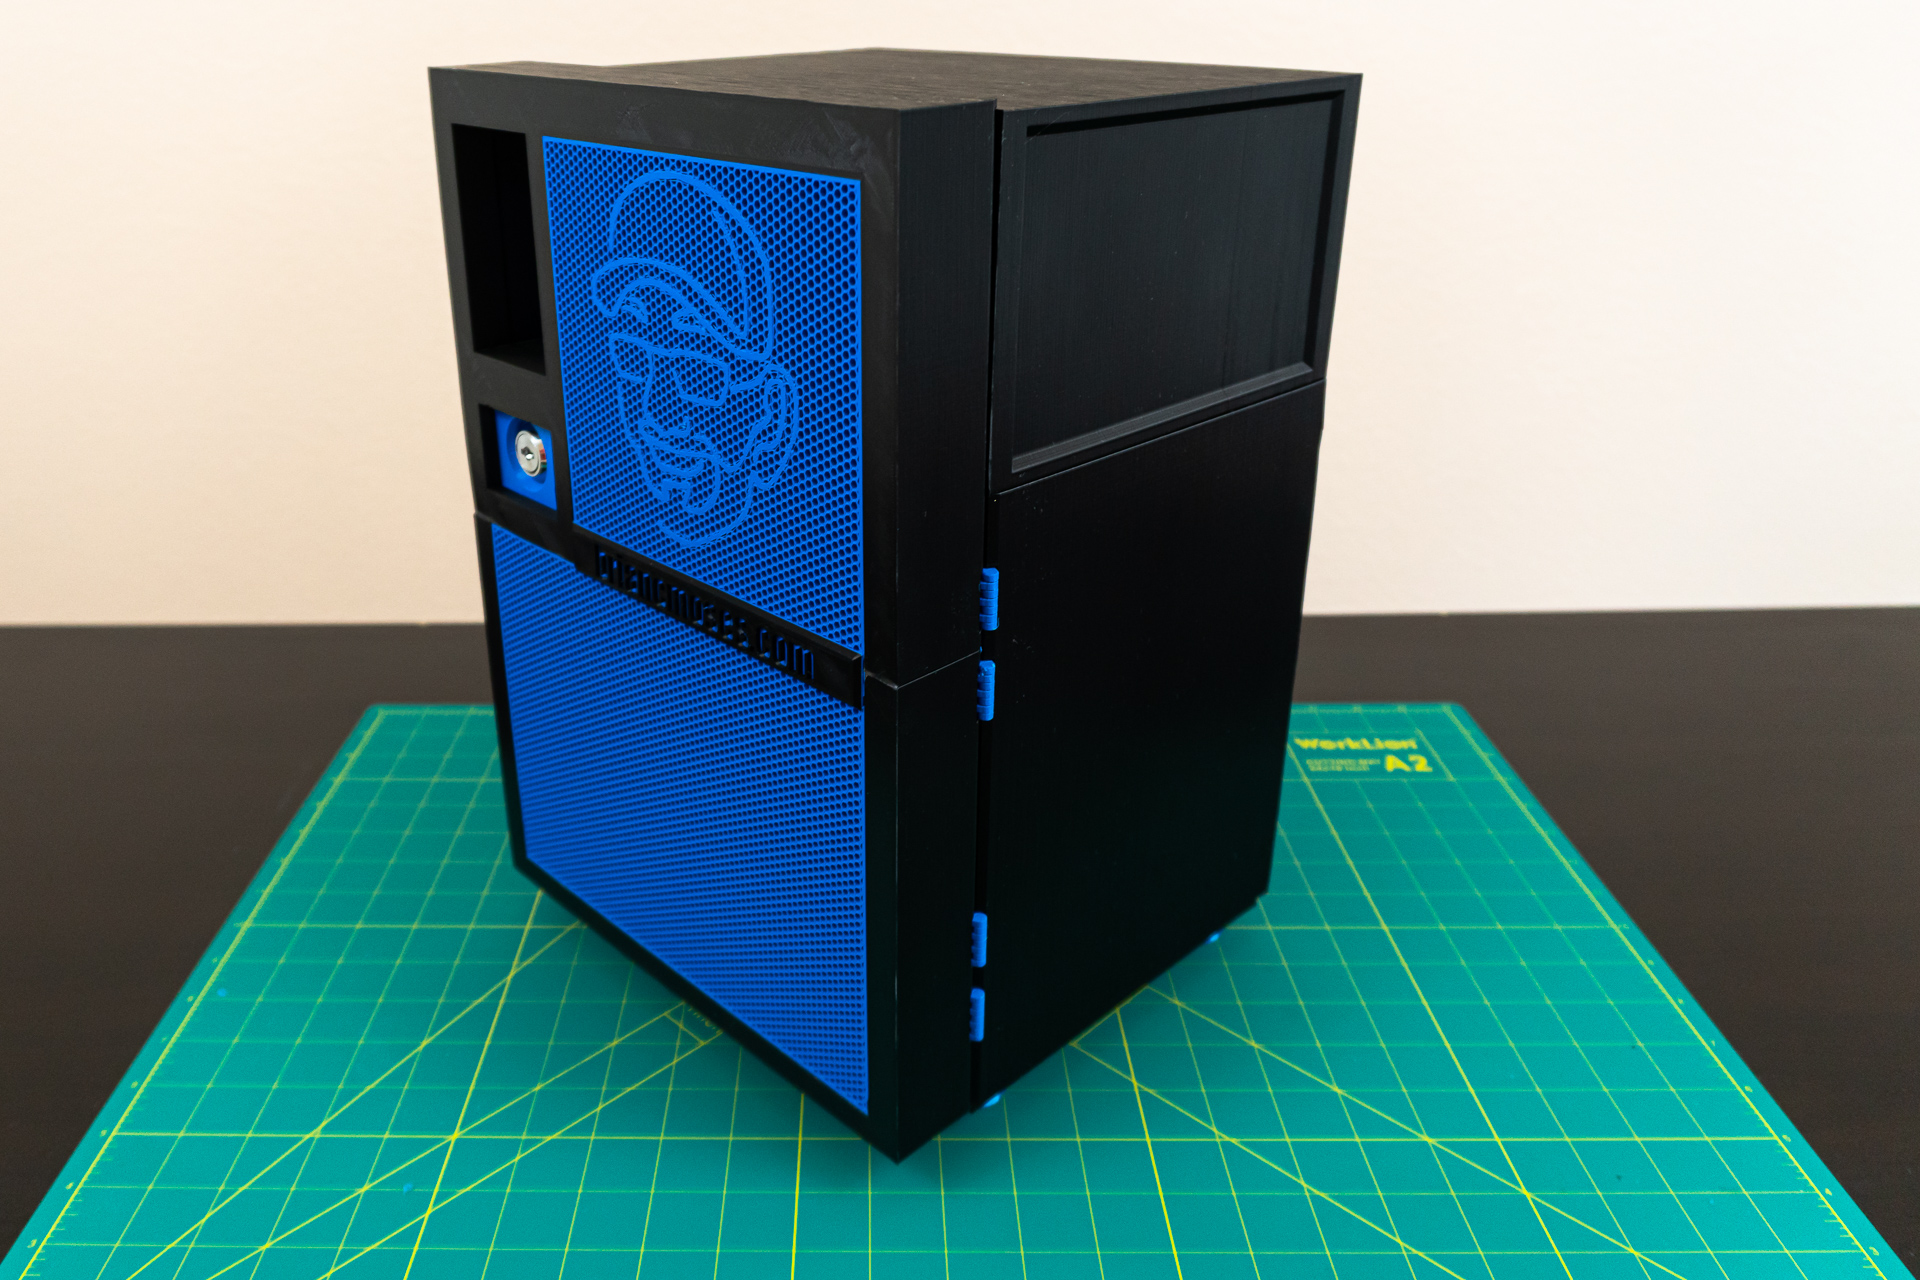
The next day, I’d printed 3 different sets of the hinges: the original hinges, some tweaks of my own, and an early version of the new-and-improved hinges. I immediately set out to use the author’s modified hinges and dropped the hinge right into its pocket and it slid in really easily. Out of paranoia, I used the deburring tool and whittled it down a little bit on the corners. This time around, I snapped the hinges into the door first and then installed the door right onto the case. Much to my relief, it fit like a glove, and my MK735 was fully assembled!
Video of Assembling the MK735’s Parts
What’s Brian Think?
Was I happy that I decided to print the MK735 to be used with own NAS? Absolutely! Do not get me wrong, it was an expensive and sometimes frustrating endeavor. For starters, adding up the filament consumed for each successful print put me right at 800 meters of filament used. That’s about two and a half 1kg spools of filament to print the entire case, and that’s assuming nothing goes wrong with any of the prints. Filament runs about $20-$40 per 1kg spool, depending on the kind of filament used. Moreover, it also involves printing with two different types of filament. So, operating under the assumption that you didn’t have any filament at all, you’d be buying at least 4 new rolls of filament to complete this print. If you wanted to do multiple colors like I did, you might need additional rolls of filament for the new color. Beyond the filament, there’s some hardware–some optional–that you’ll wind up buying: various assorted screws, the internal USB ports, the power switch, and magnets to hold the lid shut. By the time you factored in all the added cost for filament that I spent reprinting the extra drive chamber, power supply chamber, hinges, and test objects, I wound up spending way more than the $199 that my U-NAS NSC-800 cost me.
Altogether, I spent a pretty decent amount of money on what went into the case. But what I spent in actual money is only a drop in the bucket when you consider the amount of time that I spent making my own modifications to objects, preparing to print each of the objects, monitoring each print, working with each object following the print to get it ready for assembly, and then finally all the work that went into the case’s assembly
By now you might be asking yourself, “Then why on Earth did Brian spend so much of his money and time 3D-printing his own DIY NAS case?”
I’m really proud of what I’ve wound up creating. I’ve enjoyed this entire process. Each time a print completed and I added it to my project table to take pictures of before the assembly, I had a fun time working out in my head how everything would eventually go together. I thoroughly enjoyed the actual assembly, even the parts that didn’t wind up working out that well. And the payoff of the final assembled product was the pride that I got knowing that it was something that I made using the tools at my disposal.


What about you all? Assuming you have a 3D printer or had easy access to one, would you go the route of 3D-printing your own DIY NAS case? Let me know if you would and why you decided that in the comments!
What’s Next?
Next up? Well, I’ll need to move my own DIY NAS and probably write a blog about that process! For starters, I’ll need a new power supply and network card. I figured this would be a good chance to maybe find a decent modular ATX power supply for my NAS. Because the NIC I bought for my inexpensive faster-than-Gigabit network is a full-height PCI-e card, I’ll also need to swap it out for a half-height card.
Additionally, I’ll need a new power supply. The little 1U power supply being used in my UNAS NSC-800 isn’t going to work in the MK735. I also figured it’d be nice to be back to using a common power supply type. Maybe there’ll even be some improvements both in terms of power efficiency and noise.
I can’t wait to have my NAS sitting in the MK735 over on my other desk!