
For many years now, I’ve been building, blogging, and giving away DIY network-attached storage (NAS) builds. I was started down this path when I couldn’t find a relevant and recent build parts list to follow when I built my first DIY NAS back in 2012. In blogging about my own experience building my NAS, I surprisingly find myself atop Google’s search rankings for search terms like “DIY NAS”. Ever since, I’ve been regularly building and blogging about my different DIY NAS builds. My perpetual hope is to encourage potential DIY NAS enthusiasts to build and design their own custom DIY NAS solutions.

When I got done with last year’s DIY NAS build, I thought that I had built the most bananas over-the-top DIY NAS build that I could possibly imagine. Upon finishing it, I committed to myself that the 2020 DIY NAS build would be far more restrained.
Affiliate Disclaimer: Some of the links on this website are affiliate links, meaning, at no additional cost to you, I may earn a commission if you click through and make a purchase. I only recommend products that I believe will add value for my audience. Please understand that I have experience with all of these companies' products, and I recommend them because they are helpful and useful, not because of these small commissions.
But then I built my first AMD-based DIY NAS, the 2019 EconoNAS, and in building that NAS I realized that the extreme flexibility of AMD’s CPU architecture was suited quite well for DIY NAS enthusiasts to take advantage of. When I published last year’s EconoNAS blog, I remarked to myself, Well I guess I have to build an even more bananas AMD DIY NAS now, don’t I?!
- DIY NAS: EconoNAS 2020: a 10-drive, MicroATX NAS at around $500
And then 2020 happened…
…and thankfully my wife, son, and I remained healthy–something I wish for all of you too. As a Type 1 Diabetic, I’m among the highest risk for bad outcomes. As I began working from home, I thought I’d be able to spend a few of the weekly hours that I spent commuting working on blogs instead.
 But what I found was the opposite–surviving a pandemic, being a productive remote worker, plus trying to help keep an eye on my feral 4-year-old son was a tremendous energy drain. I did my best to emulate my amazing wife and focused my efforts on our household, and unfortunately the DIY NAS: 2020 Edition suffered for it.
All of the hardware that I’d purchased so far languished in my “other office” while I re-acclimated to this new normal!
If you’ve ordered anything online recently, you’ve certainly noticed that COVID-19 has disrupted a lot of the availability of items. This is especially true of the components in the DIY NAS: 2020 Edition. I was disappointed to see how much of it has been difficult to find in stock. If you decide to emulate this build, please use the comments below and help each other out in finding vendors with the parts in stock–or suitable replacements for hard-to-find components!
Case and Power Supply
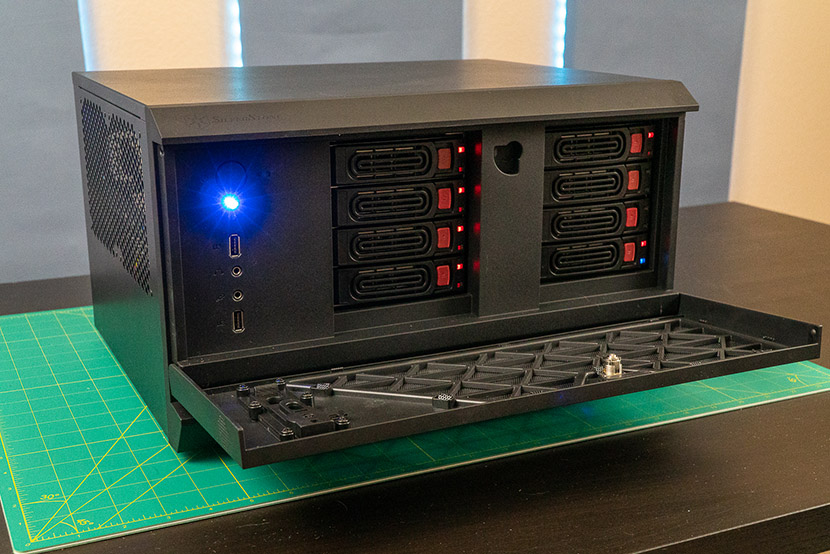
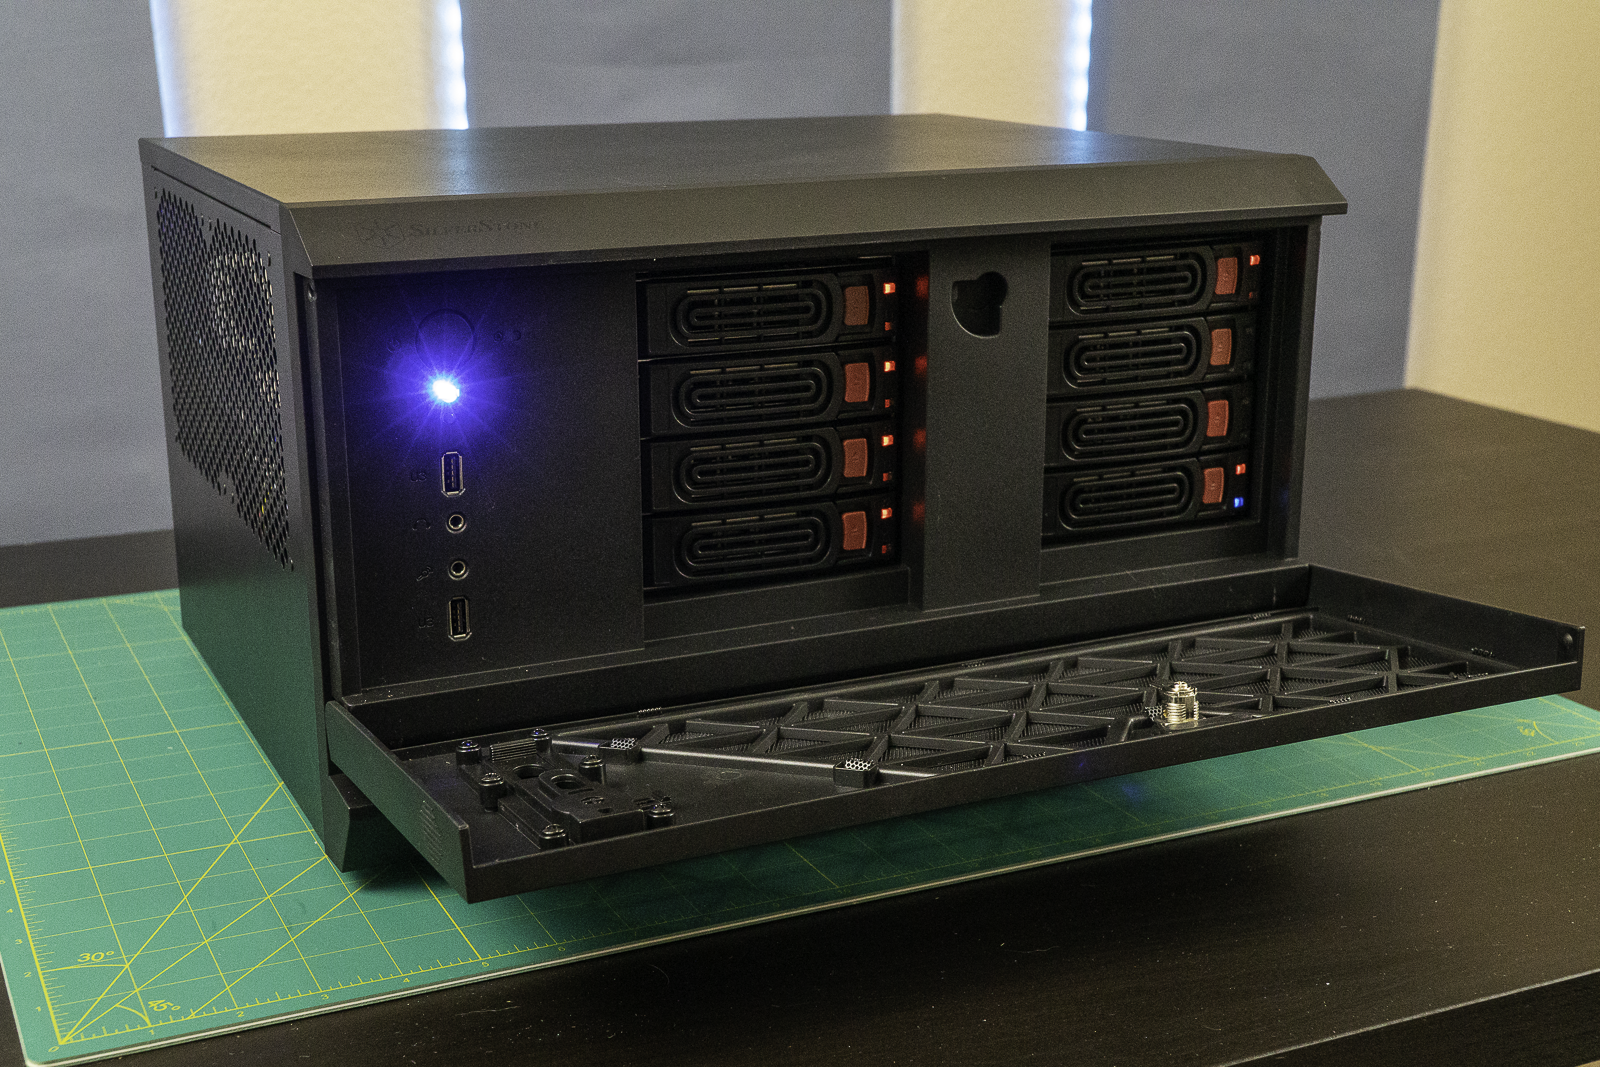
 For every NAS build, I always like to lead off with the key component, which in most years is the motherboard. Especially with my preference for smaller motherboards and integrated CPUs. But this year is different! In late 2019, SilverStone contacted me and asked if I’d review the SilverStone CS381 (specs) if they sent one to me.
The SilverStone CS381 is really impressive on paper. There’s room in the case for a total of 12 different hard disk drives. With 8 of those hard drives being accessible in hot-swap drive bays. The case accommodates Micro-ATX, Mini-ITX, and Mini-DTX motherboards. While I prefer smaller cases for my DIY NAS builds, the CS381 is not a large case by any stretch of the imagination. Moreover, its bigger footprint allows it to accommodate cards up to 267mm or even a 240mm radiator for a water-cooling setup.
Of the many components in the DIY NAS: 2020 Edition, I’ve been most excited about getting my hands on the SilverStone CS381. Will it warrant an update to Brian’s Top 3 DIY NAS Cases on butterwhat.com? Stay tuned!
 Power supply was a bit of a headache, but only because I didn’t pay attention to the details of the SilverStone CS381 and initially bought a full-size ATX power supply instead of the SFX or SFX-L power supply that the case supports. I wound up choosing the be quiet! BN639 SFX-L Power Supply primarily because of its wattage and price. I am not a fan of modular power supplies. I’d much rather use a couple zip ties to manage an extraneous power cord or two, rather than have to dig around my office months–or even years–down the road to find where I stored the extra cables. Unfortunately for me there just wasn’t any non-modular option within what I was shopping for. I would’ve considered spending an extra $5-10 for a non-modular option.
Motherboard, CPU, and CPU Cooler
 One of the things that I was most excited about after selecting the SilverStone CS381 as the case was the additional motherboards that I’d get to shop for. Being able to include Micro-ATX motherboards more than doubled the number of motherboards that met the criteria of what I feel is important for a DIY NAS build. Since I’d already decided I wanted to build a DIY NAS with an AMD CPU and that I’d picked out a case that could support up to 12 hard disk drives, my ideal criteria for the motherboard was:
- Mini-ITX or Micro-ATX
- AMD AMD4 CPU Socket
- Support for 12 SATA Devices
- Documented support for ECC RAM
- Support for M.2 SSD(s)
Of the criteria, I knew that the 12 SATA devices and the documented support of ECC RAM would present the biggest challenge. While the AMD Ryzen CPUs support ECC RAM, it’s not necessarily implemented on all of the motherboards nor is it really something that the motherboard’s marketing departments have put a lot of effort including in their marketing materials. In doing my research, the best point of advice I read was to read reviews of the motherboards and focus on whether they tested the ECC functionality.
In regards to the SATA devices, I knew that I wasn’t going to find a motherboard that supported 12 SATA devices–especially at a “reasonable” price point. Moreover, I also wanted to use M.2 SSD(s) for the operating system, and that typically knocks out the use of some of the available SATA controllers on the motherboard.
With all of that in mind, I very quickly narrowed in on the [ASRock X570M Pro4][mobo] motherboard (specs). In reading about the motherboard, I was confident it supported ECC RAM, and I liked that it had enough onboard SATA to support the SilverStone CS381’s 8 hot-swap bays. The motherboard very nearly met all of my ideal criteria by itself and at a fairly reasonable price. The only criteria it wasn’t able to meet—support to fill up all of the case’s internal and external drive bays—would get handled in the rest of my hardware purchases.
If you wind up using this build as a template for your own DIY NAS, be aware that ASRock has several X570-based motherboard with similar model numbers. Specifically, there’s an ASRock X570 Pro4 which is an ATX form factor and will not fit in the case.
Before you purchase, double-check to make sure that you are buying the [ASRock X570M Pro4][mobo]–the “M” is important! I nearly made this same exact mistake myself and decided to post this update after a commentor shared their unfortunate experience and wanted to warn others.
 In building a bananas AMD NAS, I instantly scrolled to the top of AMD’s processor offerings and observed to myself, “Now that’s just a bit TOO bananas, Brian.” But in doing a bit of browsing of benchmarks of high-end CPUs, I was drawn to the price-to-performance of the AMD Ryzen 9 3900X (specs).
Moreover, whatever way you slice it, the AMD Ryzen 9 3900X is complete and absolute overkill for the processing power needs of NAS. The selection of this processor really makes the machine capable of much more than just being a NAS. I’d encourage people who follow this blueprint to fully leverage the extra processing power to experiment with virtualization and host things that complement the storage capabilities.
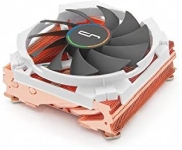 An eager patron on Patreon started building his own DIY NAS from my parts list and helped me realize (Thanks, Alex!) that because I’d selected the SilverStone CS381, I’d need a low-profile CPU cooler. Because I wound up selecting the AMD Ryzen 9 3900X, I opted for what’s widely regarded as one of the best low-profile AM4 CPU cooling solutions; the CRYORIG C7 Cu (specs). The 105W TDP of the CPU convinced me that I’d need to make sure to pack the most amount of cooling in the space I was allowed.
RAM
 Very little expense was spared in the building of the DIY NAS: 2019 Edition, but in building it I intentionally saved a few dollars by going with the bare minimum in recommended RAM. In fact, had I experienced any difficulty in the benchmarking of the NAS, I was ready to buy more RAM and talk about both of those decisions.
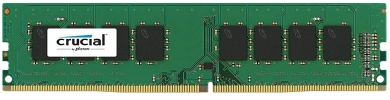
In making sure this year’s DIY NAS was more bananas than the prior year’s significantly upgrading the RAM was a no-brainer for me. I picked two 16GB DIMMs of DDR4 2666MHz PC4-21300 Unbuffered ECC RAM (specs) for the DIY NAS: 2020 Edition. A total of 32 GB of RAM would be sufficient for the needs of this year’s DIY NAS build, although I would advise the virtual machine enthusiast to consider more, depending on the number and workload of virtual machines they plan to run.
In this year’s DIY NAS, I’d also think that RAM would be one of the places where you’d see some opportunity to find savings. With my prior builds, especially the EconoNAS builds, I’ve been routinely pleased with how everything performs when using RAM that’s at the minimum side of the hardware recommendations.
Host Bus Adapter and Cables
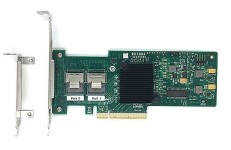 My ideal motherboard would’ve had enough onboard controllers to support 12 SATA devices and two M.2 SSDs. My ideal motherboard likely doesn’t exist or comes with such a price tag, that I’d never even consider it. Rather than try and find that motherboard, I opted to add a host bus adapter (HBA) to add support for the additional devices that I wanted the DIY NAS: 2020 Edition to support. I chose an IBM M1015 (specs) to add those additional drives. The IBM M1015 is widely recommended for use with FreeNAS/TrueNAS, once you reflash its firmware, and adds support for an additional 8 SATA devices.
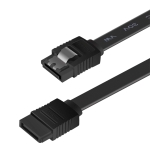 As always is the case, neither the motherboard nor the case includes enough SATA cables to support all of the drive bays. I complemented the standard SATA cables that are shipped with the motherboard with two 3-packs of 18” SATA3 cables with locking latches. But because I’d purchased the IBM M1015, I’d need more cables than just the extra SATA cables.
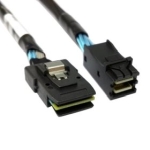 Because of the drive backplane inside the SilverStone CS381 and the IBM M1015, an additional type of cable was needed. Effectively, the cable needs to connect from the two SFF-8087 Mini-SAS ports on the IBM M1015 to the two SFF-8643 Mini-SAS ports on the drive backplane inside the SilverStone CS381 case.
When everything was all said and done, SilverStone CS381’s 8 external bays would be handled by the IBM M1015and the 4 internal bays would be handled by the SATA controller included on the [ASRock X570M Pro4][mobo].
Graphics
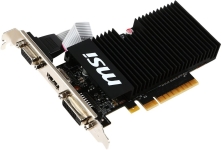 One of the drawbacks of choosing from the tippy top of AMD’s CPU offerings is that you lose the integrated graphics options. While I’m a big fan of integrated graphics in building DIY NAS builds, none of AMD’s compelling CPUs support the integrated graphics. I went online and found the least expensive low-profile PCI-e GPU that I could find, the MSI Gaming GeForce GT 710 1GD3H LPV1 (specs).
I picked the MSI Gaming GeForce GT 710 1GD3H LPV1 so that someone could follow along at home and build their own DIY NAS. If I were building this for myself, I’d strongly consider rummaging around my spare parts bin. Or potentially, just borrowing a GPU from another machine, getting it up and running, and then running the NAS headless indefinitely into the future.
Storage
TrueNAS CORE Drives
 The constant from my very first DIY NAS build to the DIY NAS: 2019 Edition has been my use of the SanDisk Fit and Cruzer Fit flash drives to hold the FreeNAS/TrueNAS OS. In my own NAS, I’ve mirrored the USB boot device and have recommended others do the same for years.
In building a ridiculous NAS, it seemed like I should wade into unchartered territory and consider something a bit more stable and durable than a USB flash drive. For this year’s DIY NAS, I decided I’d pick a pair of Corsair Force Series MP500 120GB M.2 SSDs (specs) with the intention of mirroring the OS across both of the SSDs like I’ve done for years on my trusty USB flash drives.
Update (03/14/21): The 120GB Corsair Force drive has been pretty hard for some to find. The price of the 240GB variant the Corsair Force Series MP500 240GB is cheaper than what I paid for the 120GB version and seems like it would be a fine substituion for those of you wanting to use the DIY NAS: 2020 Edition as a blueprint. I’ve updated the parts list below to reflect the 240GB version.”
Final Parts List
| Component | Part Name | Count | Cost | |
|---|---|---|---|---|
| Motherboard | ASRock X570M Pro4 | specs | 1 | $169.99 |
| CPU | AMD Ryzen 9 3900X | specs | 1 | $429.99 |
| CPU Cooler | CRYORIG C7 Cu | specs | 1 | $101.00 |
| Memory | Crucial 16GB DDR4 DIMM 2666 MHz / PC4-21300 ECC (CT16G4WFD8266) | specs | 2 | $87.98 |
| Case | SilverStone Technology CS381B | specs | 1 | $349.99 |
| Host Bus Adapter | IBM Serveraid M1015 SAS/SATA Controller 46M0831 | specs | 1 | $70.96 |
| Power Supply | be quiet! BN639 600W SFX L Power Supply | specs | 1 | $119.90 |
| OS Drive | Corsair Force Series MP500 240GB | specs | 2 | $99.99 |
| SATA Cable | BENEI SATA3 18" Straight-through Cable with Locking Latch (3 pack) | N/A | 2 | $6.99 |
| SAS Cable | Internal Mini SAS SFF-8087 to Mini SAS High Density HD SFF-8643 | N/A | 2 | $13.30 |
| GPU | MSI GT 710 1GD3H LPV1 | specs | 1 | $69.94 |
| TOTAL: | $1,728.29 | |||


")


NAS Hard Disk Drives
For the majority of DIY NAS builders, the most expensive component that you’ll wind up buying is the hard disk drives. More importantly, how much storage a DIY NAS builder needs and how much redundancy they need are both very personal decisions. Because of these factors, I’ve decided to stop buying hard drives for each year’s DIY NAS build and instead make some recommendations, instead.
Here are few tips and considerations that I have to aid picking out hard drives for your DIY NAS
- Quanity how much data you need to store and how quickly you accrue additional data.
- Assume that you’ll be replacing drives at or near the end of their warranty.
- With FreeNAS/TrueNAS, growing your array is easiest by replacing smaller drives with bigger ones.
- Decide how much redundancy you want within your array (Note: Brian strongly recommends at least 2 drives’ worth of redundancy!)
- Buy drives from different manufacturers and/or vendors to try and maximize the chance that your different drives came from different batches.
Going through each of the above should give you an idea of how much storage capacity your array should need at the end of the hard drives’ warranty period.
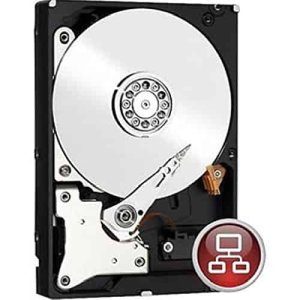 Please also keep in mind that I have zero qualms about putting consumer-grade hard drives into a DIY NAS. Most people who find themselves looking at my DIY NAS builds are probably already storing all of their data on consumer-grade hard drives. It’s important to remember that the “I” in RAID originally stood for inexpensive, and it’s indisputable that consumer-grade hard drives are usually the best value when it comes to price per terabyte.
However, it’s also worth understanding and doing a bit of research comparing and contrasting the both shielded magnetic recording (SMR) and perpendicular magnetic recording (PMR)–sometimes also known as conventional magnetic recording (CMR)–technologies used in hard drives. SMR drives achieve higher data density, but because data is laid down much like shingles on your roof, there’s a substantial performance decrease when certain tracks of data are written. The tracks being changed plus its neighboring tracks need to be read and rewritten.
I won’t begin to proclaim to full understand it, but the real world application here is that ZFS doesn’t necessarily play nicely with all SMR drives. This recently came to a head when Western Digital sneakily started using SMR in its Red drives. In making suggestions for hard drives in NAS builds using ZFS, I tend to suggest CMR drives.
A few recent sub $14-per-terabyte hard drive deals:
| Hard Drive | Price | |
|---|---|---|
| HGST Ultrastar He10 (HUH721010ALE600) 10TB (Renewed) | specs | $77.50 $7.75/TB |
| Western Digital Ultrastar DC HC520 (HUH721212ALE600 ) 12TB (Renewed) | specs | $118.99 $9.92/TB |
| 2-pack Seagate Exos X16 16TB ((ST16000NM001G) | specs | $433.99 $13.56/TB |
Hardware Assembly, BIOS Configuration, and Burn-In
Assembly
Putting the DIY NAS: 2020 Edition together was a rather straightforward event. I spent a couple hours over five different nights and had everything put together without too much frustration. The most difficult part of the assembly was easing the motherboard into the case, thanks to the sheer weight of the CRYORIG C7 Cu. Between the heft of the CRYORIG C7 Cu and the horizontal support pieces connecting the SilverStone CS381, I had to incrementally inch the motherboard onto the case’s standoffs to get it mounted and aligned.
Reflashing the IBM M1015
Reflashing the IBM M1015 was by far the most challenging part of assembling and configuring the DIY NAS: 2020 Edition. The IBM M1015 has been around for a really long time and has been a go-to choice for DIY NAS builders for a very long time. The one problem with the card is that it’s recommended that the card is reflashed with a different firmware to put it into IT mode–especially if you’re using ZFS.
There’s no shortage of “how-to” guides on getting this done. When I did my research and bought the card, I thought it’d be no big deal and something I’d be done with in a matter of minutes, but it actually wound up being a bigger hassle than that.
At first, I read through a few guides:
- /r/DataHoarder: Flashing an IBM M1015 to IT mode
- How-to: Flash LSI 9211-8i using EFI shell
- ServeTheHome: IBM ServeRAID M1015 Part 4: Cross flashing to a LSI9211-8i in IT or IR mode
The problem with all of these guides is that the content has been around for so long that a lot of it has become stale. Links are dead, technologies have changed, and weird manufacturer-specific incompatibilities made working through any of these guides impossible!
Basically, I wound up using a mish-mash of steps from all of these guides to bungle my way through what was needed for the hardware that I picked out. I’m not going to try and reinvent the wheel and add my own guide to make the waters more murky. But here are the important parts that I learned:
- Made a FreeDOS-bootable USB disk using the utility Rufus, and formatted it FAT32
- Extracted the various utilities (DOS and EFI) and firmwares to the USB disk.
- Used the v1 (important) version of the Tianocore EDK2 Shell_Full.efi, renamed it to Bootx64.efi, and placed it in the /efi/boot path on the USB drive.
- Used Legacy-mode to boot into FreeDOS on the USB drive to perform the steps using the megacli.exe and megarec.exe executables to preserve the SAS ID and clear the HBA’s memory.
- Rebooted and booted from the USB drive using UEFI-mode.
- Ran the steps using the sas2flash.efi utility for flashing the firmware and to restore the SAS ID.
BIOS Configuration
Over the years, there’s been a handful of critical BIOS settings that have wound up being a game-changer for the different DIY NAS builds, and I’ve always made sure to capture those kinds of changes as part of these blogs. However, the DIY NAS: 2020 Edition proved to be rather simple.
The only thing I changed in the BIOS was to juggle the boot order of the devices. All I did was set the NVMe drive to be the primary boot device, but then used the function key for anytime I needed to boot from the USB drive when installing TrueNAS CORE.
Burn-In
In my rush to get the DIY NAS: 2020 Edition into my rear view mirror, I opted to run Memtest86+ overnight using the default configuration. My two concerns in building my DIY NAS machines is flaky hardware and poor installation. Running Memtest86+ overnight completed 5 passes without any problems, and I rebooted into the BIOS to check the system temperatures.

The next morning, there’d been zero errors captured by Memtest86+ and after rebooting into the BIOS, I didn’t have any concerns with any of the temperatures that were reported within.
TrueNAS Installation
Way back in 2012, I was disappointed in the information that was out there regarding FreeNAS. In the time since, lots of people (me included, I hope!) have shared their experiences setting up FreeNAS/TrueNAS CORE. More importantly, the content that iXsystems has created and shared is quite helpful.
It seemed inefficient to try and recreate the same content, especially when iXsystems has done such a good job with theirs. Please take a look at How to Set up and Install TrueNAS CORE and check out the FreeNAS and TrueNAS Youtube channel.
Benchmarks
When I started building DIY NAS systems, I was particular interested in the throughput and power consumption of my DIY NAS machines. As time has gone by over the years, I’ve learned a couple things:
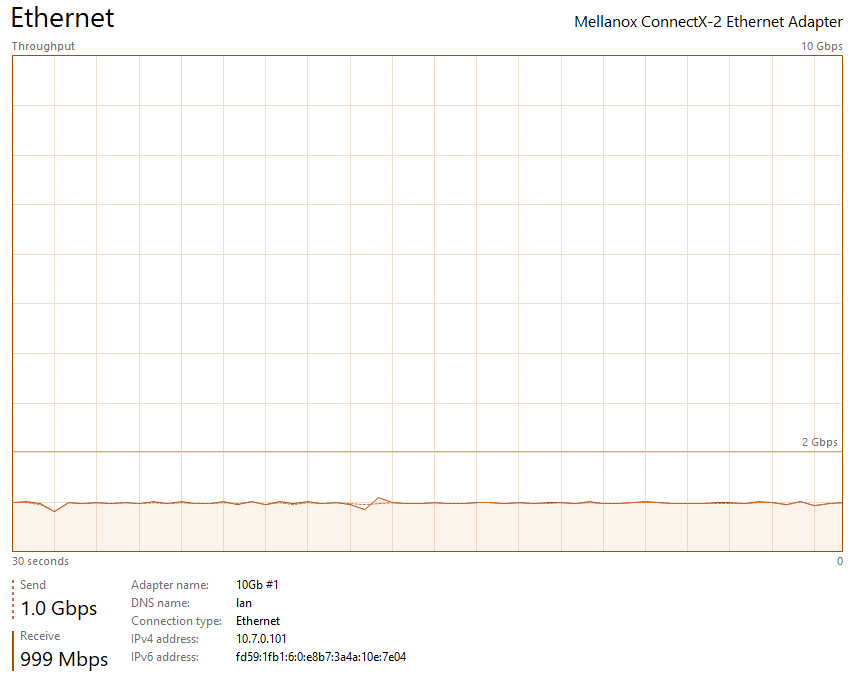
- Network is your first bottleneck: Year after year, nearly every single DIY NAS I’ve built has easily saturated the Gigabit network interface that the overwhelming majority of our computers are connected with.
- Power consumption depends on usage: The biggest single power-consuming component the DIY NAS has is the CPU (about 105W), but it’s important to consider that a typical 7200 RPM hard drive uses up to 25 watts. I put a lot of effort into trying to test and gather the same data from every DIY NAS build that I build and blog about, but those tests don’t really reflect how I use my own DIY NAS, and, more importantly, probably don’t reflect how you’ll wind up using your own DIY NAS.
Nevertheless, it’s still fun to grab all of the video I’ve recorded for the DIY NAS: 2020 Edition, copy it over to the NAS, and see it saturate the gigabit network interface on the NAS! Mission accomplished!
TrueNAS CORE
I love playing with the new hardware–it’s the most fun part of any DIY NAS build that I wind up doing. But getting a chance to evaluate the latest version of TrueNAS Core (formerly known as FreeNAS) is a huge perk! I’m always very reluctant to make changes to my own NAS, since it has become my primary place to store data. Having a sandbox machine to evaluate the latest and greatest offering is a huge value to me.
For the first time ever, I wished that I had a stopwatch running. From the time that I plugged in the USB drive with the TrueNAS CORE installer ISO on it and turned on the DIY NAS: 2020 Edition to the point where I was copying files over to the NAS itself was definitely under 30 minutes. I was surprised at how smoothly it went.
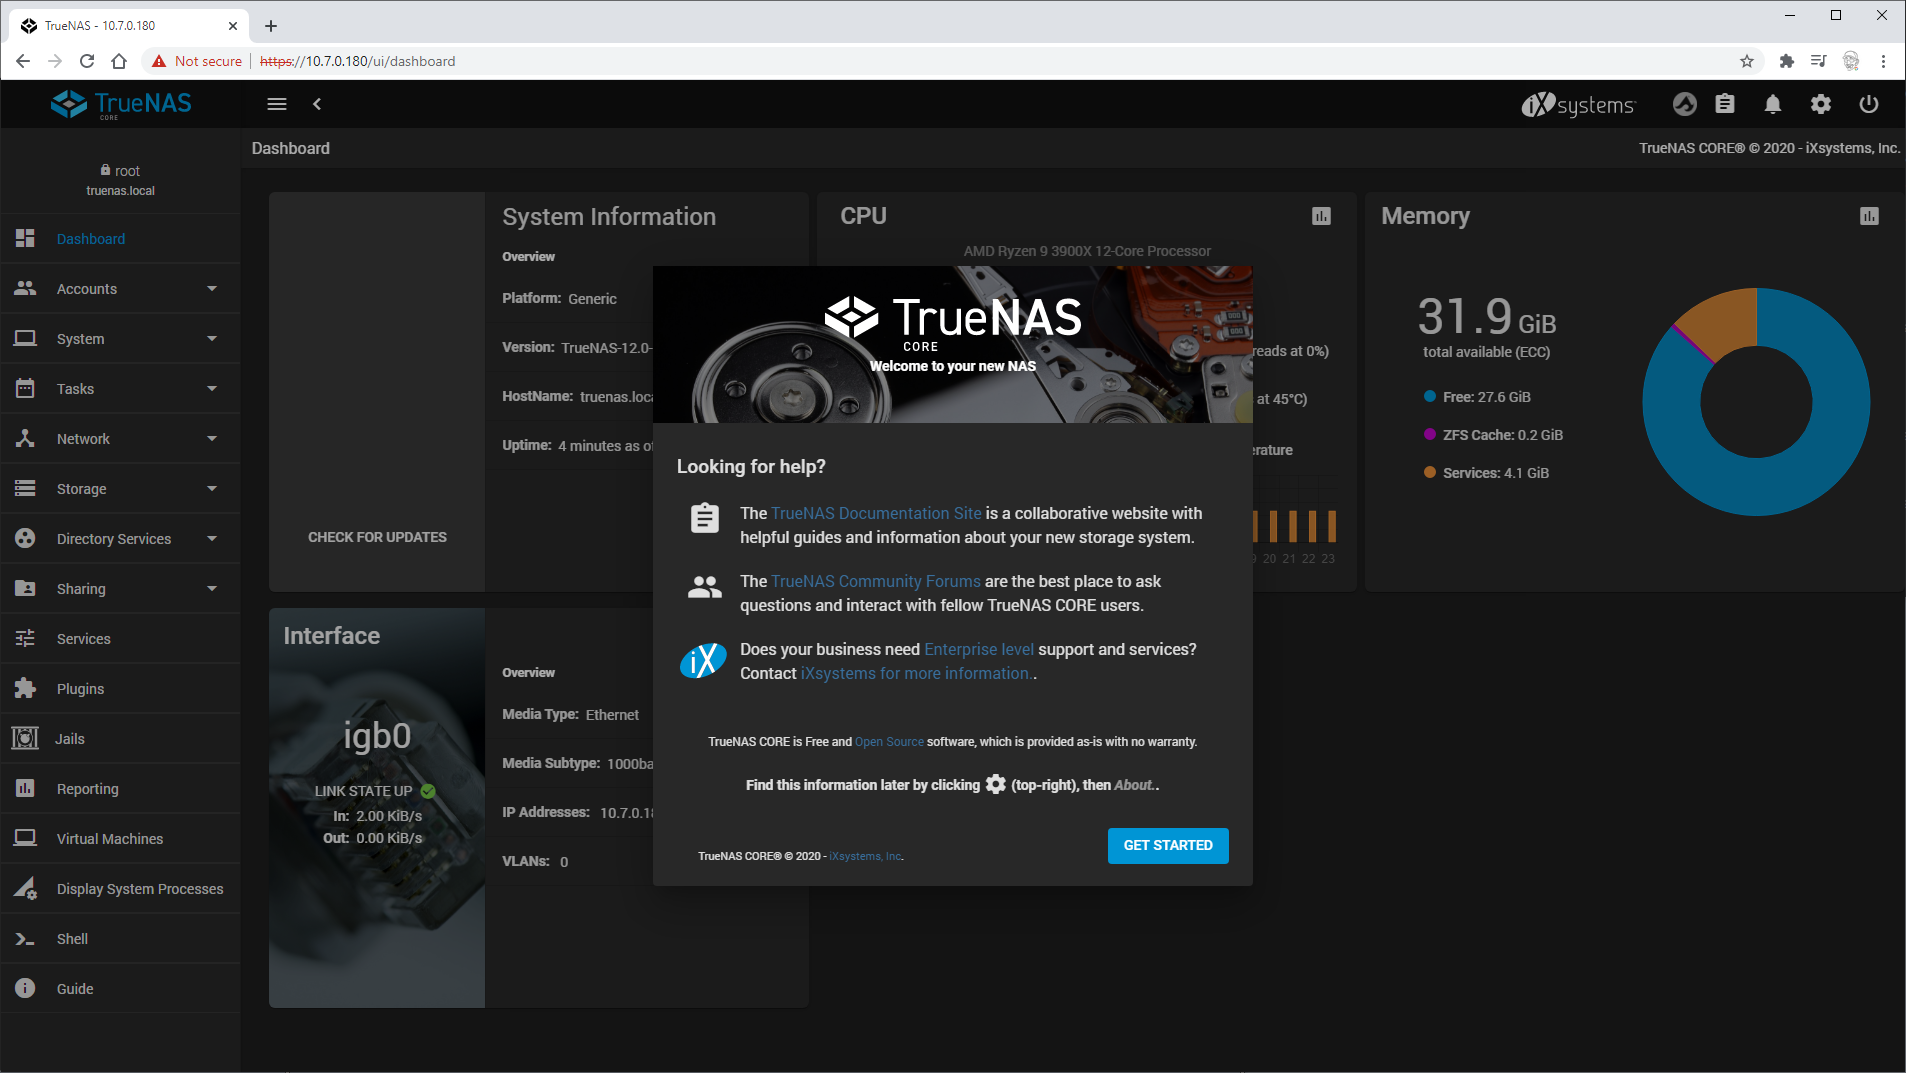
The release notes for TrueNAS CORE 12 contains a few items which have me intrigued. I’m particularly interested where they state “Virtually every area of the platform has been updated and includes some major performance improvements, including SMB, iSCSI, ZFS and more.” But on top of that, the polish and refinement of the TrueNAS interface is a nice upgrade in itself.
Similar to what someone reported to me on Twitter, I also found that TrueNAS CORE’s reporting wasn’t working particularly well. I didn’t see any of the graphs get populated with data and when I tried clicking around to the other categories of reports, it didn’t seem to have any effect in the TrueNAS interface. If reporting and monitoring are important to you, you may want to wait for what’s coming next.
Conclusion
If you thought I went overboard when I built the DIY NAS: 2019 Edition, then you’re definitely going to think that I completely overdid the DIY NAS: 2020 Edition. If this is what you think, I agree with you! This year’s DIY NAS build is going to go down as a missed opportunity for a course correction by returning to a more pragmatic approach to the DIY NAS.
Instead, I outdid last year’s DIY NAS build in nearly every regard–especially the price:
- AMD Ryzen 3900X CPU (12 cores up to 4.6GHz)
- 32GB DDR4 ECC RAM
- 8 hot-swap drive bays.
- TrueNAS CORE 12.0 (mirrored on two 120GB NVMe SSDs)
- A price tag of nearly $1,700 (and climbing!)
This machine is ultimately much more of homelab server than it is a NAS. It has plenty of potential to handle quite a bit of computing responsibilities beyond network-attached-storage.
If you’re thinking that this is just too much money to spend on a network-attached-storage device, I agree with you. If you’re thinking that this is a top-notch homelab server to run your NAS (among other things) with a price tag to match it, I agree with you too! The AMD Ryzen 9 3900X did not break a sweat in anything that I asked it to do. There’s a tremendous amount of room to grow in to in the DIY NAS: 2020 Edition.
The DIY NAS: EconoNAS 2020 blog–but no build–shortly followed the publishing of this over-the-top NAS. Among the things I liked most about the DIY NAS: 2020 Edition was its use of AM4 CPUs and the wide variety of CPUs that it could support. I tried to leverage that flexibility in picking out components for the EconoNAS.
What do you all think of the DIY NAS: 2020 Edition? Is it way too overboard for you, or do you think there’s a ton of potential and you’re excited to build your own little data center inside it? I’d love to hear in the comments below!
Giveaway
Update (01/01/2021): I rang in the New Year by picking a winner in the giveaway of the _DIY NAS: 2020 Edition! I hope that everyone joins me in congratulating_ Matt H. of Orlando, Florida for winning the TrueNASGiveaway! Matt’s visitation of my Youtube page (I hope he clicked like and subscribe!) in early December is the entry that wound up turning him into the winner of the DIY NAS. Altogether, 1,636 people combined for 7,893 entries into this year’s giveaway. Thanks to everyone for making the giveaway a big success!