
When I built my first DIY NAS back in 2012, I had a specific budget I was working within and I worked really hard to pick out components that would maximize the value out of that budget. As the years progressed and I did other DIY NAS builds, they took two different paths: my idea of an ideal DIY NAS and a more economical build, the EconoNAS. Aspects of each of these types of DIY NAS builds remind me of my very first NAS build, but I’ve known for a long time that my very first NAS build was actually an EconoNAS.

Over the years, the EconoNAS has been strictly focused on the bottom line. I was always trying to cram as much storage as I possibly could into the least expensive build I could manage. This year, I took a step back and tried to focus on what I was interested in when building my first NAS: value.
Making value an emphasis is tricky for a number of reasons, but most of all value is subjective. There are aspects and features of the parts that I shop for that I value enough to spend more money on, and there are others that I am not. I always try and explain and rationalize what I value, but not everyone will agree, which is okay! Use the comments below to explain and justify your own valuation!
Affiliate Disclaimer: Some of the links on this website are affiliate links, meaning, at no additional cost to you, I may earn a commission if you click through and make a purchase. I only recommend products that I believe will add value for my audience. Please understand that I have experience with all of these companies' products, and I recommend them because they are helpful and useful, not because of these small commissions.
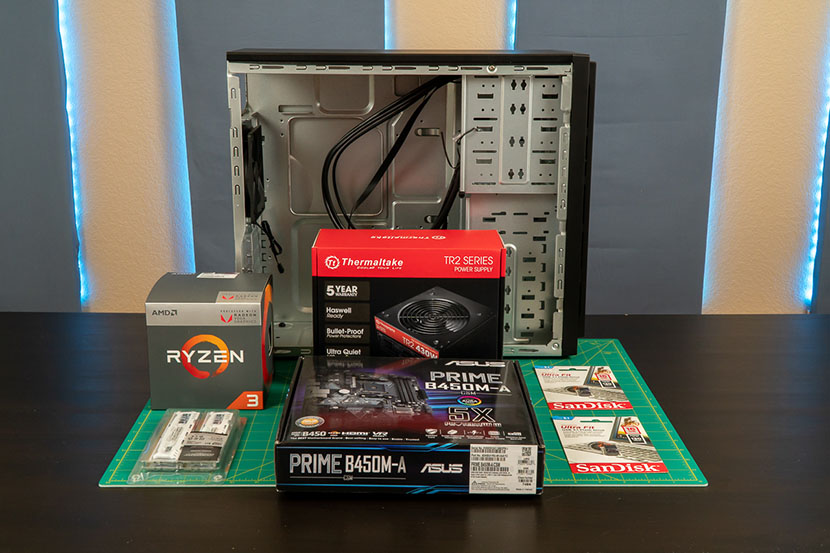
With the DIY NAS: 2019 EconoNAS, I tried to put myself in the mindset I found myself in back in 2012. I strove to make my decisions in choosing the components around fitting as many features as I could into a small budget. This year I didn’t really have a concrete dollar figure in my head when I was shopping, while I knew that I was okay with spending more than $300 but spending $400 seemed like it’d definitely be too much. I think this is probably a smaller budget than I put myself on in 2012–but I’ve learned quite a bit about NAS building in those years!


CPU & Motherboard
Right off the bat, I knew I was likely to drop one of the main features that I liked about my very first NAS–it was little! For whatever reason, in 2012, I completely lucked out. I found a Mini-ITX motherboard with 5 or 6 onboard SATA ports and an integrated CPU that was passively cooled for well under $100. That motherboard was on sale at the time and nearing the end of its technological relevance. Since then, I’ve rarely found things that match it in both features and price. Similar motherboards exist, just nowhere near that price point. Each of those features carries a price premium that I wouldn’t be able to afford in this year’s EconoNAS.
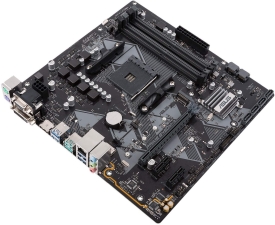 Unwilling to pay that premium, I looked for value in the motherboard. And right now, I think there’s tremendous value in AMD’s Ryzen motherboards. A lot of that comes from the fact that the AM4 socket supports so many different CPUs, including a generation of CPUs that hasn’t been released quite yet. The ability to be able to upgrade the CPU in the future is promising. I wound up selecting the ASUS Prime B450M-A (specs) motherboard. At just under $80, its feature set was enticing. In particular, the following features caught my eye:
- Supports AMD AM4 CPUs
- 6x SATA 6Gb/s connector(s)
- 1x PCIe 3.0/2.0 x16 (x8 or x16 mode depending on GPU) slot
- 2x PCIe 2.0 slots
- Micro ATX form factor
The biggest thing I liked about the ASUS Prime B450M-A is its flexibility. It supports a wide range of CPUs, including CPUs that haven’t been released yet. It has enough SATA ports to build a fine NAS out of, but if you wanted to stick a bunch more drives in it, it’s got plenty of PCIe slots to support the added SATA/SAS controller cards you’d need to expand the drives.
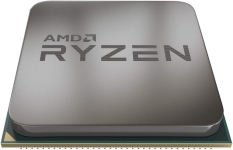 Typically, when building an EconoNAS, I find the cheapest CPU that’ll work in the motherboard I picked out and that’s it. But considering my emphasis on value, I took a step back and looked at the prices and features of a wider set of CPUs. Ultimately, I zeroed in on the AMD Ryzen 3 2200G CPU (specs). Its base clock speed of 3.5GHz and 4 cores seemed well-suited for the NAS tasks, plus I’d hoped it’d be up to the task of acting as the hypervisor for a virtual machine or two under bhyve.
RAM
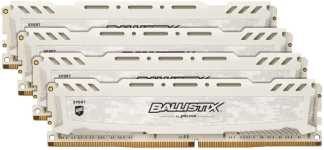 Choosing RAM for the EconoNAS is usually a bit easy too. I take a look at the bare minimum recommended by FreeNAS and I find as inexpensive of a kit as I can for that amount. Much like I did in selecting the prior components, my focus on value caused me to branch from that approach again in picking RAM. Because I’d hoped that the EconoNAS would be able to run a virtual machine or two, I opted for a 16GB kit of 2666MHz DDR4 memory from Crucial (specs). For the “big” DIY NAS builds, I choose ECC RAM, but I don’t think ECC RAM is necessary for your DIY NAS and it didn’t present enough value to me to incorporate into this EconoNAS build.
Case and Power Supply
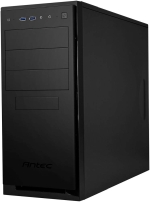 The Micro ATX form factor of the ASUS Prime B450M-A motherboard that I picked offers a tempting choice at building a compact EconoNAS, which was nearly as tempting as it was expensive. Unfortunately, small cases that fit six (or more) 3.5” drives are simply expensive. Instead, I saved quite a few dollars in choosing the Antec NSK4100 (specs). The case’s biggest selling point was that it boasted a total of 11 drive bays:
- 3x external 5.25” bays
- 1x external 3.5” bay
- 6x internal 3.5” bays
- 1x internal 2.5” bay
With the exception of the DIY NAS: 2019 Edition, I’ve only bought 3.5” drives. The fact that the case could support up to 10 different 3.5” drives–with the help of a few drive adapters–was really quite compelling.
 Of all the components that I shopped for, the power supply is about the only component where I went bargain hunting. In choosing the Thermaltake TR2 430w, I was simply looking at something which is at least 400 watts, inexpensive (under $50), and fairly well-reviewed. The TR2 comes in 500W and 600W as well, but I can’t really imagine needing that much power. I budgeted about 200 watts to the CPU, motherboard, and RAM, with the remaining 200-230 to support hard drives. I tend to budget around 15 watts per drive. Ultimately, I’m pretty confident that you’d fill up all the Antec NSK4100’s eleven drive bays without needing to upgrade the power supply.
FreeNAS Flash Drive
On my very first DIY NAS, I wound up trying to save space by mounting the USB drive internally and proceeded to put the least-expensive, but well-reviewed, USB drive I could find in there. And that USB drive lasted probably around a year. In buying the drive and the header to plug it directly into the motherboard, I’d spent more money than I would’ve had I just picked a nice and compact USB drive. When I replaced that failed USB drive, I picked up a Sandisk Cruzer Fit and I’ve pretty much stayed true to those USB drives across all my NAS builds.
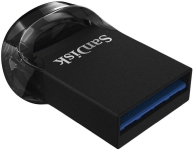 For this year’s EconoNAS, I went with the 16GB SanDisk Ultra Fit. In this process, I also learned how easy it is to mirror the USB boot drive for FreeNAS and have been regularly putting mirrored USB drives in my regular DIY NAS builds ever since, but not in an EconoNAS until now. In prior years, I was pinching as many pennies as I could and felt every little bit would help, but I think the value of having a mirrored boot device is far greater than the few dollars it winds up saving.
Final Parts List
| Component | Part Name | Count | Cost | |
|---|---|---|---|---|
| Motherboard | Asus Prime B450M-A/CSM | specs | 1 | $76.99 |
| CPU | AMD Ryzen 3 2200G | specs | 1 | $77.99 |
| Memory | Crucial Ballistix Sport LT 2666 MHz DDR4 DRAM Desktop Gaming Memory Kit 16GB (4GBx4) | specs | 1 | 76.99 |
| Case | Antec NSK4100 | specs | 1 | $60.74 |
| Power Supply | Thermaltake TR2 430W | N/A | 1 | $49.99 |
| OS Drive | SanDisk Ultra Fit 16GB | specs | 1 | $6.49 |
| TOTAL: | $355.68 | |||
But what about Hard Drives, Brian?!
For the past EconoNAS builds, I’ve had a combination of size and price in mind where I’ve found the most amount of value, and I usually bought as many of those drives as would fit into my budget. However, as I attempted to explain in a blog earlier this year, I’m not buying hard drives for my NAS builds any longer. I’m doing this for a few good reasons, and while saving money was definitely one of the top reasons, what I’ve found over the years is that: How much storage you need and how much you are willing to spend on it is an incredibly personal choice. There’s value to everyone in how much storage they have, how much money they spend, and how much redundancy they get in the end.
What I’ve done in the EconoNAS builds in the past is spend around $50 to $75 per hard drive. And then depending on the drive’s price point, I’d put between four and six hard drives into the EconoNAS. For the most part, I think it’s been a successful enough formula. But I think that maybe I can do better by offering more options, but in offering those options I’d like to share a couple pointers that I’ve come to discover in building my own FreeNAS machines:
- There's more value in buying more quantities of smaller drives: Larger almost always offer larger amounts of storage for your dollar, so they’re tempting. But, because of how arrays are constructed, more space gets reserved for redundancy on arrays with fewer drives. Example: 4x8TB drives vs. 8x4TB drives, in raid-z2 (two drives’ worth of redundancy). The array made up of 8TB drives will have 16TB of usable storage and the array made up of 4TB drives has 24TB of usable storage.
- I recommend at least two drives' worth of redundancy in your array: Google for “RAID 5 is dead.”; there’s lots of good information/discussion out there. I don’t necessarily think RAID 5 is dead, but I value my data and time enough that I’ve simply moved to making sure there’s at least two drives’ worth of redundancy in all of my own arrays.
- As a DIY NAS builder using FreeNAS, your upgrade path is drive replacement: Replacing smaller drives with bigger drives and then eventually having the array grow to a larger size is your most likely upgrade path. Adding new drive(s) to an array is possible, but it’s conceptually tricky and potentially wasteful if done poorly.
Here’s a table of hard drive options. I did a bunch of hard drive shopping and built a few fictitious arrays for you to consider. What do you think of the options? Please share in the comments below?
| Array Name | Hard Disk Drive Model(s) | HDD Size | Total Price |
ZFS Level | Net Storage |
Price per Net TB |
|---|---|---|---|---|---|---|
| Dangerously Economical |
2x Seagate ST1000VM002 2x WD WD10EURX 2x Toshiba DT01ACA100 |
1 TB | $194.60 | raid-z1 raid-z2 raid-z3 |
5 TB 4 TB 3 TB |
$38.92 $48.65 $64.87 |
| Thrifty |
3x WD WD2000F9YZ 3x Toshiba DT01ACA200 |
2 TB | $383.97 | raid-z1 raid-z2 raid-z3 |
10 TB 8 TB 6 TB |
$38.40 $48.00 $64.00 |
| Value |
3x Toshiba MG03ACA400 3x WL 4TB |
4 TB | $425.82 | raid-z1 raid-z2 raid-z3 |
20 TB 16 TB 12 TB |
$21.29 $26.61 $35.49 |
| Hoarder | 6x WD Elements 8TB | 8 TB | $749.94 | raid-z1 raid-z2 raid-z3 |
40 TB 32 TB 24TB |
$18.75 $23.43 $33.13 |
Note: It’s probably worth pointing out here that 1TB, 2TB, and even 4TB drives are beginning to get “old” now. While I don’t know this for certain, I doubt any of the major hard drive manufacturers are making any drives of these sizes any longer. In exploring the reviews and comments left on drives of these size(s) across the Internet, they’re full of people who are reporting that their so-called new hard drive is refurbished, or worse, used. Similarly, what few new drives remain out there are probably starting to flirt with the end of their manufacturer’s warranty period. Caveat emptor!
Hardware Assembly, Configuration, and Burn-In
Assembly
One of the things I’ve always liked better about the EconoNAS is that it is usually easier to put together. My fascination with small motherboard form factors and small cases generally winds up resulting in working in much smaller spaces! Thanks to the cavernous interior of the Antec NSK4100, I didn’t have any of the problems that I had when assembling the diminutive DIY NAS: 2019 Edition. About the only complaint I had was that the two SATA ports in the corner of the motherboard pointed right in the direction of two of the case’s 3.5” drive bays. Routing a cable from so close to the drives was a bit problematic, but not a tremendous hassle.
Altogether, it took me a little over an hour to put the NAS together and have it booted up and ready to burn-in. Even for someone who’s built as many PCs as I have, I was impressed at how easily everything was put together.
Hardware Configuration
It used to be, when building DIY NAS machines out of consumer-grade equipment like the EconoNAS, there were all sorts of gotchas to watch out for. For example, difficulties in getting motherboards to boot from a USB device or having to trick the BIOS into thinking a keyboard and monitor were plugged in if you wanted to run headless. Thankfully over the years, those kinds of hassles have pretty much disappeared!
Pretty much the only thing I had to do in the motherboard’s BIOS was to go in and set the boot order to boot off the USB devices to run Memtest, then the FreeNAS installation, and finally to boot from the dual USB drive setup for the FreeNAS OS. The most frustrating part of configuring the hardware was that the BIOS was a graphical interface and I couldn’t be bothered to figure out if I could even use a keyboard to re-order the boot devices!
Burn-In
For the EconoNAS, I ran Memtest86+ to do my burn-in testing. Because I was busy and distracted over the weekend that I built the EconoNAS, I let Memtest86+ run for nearly 24 hours while I neglected the EconoNAS. In that time, it completed 10 successful tests with 0 errors. That was entirely overkill and unnecessary; 3 to 4 tests should’ve been more than enough for what I needed to prove.
I didn’t do it this time around, because I was too lazy to find my Ultimate Boot CD. But typically I use it to also run some sort of CPU stress-test to try and see how the machine performs under a load. Tormenting the CPU for 20-30 minutes nonstop is also a good way to try and force flaky hardware to come out of hiding and cause instability.
I did discover something a bit unsettling in my burn-in testing. The drives in my test array were all running quite warm with their operating temperatures being above 50 degrees centigrade (122 degrees Fahrenheit), which is at or outside the recommended operating temperature for enough of the drives I’m using in my test array for me to be concerned, but not concerned enough to stop any of my testing. If this were my NAS, I’d consider one of the following options:
- Space the drives out inside the case: there’s room for 10 drives in there, so I’d buy a pair of inexpensive 5.25” to 3.5” drive adapters and put some additional space between the drives.
- Add some additional cooling: between the case’s front fascia and the metal frame, there’s room there to add an additional fan. That fan would pull cool air from outside the case and hopefully push it across the drives to help cool them.
- Hard Drive Coolers: I’ve seen hard-drive-specific cooling before like this example or this other example, but I’ve never personally used them myself.
- Consider Other Case Alternatives: other cases might have easier or better solutions for maintaining your hard drives’ temperatures.
Of the above, I’d probably be tempted to go with the first option I listed. If I was really focused on getting the most out of my money, I’d probably wind up building a NAS with a few large hard drives, rather than my preferred solution of more smaller hard drives. With fewer drives, it’d be easier to space things out in the case and probably not have to worry about the hard drive temperatures.
FreeNAS Configuration
The installation and configuration of FreeNAS is getting to be a bit routine. When I built my first NAS, I was intimidated and concerned by my lack of knowledge and expertise with BSD or anything UNIX-related. I don’t really consider myself all that more knowledgable now, I’ve just benefitted from what an excellent product FreeNAS is and continues to become.
- Used the BIOS’s boot menu to boot from the USB device I put the FreeNAS ISO on.
- Selected “Install/Upgrade FreeNAS”
- Chose two SanDisk Ultra Fit 16GB drives from the available devices.
- Chose “Yes” on the warning about the partitions and data on those devices being erased.
- Entered and confirmed a password to be used for the root account.
- Chose “Boot via UEFI” for the FreeNAS Boot Mode
- Removed my FreeNAS Installation USB device and hit OK on the successful installation dialog.
- Used the Shutdown option to power down the NAS.
- Using the IP displayed in the FreeNAS console, I pulled up the FreeNAS web interface in a browser.
- Logged in using root and the password I picked during the installation.
- Under Network > Global Configuration, I set the Hostname to “econonas” and the domain to “lan” (the name of my local workgroup)
- Under Users, I created a new user which matched my username and password that I use on my local computers at home.
- Clicked Storage > Pools and clicked the Add button
- Selected all the hard drives listed under Available Disks and then moved them to the right under Data VDevs
- Named the new pool “econopool”
- Below the Data VDevs I picked Raid-z2
- Clicked the Create button.
- I edited the permissions of the econopool’s dataset and set the apply user to match my username and checked the apply permissions recursively option.
- Under Services I enabled the SMB service, started the service, and set it to “Start Automatically”
- I opened the SMB Configuration and made the following changes:
- Set the “NetBIOS Name” and “NetBIOS Alias” to: econonas
- Set the “Workgroup” to: lan
- Set the “Description” to: DIY NAS: 2019 EconoNAS
- Expanded Sharing and selected Windows (SMB) Shares and clicked the Add button.
- Set the Path to “/mnt/econopool”
- Under Tasks > S.M.A.R.T Tests I added two tasks for all the drives.
- A weekly Long Self-Test on Sundays
- A daily Short Self-Test
- On my desktop, I browsed to \\econonas, opened econopool, created a file, modified that same file, and then deleted that file to test my permissions.
Benchmarks
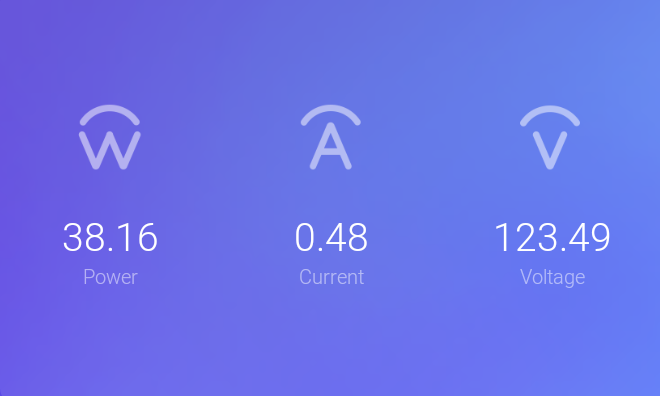
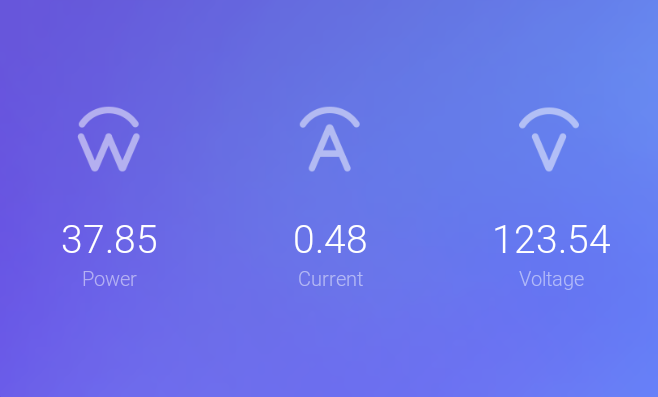
Generally speaking, the two benchmarks I’m most interested in my DIY NAS builds is its power consumption and its throughput. Lots of other benchmarks could be relevant, but these two really stick out to me. With the DIY NAS: 2019 EconoNAS, I was a bit surprised by the power consumption. Regardless of what the EconoNAS was doing, it was pretty much consistently drawing the same amount of wattage. In fact, I was most surprised that its lowest power draw was when I would’ve expected to see the highest numbers! Perhaps I need to find a better tool to log and measure power consumption?
I was relatively unsurprised with the throughput on the EconoNAS. For a long time nearly all of my builds have been capable of saturating the gigabit interface on reads, and the 2019 EconoNAS is no different. What surprised me the most was that the DIY NAS: 2019 EconoNAS managed to outperform the DIY NAS: 2019 Edition in both random reads and random writes.
Power Consumption
| Bootup | Idle | NAS Write Test |
|---|---|---|
 |
 |
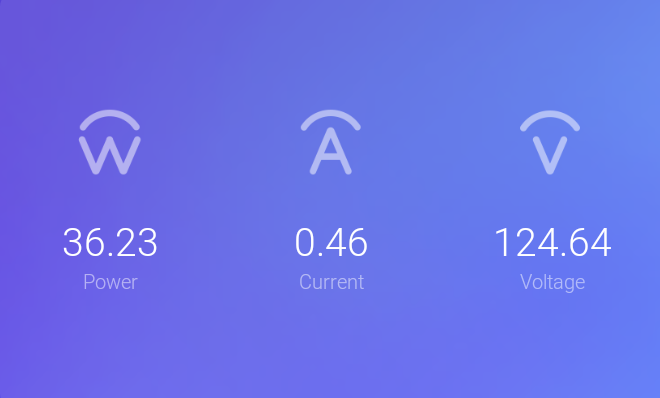 |
Throughput
I’ve been all over the road each year, trying to test throughput on my DIY NAS builds. Each year I was simply focused on measuring the throughput for the build, but until a couple DIY NAS builds ago it dawned on me that I also wanted to compare the throughput between my different DIY NAS builds. That’s when I realized I was going to need a standardized set of steps to capture throughput, to document those steps, and then test each NAS build with them. Here’s that set of steps!
- Mapped a drive in Windows to the share on NAS that’s being tested.
- IOMeter
- Set up 2 workers per CPU core. On each worker I set the Maximum Disk Size number of sectors to a number that’d be 2.5 times as big as my total amount of RAM (~512 bytes per sector) and also picked the drive letter of the mapped drive as the Target
- Under Access Specifications, I created four different Global Access Specifications all with a 512KB block size:
- Sequential Read: 100% Read and 100% Sequential
- Sequential Write: 100% Write and 100% Sequential
- Random Read: 100% Read and 100% Random
- Random Write: 100% Write and 100% Random
- I quadruple-check each IOMeter worker because I almost always forget to update one when repeating these steps.
- I execute each of my four different tests (described above) individually in IOMeter against the drive mapped above.
I have yet to run these steps on an EconoNAS build, having skipped building one in 2018, but here’s how the EconoNAS stacks up against the other NAS builds I’ve captured these same results for over a gigabit network.
But Brian, You’re Wrong!
I’m not entirely certain that I’d agree with this assertion, but it has merit! Ultimately the “Y” in DIY stands for “yourself.” It’s not a do-it-Brian’s-way NAS, it’s a do-it-yourself NAS. The important part in there is that it’s an approach that lets you find the solution that works best for you! I like hearing about how people have decided to tackle their own NAS needs, even when it’s not totally aligned with what my opinion is.
I’ve taken some time to write up blogs on our new site, Butter, What!? about others’ DIY NAS builds. I enjoyed hearing and writing about Jim’s 100TB NAS as he’s working to fill it full of disks and @Sam010Am’s 48TB NAS in a Node 304 case. Instead of telling me what you think I’ve done wrong, tell us what you think is right about your own DIY NAS and why you made different choices.
Conclusion
Overall, I’m pretty pleased. I’ve managed to build a 6-bay, Ryzen 3 2200-powered NAS, with 16GB of RAM, running an incredibly popular storage OS, for just under $350 without any disks. When you compare that to other current 6-bay off-the-shelf NAS machines like the Synology DS1618+, the EconoNAS beats the Synology DS1618+ in nearly every regard. It’s got a much more powerful CPU, more RAM, it’s more upgrade-friendly, and–above all else–it’s less than half the price of the Synology. The DS1618+ is not without its own merits. It has a smaller footprint, it probably comes with better support, and–best of all–it’s already assembled and ready to go!
I’m a bit bummed that the case’s airflow is poor enough that my test drives couldn’t be stacked atop each other in the bottom six drive bays. While I’m quite confident that adding additional cooling or putting some space between the drives will solve this problem, one of the reasons I was excited about the EconoNAS’s case was the possibility that somebody out there might fill it full of hard drives and build a monster NAS from this blueprint. This seems unlikely now without an extra helping of that do-it-yourself spirit to find methods to cool the hard drives better.
Ultimately, that disappointment in the high drive temperatures was utterly obliterated by the fact that the EconoNAS performed nearly as well as the DIY NAS: 2019 Edition in the sequential read and write tests but then outperformed its expensive older brother in both the random read and write tests quite handily!
In past years, I tried to keep my EconoNAS builds under $500. I can’t remember ever achieving this goal, but I always felt that striving to meet it is part of what kept things affordable in the first place. Had I included hard drives in this year’s EconoNAS, I probably would’ve wound up further away from that goal than I’d ever been. But you know what? I built a much better NAS! This parts list has enough upgrade options down the road that I think you’ll spend less money than had I chosen cheaper parts. I think there’s a healthy amount of value in what I wound up buying for the 2019 EconoNAS.
What do you all think? Is this a good blueprint to recommend for the thrifty DIY NAS builder? Which parts would you have spent less money on? And more importantly, which parts would you have spent more money on? I’m interested to see your feedback in the comments below!
Giveaway
#FreeNASGiveAway Update
01/02/20: Way back–a whole decade ago–I was enjoying a vacation back where I grew up around Christmas and New Years. But I didn’t let my vacation stop me from drawing a winner of the *DIY NAS: 2019 EconoNAS.* I’m excited to share that last year’s EconoNAS giveaway saw an increase by around 50% on the number of people who entered the giveaway. The winner of this EconoNAS is Jt Bailey of New Zealand! Congratulations, Jt!
What does Brian do with all of these DIY NAS builds, anyway? Each time he gives them away to his readers! If you’re interested in the full details, please go check out my FreeNAS Giveaway page. But essentially, I will raffle the DIY NAS: 2019 EconoNAS off to one of my blog’s readers. There are multiple ways to enter the raffle by sharing on different social media platforms and referring your friends.