Introduction
Since starting the project up to wire my house with Ethernet, I have been thinking of interesting ways to put my network to use. For awhile now, we have been using a Western Digital Media player and an external USB hard drive to watch video content on the television. With products like Google TV I have been thinking there would be a value to having attached network storage. My hope is that sometime in 2012, I will have a device plugged into my TV that can stream video over my network both locally and from the Internet.
Most of my thinking was spurred on by a recent sale that Drobo had on one of their low-end models. I have been an admirer of the Drobo hardware for quite some time, but I have always found it to be cost-prohibitive; I had never thought I’d get the use to justify the price. In doing some research of the products out there, I felt I had about two choices: to either build a computer or to buy an enclosure with the functionality I need built into it.
The features that I was after were for the device to be network capable supporting Gigabit, to support at least 4 or more hard drives, to support redundancy via RAID, to have a smallish footprint and to be simple enough that I can manage it without having to hire an IT consulting firm.
Because of my requirements,I started off by researching quite a few enclosures, both USB and NAS-type devices. What I found, was that with the enclosures that had the features I was looking for you wound up paying a premium both for the smaller form factor and for the ease of use. Ultimately, a combination of this cost premium and my discovery of FreeNAS convinced me to go the do-it-yourself route.
Hardware
Because I decided to build the NAS from the ground up, I had the luxury to pick the parts I wanted and that suited my needs nearly perfectly. After researching hard drive prices (over half of the cost) I budgeted around $750-$800 in total and visited the website of my favorite vendor, Newegg. I probably could have saved a few dollars going with different vendors for different components, but I value getting all my parts from a company that I have enjoyed working with over the years.
Case
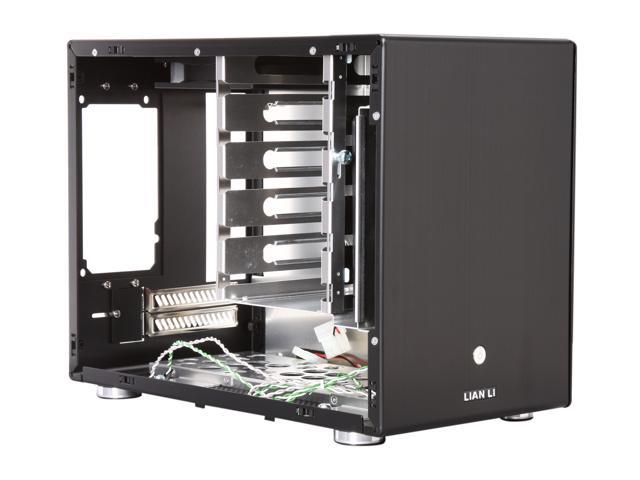
 One of the most important requirements was to consolidate all of this equipment down into the smallest reasonable footprint possible. This caused me to invest a little bit of effort and value into the case. I spent more time shopping for the case than I did for any other component. I needed a case that would hold at least 6 different drives and a Mini-ITX motherboard. I wound up choosing the Lian Li PC-Q25B. The case has room for 7 different drives internally and features a hot swap-able drive cage all in small-ish footprint of 14.41” x 7.83” x 11.02”.
Motherboard, CPU and RAM
 For the motherboard I wanted something low power with an integrated CPU, Gigabit Ethernet and support for numerous (six or more) SATA drives. I wound up picking the ASUS E35M1-I Fusion, a mini-ITX board with an air cooled dual core 1.66GHz AMD CPU built on the board. The motherboard supports up to 8GB of RAM, so I chose two sticks of Crucial 4GB 240-Pin DDR3 SDRAM DDR3 1600 (PC3 12800).
In this blog as well as others about FreeNAS people have asked why I routinely pick non-ECC RAM. A question which I’ve answered in a blog discussing ECC vs. non-ECC. 
Storage
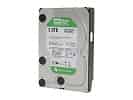
 The most important and most expensive part of the build is the hard drives. To start off, I decided that I would begin with four drives and then add two more down the road in the future. Because of hard drives’ declining reliability, I wound up buying drives from two different manufacturer; the Western Digital Caviar Green WD20EARX and the HITACHI Deskstar 5K3000. Because hard drives often share problems across an entire batch there is a good chance that when buying two identical drives from the same vendor that both drives came from the same batch. By buying from two different manufacturers I help reduce the fact that half of the drives may in a short time span.
In addition to the disk drives, I purchased a small 8GB USB Flash Drive and a USB cable that plugs directly to the motherboard’s USB header to mount inside the case. The purpose of the flash drive is to host the OS and the software to manage the NAS.
Alternatively, check out the Brian’s Face 16GB USB Drive on Tindie for $12.00 or pre-loaded with the current FreeNAS ISO for $15.00.
Software
The software to power the NAS was my biggest area of concern. I’ve tinkered with hardware RAID in the past using a 3Ware controller card. Once upon a time in a gaming rig, I had created a RAID 0 array across two disks for the fastest performance. My needs now are a little bit different I need something cheaper and that is not hardware-specific, so there are fewer points of hardware failure. Researching how to configure and support the RAID software choices made me lean towards buying one of the all-in-one enclosures. However the discovery of FreeNAS enabled me to go the PC route instead.
From FreeNAS’ webpage:
FreeNAS™ is an Open Source Storage Platform based on FreeBSD and supports sharing across; Windows, Apple, and UNIX-like systems. FreeNAS™ 8 includes ZFS, which supports high storage capacities and integrates file systems and volume management into a single piece of software.
From what I have been able to research so far, I am going to be able to place FreeNAS directly on a bootable USB device, and be able to configure/use it remotely via a web-interface running on NAS itself. I have read over their user documentation and I think that FreeNAS is something that a novice like myself can tackle.
Next Steps
Right now, my parts are coming in three different packages making the trek from Memphis, TN to my house. I have been eagerly tracking the packages throughout the beginning of the week. Hopefully over the next week or so I will have time to wrap up my other ongoing projects and begin to tackle this new project.

