layout: post title: “DIY NAS: EconoNAS 2016” description: “An economical DIY NAS featuring FreeNAS, an ASUS B150M-K D3 motherboard, Intel Celeron G3920 GPU, 16GB DDR3 RAM, and 12TB of storage (6 x 2TB) for just under $700.” date: 2016-09-21 00:00 comments: true categories: [“DIY NAS”, “FreeNAS”, “NAS Build”] image: “/images/2016/econonas/econonas_2016_830.jpg” thumbnail: “/images/2016/econonas/econonas_2016.png” authors: [“Brian Moses”] —
Giveaway Update (11/21/16): If you can forgive a Thanksgiving pun, it looks like [@chrisgonyea][cg_twit] has a little bit more to be thankful for in 2016–due to winning this edition of the #FreeNASGiveaway! Chris won in an unconventional fashion, the original winner failed to respond to my numerous attempts after the first drawing. Undaunted and determined to give this EconoNAS away to a reader, I picked another number from the hat out of the 450-something entrants into the #FreeNASGiveaway and pulled Chris’ number and thankfully I had no issues at all contacting him! I appreciate everyone’s interest and participation, while you may not have won this particular giveaway, your ensures there’ll be EconoNAS giveaway in 2017 too!
Have a happy Thanksgiving, everybody!
Quite a few years ago, I decided I wanted to build my own DIY NAS, primarily for the purpose of backing up my Windows PCs. But Google let me down–I wasn’t able to find a good build blog to get me started. So I decided to set out and build my own NAS and blog about it along the way. Much to my surprise, I quickly found there were a number of other people asking Google the same kinds of questions, and my DIY NAS category of blogs has seen the bulk of my traffic over the years.

In an attempt to defend my turf at (or near) the top of the Google search results related to building your DIY NAS, I’ve been publishing new NAS builds every year. As I’ve gotten more interested in one-upping myself, I quickly found that I was spending and suggesting parts that far exceeded the budget of what my original NAS wound up being. Consequently, I’ve been publishing two very different NAS builds every year: a large, powerful, and expensive DIY NAS and something more budget-friendly, which I coined “the EconoNAS.” Of the two, the EconoNAS is what most closely resembled my very first DIY NAS, a machine built from some inexpensive parts that I could find in an effort to add as much redundant storage that my limited budget could offer. Each year, I do my best to set a budget of around $500 and then ultimately go over it. The 2015 EconoNAS missed that mark quite badly, so this year I doubled down my efforts and tried really hard to both exceed the specifications of last year’s version but to also bring the price down considerably closer to my goal.
Affiliate Disclaimer: Some of the links on this website are affiliate links, meaning, at no additional cost to you, I may earn a commission if you click through and make a purchase. I only recommend products that I believe will add value for my audience. Please understand that I have experience with all of these companies' products, and I recommend them because they are helpful and useful, not because of these small commissions.
CPU & Motherboard
As you might expect, the component that I find to be the most important is the motherboard. Ideally, it’d be inexpensive (under $100), a small form factor, have 6 or more SATA ports on it, onboard Gigabit network controller, and have some sort of onboard video. Most years, I wind up having to compromise on some of the bits of criteria. Typically the compromise has always been made on the size of the motherboard. The smaller the motherboard is, the more expensive it tends to be, especially when it has a sufficient number of SATA ports to be used in a NAS.
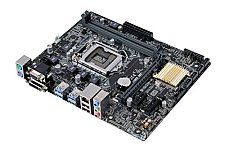 You can imagine my delight when I found that the ASUS B150M-K D3 (specs) was in my price range. The smallish MicroATX motherboard supports CPUs from the Intel Skylake CPU family and features the Intel B150 chipset. The B150M-K D3 has six SATA III (6.0 Gbps) ports. If additional storage were needed, the board includes one PCIe (x16) expansion slot and a pair of PCIe (x1) expansion slots. To cap it off, the motherboard also features a built-in Realtek RTL8111H Gigabit LAN. Normally when shopping for DIY NAS components, I agonize over the motherboard and pour over options for what seems like an eternity, but when I saw the list of features and the price tag on this motherboard, I immediately purchased the motherboard.
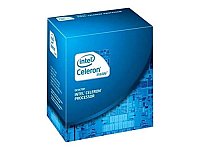 My budget ultimately made my CPU choice for me. I picked the Intel Celeron G3920 CPU (specs) largely because it was the least expensive CPU that I could find that was supported by the ASUS B150M-K D3. However, while the G3920 might not have the performance and sex appeal of its bigger siblings, it is a very capable CPU. Last year’s EconoNAS featured the Intel Pentium G3220 and in comparison the G3920 scores quite a bit higher on the PassMark benchmarks. The icing on the cake of that comparison is that the G3920 also is more power efficient. More computing ability and a lower power consumption is a significant upgrade over the 2015 EconoNAS.
RAM
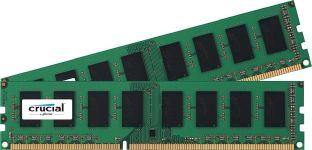 Because I intend to use FreeNAS, the most controversial part of this build will be the RAM. The controversy being that I’m an advocate of using Non-ECC RAM with FreeNAS/ZFS, especially on cost-conscious builds like this EconoNAS. Many, especially a vocal majority of the FreeNAS forum, don’t agree with this sentiment and think that ECC RAM is an absolute requirement for use with ZFS. Considering that cost is a driving factor in the EconoNAS, non-ECC RAM is an ideal option. Furthermore, my selection of the ASUS B150M-K D3 motherboard eliminated ECC RAM from contention. All that being said, RAM is important, especially with the ZFS file system. The 2015 EconoNAS featured 8GB of RAM, so for this year’s build I decided to up it to 16GB by purchasing the Crucial 16GB Kit (2 x 8GB) DDR3L-1600 (specs). The kit features two 8GB DDR3 DIMMs running at a 1600MHz clock speed. Doubling the amount of ram found on 2015’s EconoNAS is a very nice upgrade for the current build.
Updates:
10/15/2016: If it sounds too good to be true, it usually is. The motherboard mentioned below does indeed support (I use this term very loosely) ECC RAM, but only if you’re willing to run it as non-ECC RAM. In other words, the RAM fits, the machine will run, but it’ll never do any kind of error checking and correction–you’ll never get the benefit of the ECC feature.
02/11/2017: A reader pointed out that 1.5v RAM is out-of-specification for the Intel Celeron G3920 CPU. Choosing to err on the side of caution, I updated the blog to point at memory that is within the Skylake specification; 1.35v DDR3L.
But What if You Want ECC RAM? It’s going to cost you!
Typically, buying ECC RAM meant buying a whole different grade of motherboard to support it–and economical was not a word you’d use to describe the prices of those motherboards. However, thanks to @comfreak from Twitter, I learned that’s not the case with the Skylake-generation of Intel CPUs. Buying a MSI B150M Pro-VDH (specs) motherboard and pair of Kingston Technology 8GB DDR4-2133MHz Unbuffered ECC DIMMs (KTH-PL421E/8G) would cost roughly an additional $25 (4-5%). The option of being able to add ECC RAM to this build for an additional $25 is a reasonable value, and I certainly wouldn’t fault anyone for choosing that route. Having learned this I’d be tempted to go the ECC route, but still think that I would end up choosing my non-ECC approach for this EconoNAS build and most likely others like it in the future.</strike>
Case, Power Supply, and Cables
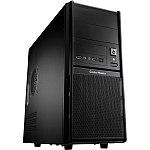 For my regular DIY NAS builds, I spare no expense on the cases and typically purchase the best NAS case that I can find: something small, compact, loaded with easy-access drive bays (preferably hot-swappable), and ultimately rather expensive. The EconoNAS budget doesn’t allow for such an extravagance. Regardless, I’m pretty excited about the case I chose. The Cooler Master Elite 342 (specs) includes a 400watt power supply, mini tower MicroATX case. The included power supply made the case an absolute bargain at around $55. Out of the box, there are enough drive bays to fit six 3.5” drives (five internal and one external), and depending on what 5.25” to 3.5” adapter you buy, there’s room for 2-3 more drives in the two external 5.25” bays. In terms of drive capacity, the Cooler Master Elite 342 meets or exceeds my favorite DIY NAS case so far, the U-NAS NSC-800. My favorite unexpected feature of this case is the removable drive “cage” (more like a bracket) which contains four of the internal 3.5” drive bays.
The ASUS B150M-K D3 may have six SATA ports, but as is standard these days, only included 2 SATA cables with the motherboard. What’s even worse is that one of the cables has the aggravating 90-degree bend that I absolutely hate. I had to dig into my surplus SATA cables to hook up all the drives; if you don’t have any extras of your own, a pack of 5 Mudder 18” SATA III cables is probably a good idea. The included power supply has 4 SATA power cables necessitating an additional 1 or 2 cables to adapt a standard molex connector and split it into two SATA power connectors, which my supply of excess parts was also able to provide me with.
Storage
FreeNAS Flash Drive
 Of all the parts and pieces in my DIY NAS builds, this is where there’s been the least amount of variation. I have been extremely loyal to the SanDisk Cruzer Fit, using the 8GB and 16GB versions in every single one of my DIY NAS builds except my very first one. If you’re doing your shopping on Amazon, the 16GB version is currently one of their “Add-On” items that you can get added to a qualified order for free. From a budget perspective, it’s still perfect. For this year’s EconoNAS, I ultimately went with the Cruzer Fit’s bigger brother, the SanDisk Ultra Fit 16GB.
Why the change? It’s priced competitively, at about $0.50 more than the Cruzer Fit, and it’s USB 3.0. For a long time FreeNAS had not yet adopted USB 3.0 support, and ever since they included USB 3.0 support I have pondered an upgrade to a USB 3.0 flash drive. That being said, I doubt that the improvement in USB 3.0’s faster throughput is going to have much (if any) impact on day-to-day operations of the NAS itself. Ultimately, the upgrade to the SanDisk Ultra Fit 16GB has to do with the eventuality that I just won’t be able to find the prior generation at competitive prices.
NAS Hard Disk Drives
Ahhh, the meat and potatoes of every single NAS build. When building a budget-based NAS, my recommendation is to buy as many small drives as your budget allows–that is assuming that their price per terabyte is at least in the same neighborhood as larger drives. Bigger drives almost always have a cheaper price per terabyte, but one detriment of bigger drives is the net storage lost due to your redundancy requirements. If you’re trying to build an economical NAS, instead of using the raw storage to calculate your price per terabyte, add everything up together, factor in storage used for redundancy, and figure out your price per terabyte on the overall net storage. Here’s an example, using some Western Digital Red Hard Drives of varying size to build a 12TB NAS with 2 drives worth of redundancy:
| HDD | HDDs Needed for 12TB |
Price Per HDD |
Price Per HDD TB |
Total Cost for HDDs |
Net Storage |
Price per Net TB |
|---|---|---|---|---|---|---|
| WD Red 1TB | $60.99 | $60.99 | $731.88 | $73.19 | ||
| WD Red 2TB | $89.99 | $45.00 | $539.54 | $67.49 | ||
| WD Red 3TB | $109.00 | $36.33 | $436.00 | $72.67 | ||
| WD Red 4TB | $147.83 | $36.96 | $443.49 | $110.87 |
Across the Western Digital Red Hard Drives, when building a 12TB NAS, you’re going to get the most net storage using 1TB HDDs, but get the second-worst net price per terabyte due to the fact that 1TB drives have gotten so expensive. Old drives get expensive when they’re scarce because people still need them for their like-for-like replacements. Of all the drives, the 3TB drive has the best price per terabyte, but that doesn’t carry through to the best price per net terabyte across all the drives due to using 6TB for the redundancy. In the end, the 2TB drive winds up being the best deal despite having almost the worst price per terabyte for each drive. When building an economical NAS, use your budget, redundancy requirements, and capacity requirements to calculate out the net price per terabyte of all options. Then pick the configuration which meets your needs the best.
An added benefit of building the biggest array possible out of smaller drives is that it’s a simpler upgrade path when using FreeNAS–especially for small NAS builds like the ones I do. For the DIYer, adding a drive to an existing zpool is not impossible, but it’s very difficult and it takes planning in advance. For a NAS of this size, it is much easier to simply swap out each drive with bigger ones as they fail or go on really good sales; once all of the drives have been upgraded, ZFS will automatically use as much of the added space as is available on each of the drives.
 I debated back and forth between 2TB and 3TB HDDs for quite some time and ultimately arrived at the decision to continue using 2TB hard drives for this year’s EconoNAS. And I found a good deal on the 2TB HGST Deskstar 2TB hard drive at $48.50–I generally budget around $60 per drive for the EconoNAS. Because the 2015 EconoNAS featured 5x2TB drives in total storage, I decided to surpass it by adding a sixth drive to this year’s EconoNAS. Had I found a motherboard with capacity for a 7th or 8th SATA drive, I would’ve been tempted to add an additional drive or two. Typically in my DIY NAS builds, I like to avoid buying all of the same drive, especially all from the same vendors. Typically I do that to avoid issues with a particular model of a hard drive, or even a bad batch of hard drives. However, Backblaze’s ongoing hard drive reliability reports indicate that this particular drive has a very low failure rate: 1.57% of the 4,264 drives have failed in over 3 years. That low failure rate emboldened me to capitalize on the inexpensive 2TB HGST Deskstar 2TB hard drives.


Final Parts List
| Component | Part Name | Count | Cost | |
|---|---|---|---|---|
| Motherboard | ASUS B150M-K D3 | specs | 1 | $85.94 |
| CPU | Intel Celeron G3920 | specs | 1 | $51.90 |
| Memory | Crucial Ballistix Sport 16GB Kit DDR3 PC3-12800 | specs | 1 | $108.60 |
| Case and Power Supply | Cooler Master Elite 342 | specs | 1 | $63.65 |
| SATA Cables | Mudder 18 Inch SATA III Cable (Pkg of 5)" | N/A | 1 | $7.99 |
| Power Splitter | LP4 to 2x SATA Power Y-Cable | N/A | 1 | $3.59 |
| OS Drive | SanDisk Ultra Fit 16GB | specs | 1 | $5.99 |
| Storage HDD | HGST Deskstar 2TB 7200RPM HDD (0F10311) | specs | 6 | $59.95 |
| TOTAL: | $687.36 | |||
Hardware Assembly, Configuration, and Burn-In
Assembly
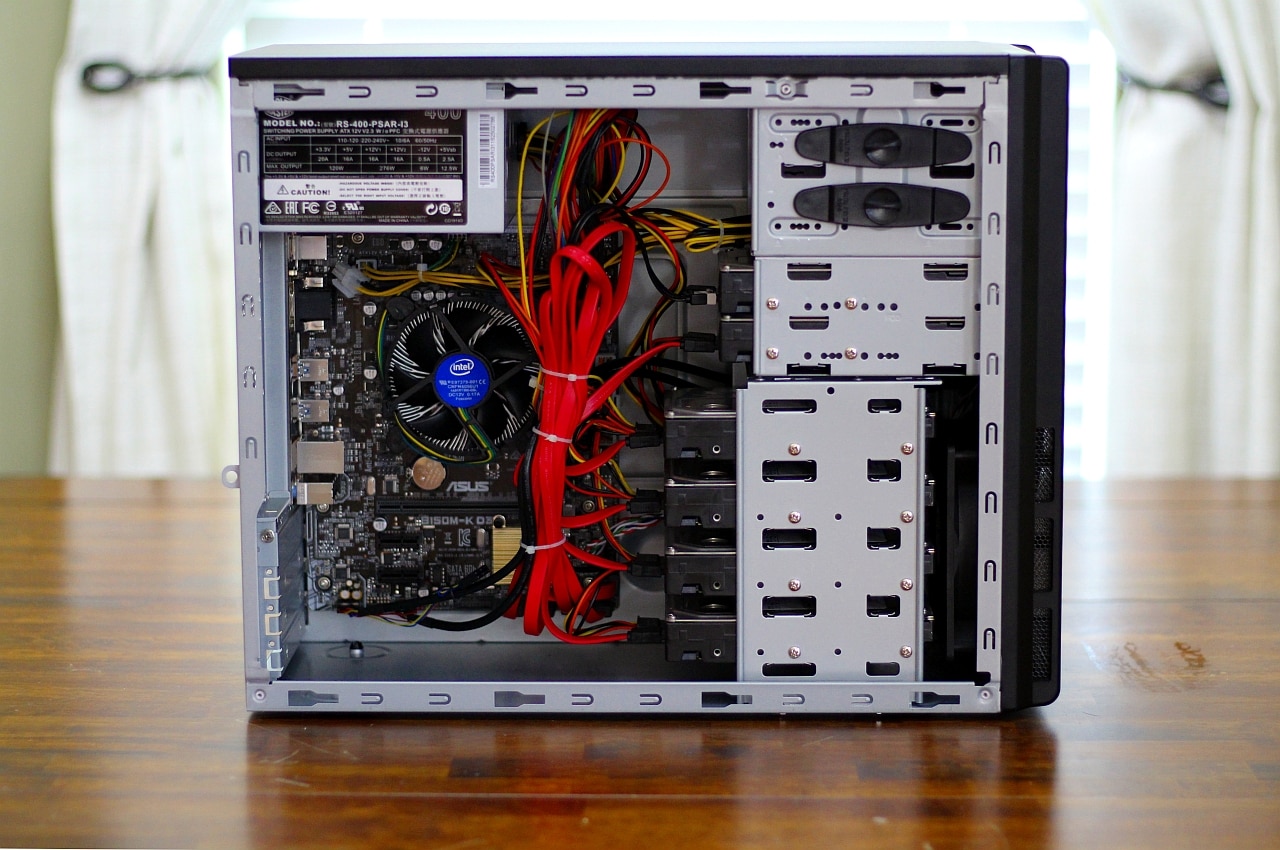
If you’ve seen the time-lapse video of me putting together the DIY NAS: 2016 Edition then you know it was a challenge to assemble the DIY NAS: 2016 Edition. The U-NAS NSC-800 fits a ton of features into a very small case, which was a pain to work inside. Comparatively, assembling this year’s EconoNAS was a breeze. Even though MicroATX is considered a smaller form factor, working inside the Coolermaster Elite 342 was much roomier than the other two machines that I put together this year.
Even though I didn’t have to work too hard, I did run into a couple wrinkles. Firstly, half of the brass standoffs included with the case were for wider screws than are used for mounting motherboards. The screws included (and screws from my excess-parts stash) wouldn’t bite and would pull right back out of the standoffs. Thankfully, I have a number of extras that I was able to raid and replace the defective standoffs with. The second wrinkle was the thumbscrew provided to help mount the drive “cage” inside the case. At the bottom of the case, the drive cage had 4 standard case screws that fastened it to the bottom of the case, and at the top of the cage was a single thumbscrew that attached it to the part of the case the holds the sixth internal 3.5” drive bay and one external 3.5” drive bay. The thumbscrew provided was just a bit too tall, and I wound up having clearance issues trying to get a hard drive installed in there. It’s possible that I wouldn’t have had these clearance issues if I’d installed the drives before the motherboard, but I’m skeptical. Thankfully I was able to use one of the extra case screws and a small stubby screwdriver to replace the problematic thumbscrew.
Lastly, I discovered that the 18-inch SATA cables were probably longer than I necessarily needed. 12-inch cables would’ve probably been good enough. As a result, there was quite a bit of excess slack in the cables to try and manage. Back when I worked on or fixed friends’ computers more often, I hated finding lots of zip ties inside computers. Much to my chagrin, I used nearly all of the zip ties that came with the Coolermaster Elite 342 to bundle up the extra slack in the SATA cables.
All things considered, it was an incredibly simple assembly, especially when you compare it to with what I went through when I assembled both the DIY NAS: 2016 Edition and my own NAS this year. I was actually a bit disappointed that it worked out so well: I was hoping to have to design an object to print with my 3D printer to include as a component in this year’s EconoNAS.
Hardware Configuration
Back when I built my first NAS, there were all sorts of machinations that you had to do in the BIOS in order to get it working just right–or at least it felt that way. Now? It’s just a matter of making sure that the USB devices are the only devices the machine is allowed to boot from. While I was tinkering around the BIOS and looking at the motherboard’s support page, I learned I was on the original BIOS and that there’d been a few stability and performance updates in subsequent BIOS releases. So for no particular reason at all, I went ahead and updated the ASUS B150M-K D3 to the latest available BIOS.
Burn-In
I typically burn-in my NAS focusing primarily on the motherboard, CPU, and RAM. Of all the components that go into a NAS, these are the most difficult to get replaced, so they get the bulk of my attention. If I have a bad motherboard, CPU, or RAM, then I want to know about it right away, not down the road.
Quite a few people have asked in the past why I don’t do any kind of burn-in on the drives, but I’m not too concerned about the bad drives for a couple reasons. Firstly, the Backblaze drive quality reports typically have me pretty confident in whichever drives I’ve selected for the NAS. Secondly, the hard drives are the only components that have some redundancy. Thirdly, the hard drives are much, much easier to replace. For these reasons I typically choose not to do any kind of burn-in on the HDDs.
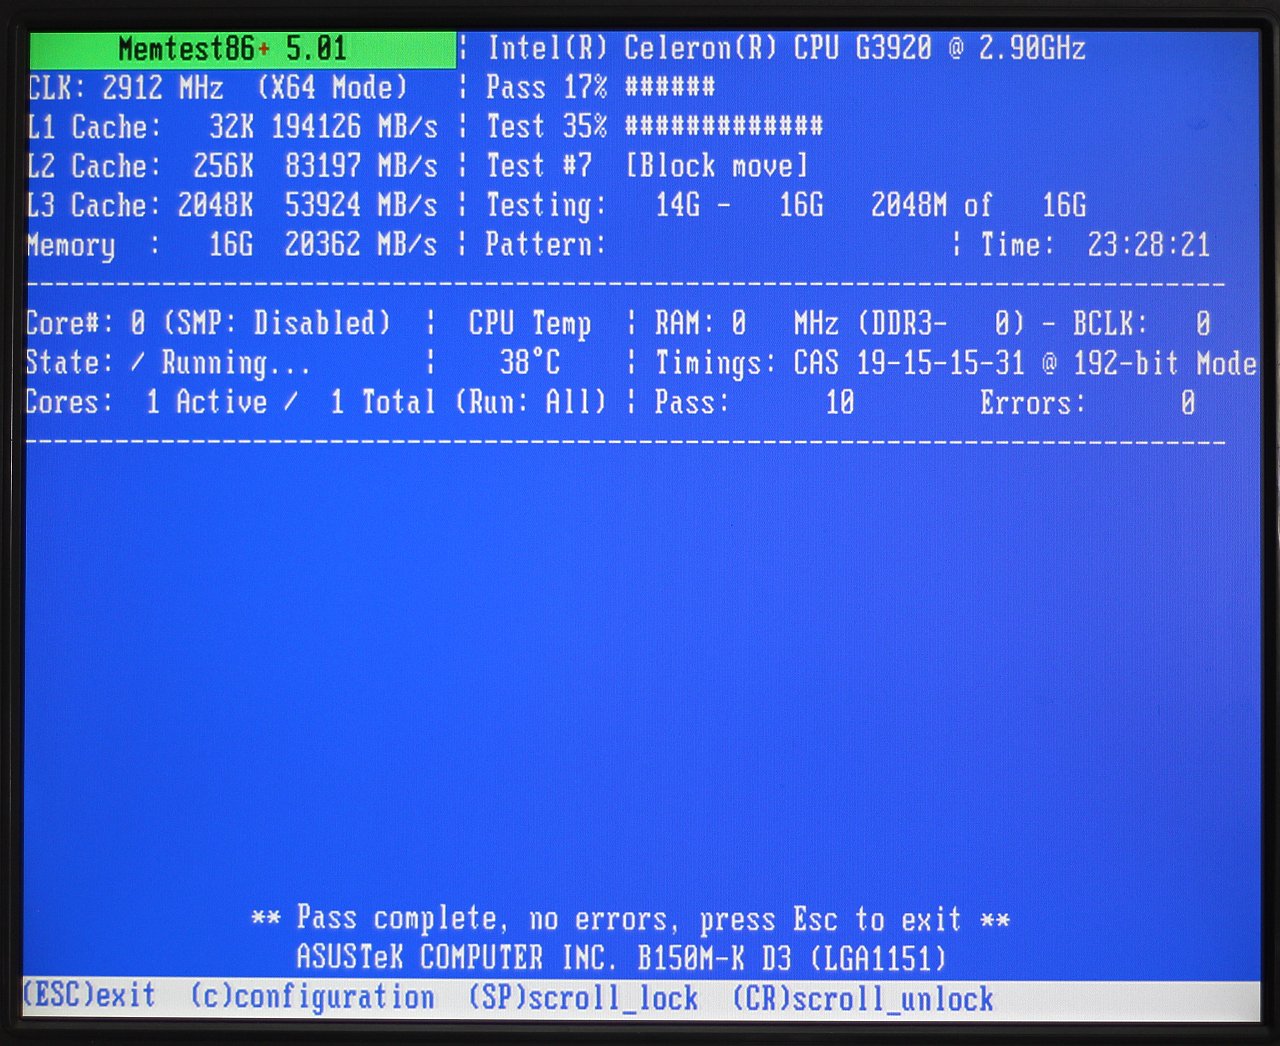
For burning in the memory, I run Memtest86+. If there are no errors found after three passes, then you’re typically in good shape. But usually in my tests, I’ve gone way, way past 3 passes. That’s usually because I get busy working on the blog while I do the various burn-in tests. Between blogging, my day job, and sleep, I’ve been known to let Memtest86+ run continuously for several days! But those first 3 passes are the only ones I ever care about.
I’ll also use some sort of load tests, like the ones found on the StressLinux, Ultimate Boot CD, and Hiren’s BootCD. Particularly, what I want to do is to put the system under heavy load for a few minutes and keep an eye on temperatures and such. If everything goes well, then I repeat the tests and leave it running for around an hour, and finally running a third test and leave it running for a duration of a few hours (3-4). Assuming there’s no random lockups or reboots during any of those tests, then I consider the hardware sufficiently burned in.
FreeNAS Configuration
In setting up FreeNAS for the purposes of these blogs, I usually take a pretty short path towards getting it functional. On your first login, you’re asked to set the root account’s password and then you’re put into the Initial Wizard, which is quite handy and will help you set things up from scratch, but I always exit out of it and manually set up everything I need.
When manually setting everything up, I first update the hostname (EconoNAS) and domain (lan) to match the rest of my computers. After doing this, I like to reboot and then log back in using the new hostname to make sure it worked. Then I enable the services I’m going to need: CIFS (for Windows file sharing), SSH (for remote access) and S.M.A.R.T. (for drive monitoring). Then I work through each service and configure them:
- CIFS: I update the NetBIOS Name, Workgroup, and Description to match what I picked for the hostname and domain name.
- SSH: I use the suggested default settings.
- S.M.A.R.T.: I update the Email to report field and set it to my email address.
Using the Volume Manager, I then go create the volume (ZFS pool) named Storage. I added all 6 of the 2TB HGST Drives to the pool and pick RaidZ2 (the ZFS equivalent of RAID 6), which will result in my two drives’ worth of redundant data. Once I’ve created my volume, I add a dataset to that volume, I name that dataset share, and accept the remaining default values. Then I set permissions on the dataset, changing the owner to the user, nobody (more on this below), and making sure that the owner has Read/Write/Execute permissions to the dataset.
At that point, I drill into sharing and create a CIFS share pointed at the new dataset that I just created. For this year’s EconoNAS, I set up the permissions to be wide open by allowing guest access. No password is then required to access the share, and the privileges of the guest account (“nobody” from above) are used when accessing the share. At this point, I pull the share up from another machine and ensure I’m able to read, write, and delete files on the share.


Please keep in mind this is a very basic and very wide-open setup for the purposes of keeping things brief in this blog. I have a list of a few other tips that you might want to delve deeper into if you’re following along:
- Create users whose credentials match the credentials used on your network’s PCs. Tighten down the share(s) so that only those users have access.
- Set up a monthly scrub of the Volume (aka ZFS Pool)
- Set up some periodic S.M.A.R.T. tests of the hard drives (long and short tests)
- Others: Leave your tips in the comments below!
Benchmarks
Power Consumption
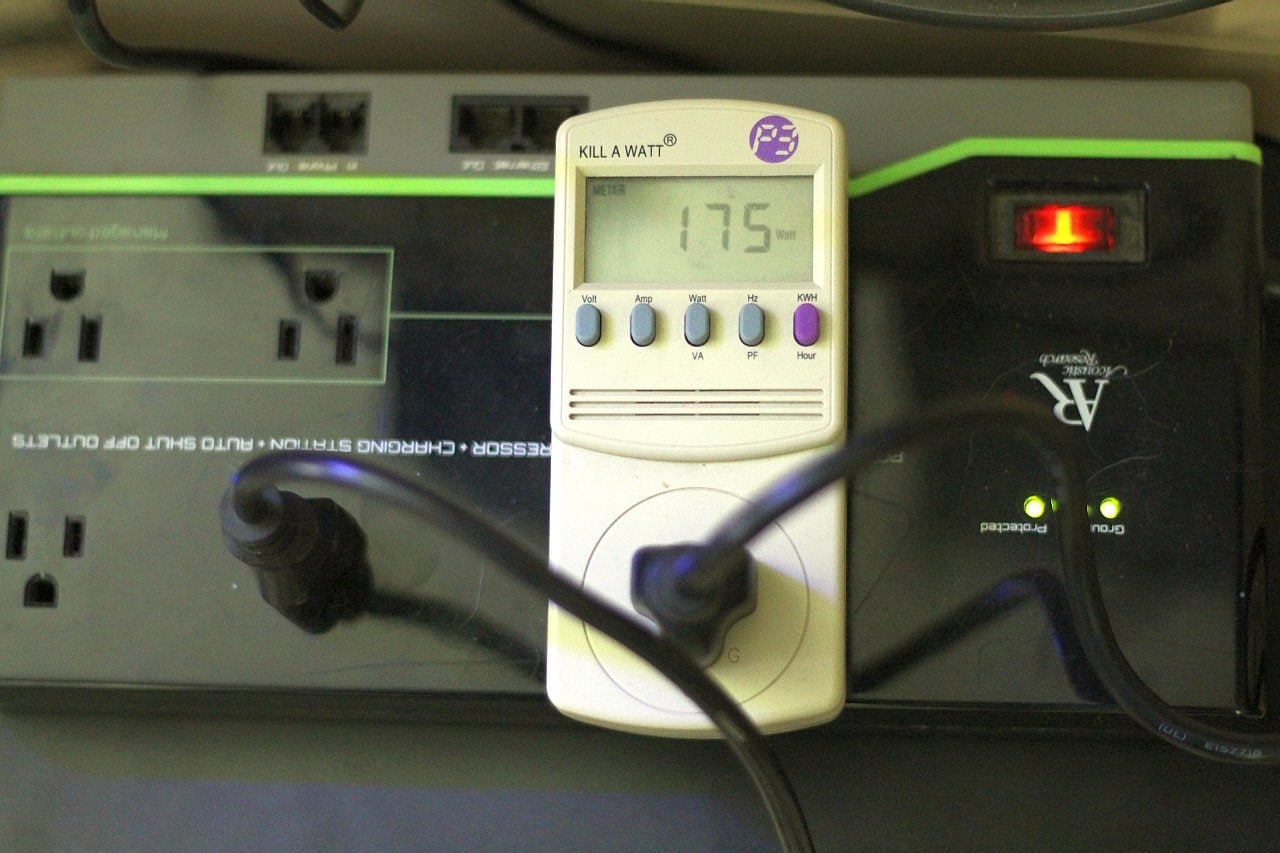
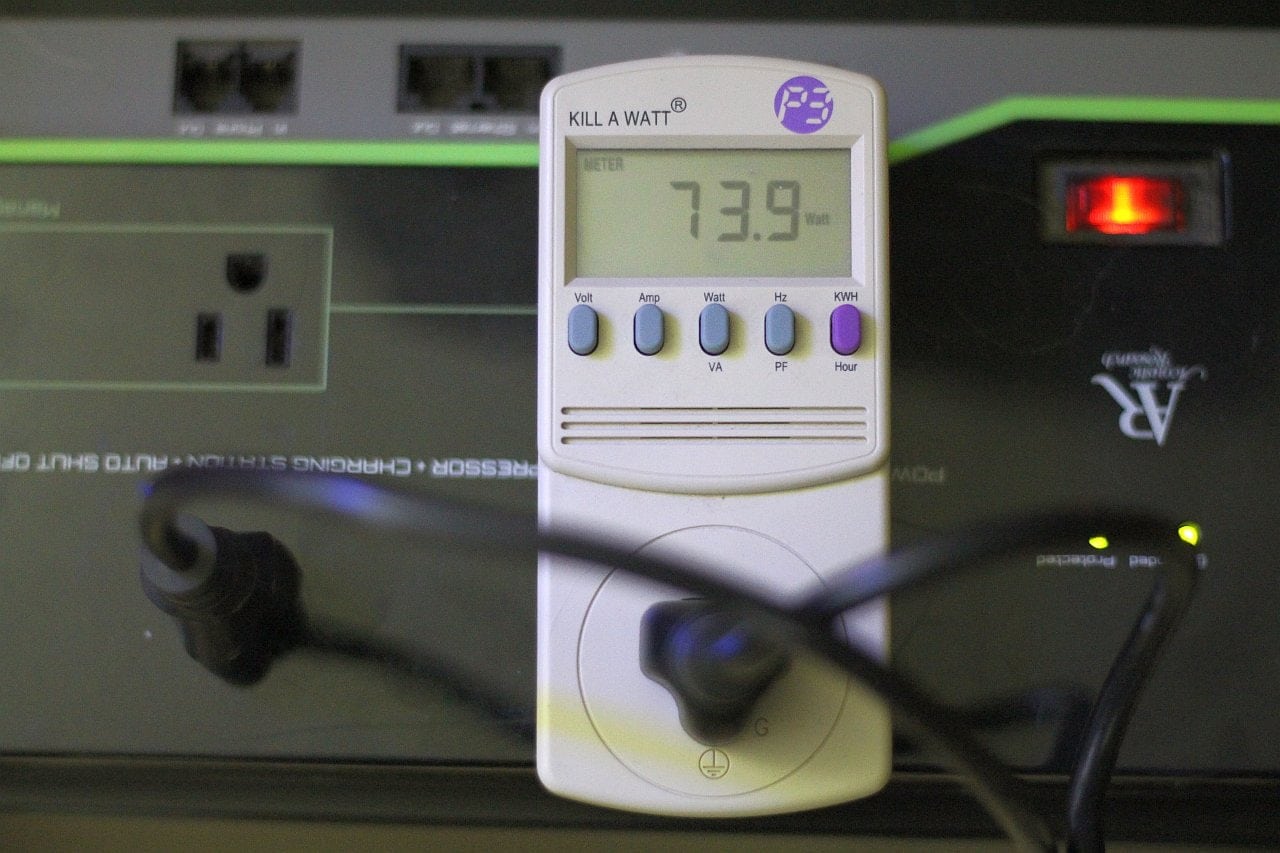
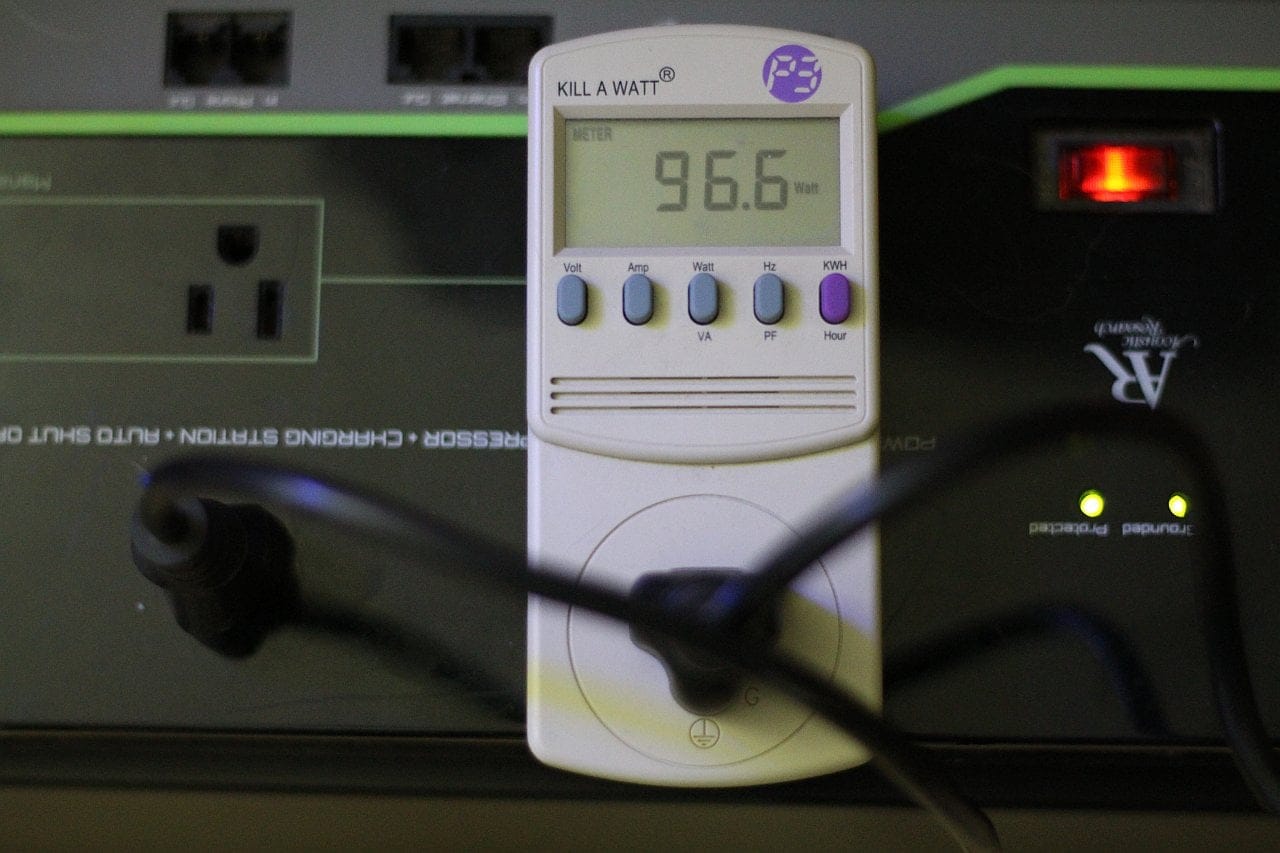
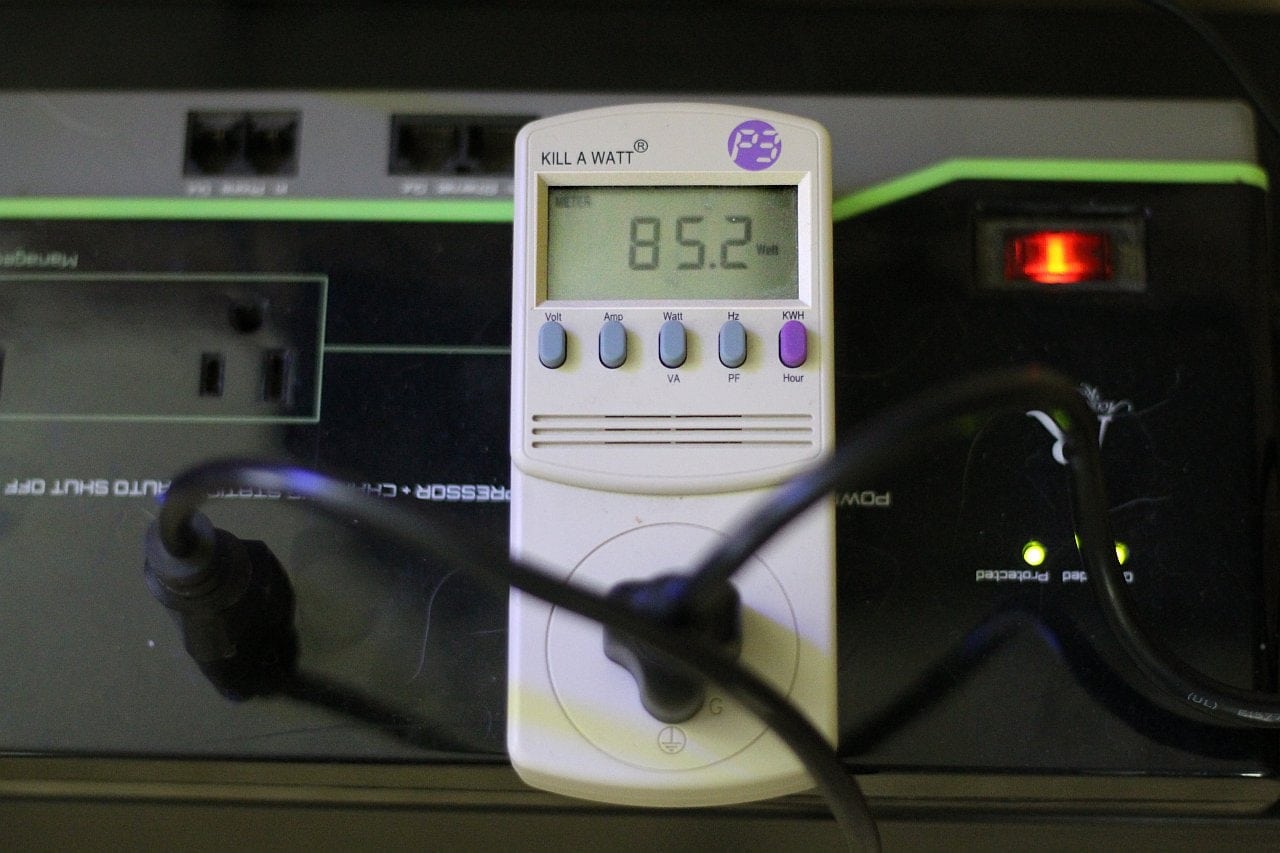
One of the sneaky costs of a NAS is power consumption, so when building a NAS, I’ll typically have it plugged into a Kill-a-Watt to see how much power it is consuming at any given moment. Usually, I use the numbers to come up with a best-case and worst-case scenario for power consumption, then use my most recent power bill to try and figure out my monthly costs to keep it running. I tend to take a look at the power being consumed at first boot, when the machine is in an idle state, during my CPU burn-in tests, and lastly during a write speed throughput test.
| Boot | Idle | CPU Burn-In |
Disk Throughput |
|---|---|---|---|
 |
 |
 |
 |
Throughput
For the DIY NAS builder, the most likely bottleneck for you to hit is the speed of your network. In building the EconoNAS, my goal is to hit that bottleneck. I won’t begin to predict what the most common network speed is for DIY NAS builders, but I’m going to guess it’s Gigabit. My preferred throughput-testing tool is IOMeter. I was able to saturate my desktop computer’s Gigabit interface easily with a sequential read test. And to my surprise, a sequential write test was in the same ballpark but a few MB/sec slower. I’m rather pleased that the EconoNAS can pretty much monopolize a Gigabit network connection in both read tests and write tests.


Conclusion
When last year’s EconoNAS was first published the, price tag was roughly $675. My biggest regret in last year’s EconoNAS was missing my budget so badly–it was 35% over budget. I’m really excited to say this is a regret that I’ve rectified this year. At around $620, I’ve exceeded the budgetary goal by only 10%. This is way more worthy of the EconoNAS label than last year’s attempt. If you were to buy and build the 2015 EconoNAS right now using current prices, it’d still cost you in the neighborhood of $530. Building the 2016 EconoNAS costs an additional $90, but gets you the following upgrades:
- A more powerful CPU
- Twice the RAM
- Improved power efficiency
- An additional 2TB of storage.
All of that for an additional $90? I’m sold! The extra 2TB of HDD space is $50 by itself. It’s a bit unfair comparing last year’s NAS against this year’s NAS, but that’s not even the most outrageous comparison that I was able to come up with. I took the key attributes of a NAS machine (number of available drive bays, CPU, RAM, and network interface speed) and did some searching online to compare the 2016 EconoNAS with other popular NAS solutions and even compared it to the DIY NAS: 2016 Edition. Here’s what I found:
| NAS | Price | # of Bays | CPU | Passmark Score |
RAM | Network |
|---|---|---|---|---|---|---|
| 2016 EconoNAS | $264.81 | Intel Celeron G3920 | 3760 | 16 | 1xGigabit | |
| Seagate WSS STEE100 | $449.99 | ??? | ??? | ??? | 1xGigabit | |
| NETGEAR ReadyNAS 316 | $599.00 | Intel Atom D2700 | 844 | 2 | 1xGigabit | |
| Synology DS1515+ | $699.00 | Intel Atom C2538 | ~2329 | 2 | 4xGigabit | |
| Brian's 2016 DIY NAS | $768.46 | Intel Atom C2750 | 3831 | 16 | 2xGigabit | |
| QNAP TS653A | $939.00 | Intel Celeron N3150 | 1706 | 8 | 4xGigabit |
In comparing the most important features of each NAS, it’s my opinion that the 2016 EconoNAS is a tremendous value. It compares favorably to every single one of the off-the-shelf NAS systems, and I picked the ones that were the most price-competitive. In my opinion, the 2016 EconoNAS even compares favorably to the two other NAS machines that I built this year: DIY NAS 2016: Edition and my own NAS upgrade.
That being said, these other NAS systems do have their own unique advantages: they’re all smaller, they all have nice purpose-designed NAS cases with easy access to the hard drives, they almost all have CPUs which are more power-efficient, and for the most part they all have support teams standing behind them. These features carry a pretty hefty price tag, but I wouldn’t fault anyone for thinking that they were a better option. If you’re willing to put it together and support it yourself, there are considerable savings to be had in building your own DIY NAS. If you can live without the really nice NAS cases and easy drive access, you can build the EconoNAS and get even more considerable savings!
Giveaway
Like with the DIY NAS: 2014 Econonas, the DIY NAS: 2015 Edition, the DIY NAS: 2015 EconoNAS, and the DIY NAS: 2016 Edition, I will be giving the DIY NAS: 2016 EconoNAS away to a lucky reader. Here’s how this giveaway works:
- You follow
my blog and myself on Twitter, the blog’s Facebook page, and the blog’s Google+ page. - You retweet or share the promotional posts from these social networks (links below) with your own friends and followers. (Note: Make sure that your share is public, otherwise I won’t be able to see it and give you credit!)
- Your name gets entered up to three times (once per social network) in a drawing.
- After a month or so, I’ll pick a winner at random and announce it.
Here’s a link to the best posts to promote for each social network:
If there are any questions, please go read the #FreeNASGiveaway rules page, I explain it in additional detail there. Please keep in mind, it’s more about the “spirit” of these rules, rather than the letter of the law. If you go to the trouble of helping promote my blog, I’ll do whatever I can to make sure you get an entry into the giveaway. But the best way to make sure you get your entry is to follow the steps above.