
Ever since building my own NAS, I’ve enjoyed periodically writing a NAS Build blog to help inspire fellow DIYers. Each of the times, these builds have been hypothetical for me, but based on the comments, someone usually winds up using the suggestions as a template for their own FreeNAS. However, I usually wind up having to plead the fifth when someone has a specific question about the hardware. There’s nothing I hate more than having to say “I don’t know,” both personally and professionally, so I made a commitment this year that I’d actually buy and build the NAS myself so I wouldn’t have to say “I don’t know” to some of the easier, more common questions related to building a NAS.
I’ve generally written one FreeNAS build blog about every 6 months and rotate between two themes, a more powerful updated version of my own personal NAS and a cheaper budget-based build that I call the EconoNAS. Originally, I thought I could repurpose this new hardware and use some of it upgrade my NAS, but my own NAS is already pretty close to being maxed out. I thought also about using it to for a media server or something similar, but I couldn’t justify keeping this new hardware for other purposes; I just wouldn’t get any utility out of it. What else could I do with an extra FreeNAS server? Give it away to a lucky reader, of course! Please see the Giveaway details at the end of this blog, or check out the #FreeNASgiveaway page for more details. Here are links to the social-media items to share to enroll in the giveaway:

At one point in 2013, I was thinking about FreeNAS and was curious about what one could build on a shoestring budget. This lead to the creation of the 2013 edition of the EconoNAS blog. My goal was to come up with parts that would cost somewhere around $500 to build a FreeNAS box. Between the features of FreeNAS and the amount of storage, I thought it wound up being a fantastic value. This time around, my goal was to outdo myself, to beat that price and increase the storage capacity of the EconoNAS. This wound up being particularly difficult; in my research I found that hardware prices seem to be nearly the same and have not fallen all that much since I wrote the first EconoNAS build blog. Hard-drive prices proved to be especially stable; I found that hard drive prices were pretty much exactly where they were a year ago when I wrote the 2013 EconoNAS blog. These static prices actually caused this build to be a tiny bit more expensive than the prior build, but I think you’ll see that the hardware improvements should justify the tiny bump in price.
Affiliate Disclaimer: Some of the links on this website are affiliate links, meaning, at no additional cost to you, I may earn a commission if you click through and make a purchase. I only recommend products that I believe will add value for my audience. Please understand that I have experience with all of these companies' products, and I recommend them because they are helpful and useful, not because of these small commissions.
CPU & Motherboard
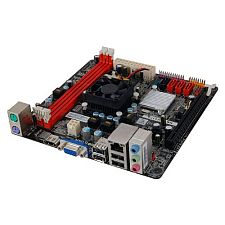 For all of my NAS Build blogs, I would prefer to pick low-power components. Primarily because my builds are intended for home use for only a few users. I wasn’t able to find an affordable motherboard in the 2013 EconoNAS build, sso one of my goals for this edition was get back to using a Mini-ITX motherboard with an integrated CPU, even if it ate up more budget than what the same parts had consumed in the prior edition. An integrated low-power CPU and low-power motherboard are critical to helping save money by lowering your operating costs. The up front cost might be higher, but the electricity savings over the life of the machine would more than compensate for that price premium. I picked the Biostar NM70I-1037U (specs), which ticked off most of my must-haves in a NAS motherboard: integrated Intel Celeron 1037U dual-core 1.8GHZ CPU, 4 SATA ports (1xSATA3, 3xSATA2), onboard video, and onboard Gigabit ethernet. In a perfect world, there would have been more SATA ports (at least six), but at the paltry price of $69.99 I thought it was an exceptional deal. I do not mind the combination of SATA3 and SATA2 ports on account of the fact that both the drives’ maximum throughput and the network are both going to be bottlenecks before SATA3’s higher capacity is put to use.
Running Total: $74.99
RAM
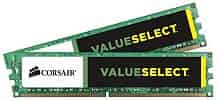 For this build, I chose to go with 8GB of RAM via two 4GB DIMMs of DDR3 1333MHZ Corsair ValueSelect RAM from Corsair. On the FreeNAS, site a rule of thumb is often suggested which says 1GB of RAM for 1TB of storage space because ZFS loves RAM. That suggestion doesn’t scale very well due to the size of hard disk drive storage outpacing the size of sticks of RAM, so I’m not sure how much longer that suggestion will be relevant or attainable. In last year’s EconoNAS I suggested 4GB of total RAM, so in this year’s build I decided to go ahead and bump that up to 8GB. It wound up costing a few extra dollars, but it was a decent value to double the amount of available memory.
Some of you might ask: “Why not ECC RAM?” That is a subject that I’ve already covered in another blog previously. I’ll summarize my thoughts here–I do feel that ECC is the better choice. However, because ECC memory and the hardware to support it (especially in the Mini-ITX form factor) are considerably more expensive, I am willing to take the risk using Non-ECC RAM. Based off of research and experience, I believe that this risk is remote enough to feel comfortable with Non-ECC RAM.
Running Total: $166.23
Case
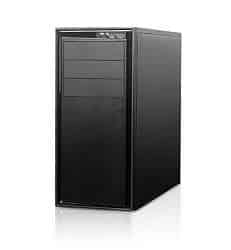 The case is one of two items which persists from the 2103 EconoNAS build. I built my primary computer using this same case 18 months ago, and the price and quality of the case really seem to be the best bang for your buck. The NZXT Technologies Source 210 is a mid-tower case with room for up to 11 different 3.5” drives internally (8x3.5” drive bays and 3x5.25” drive bays). I would have preferred a smaller, more compact Mini-ITX case, but they generally don’t have room for many drives and carry a much heftier price-tag. The few Mini-ITX cases I found which can accommodate numerous drives tend to be 3 to 4 times as expensive as the NZXT Source 210. The case does not include a power supply, so I picked out a Rosewill RV350-2 Silver power supply as well.
Altogether, the basic components total for about $20 more than the components priced in the 2013 EconoNAS build. However, I think the extra 4GB of RAM upgrade is well worth that added bonus. Furthermore, the power-sipping features of the Mini-ITX motherboard and power supply will wind up bringing the total cost of ownership down beneath last year’s EconoNAS over the lifetime of the device.
Running Total: $229.08
Storage
FreeNAS Flash Drive
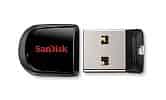 There’s not much to be said about this device. I’ve been recommending the same USB drive for each of my builds and at around $7 it seems like a pretty decent deal. The SanDisk Cruzer Fit 8GB has more than enough storage to house FreeNAS, plus it’s slim enough to be permanently mounted on either the front or rear-facing USB ports on the computer without drawing any attention to itself or getting in the way.
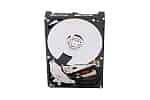
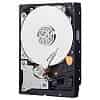
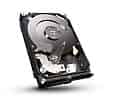
NAS Hard Disk Drives
Each time I write one of these blogs, I marvel a bit at how little hard drive prices have fallen since last year’s blog. The sheer size of drives is probably a big reason why the prices haven’t fallen all that much. When I wrote the 2013 EconoNAS blog, the pricing for a 2TB HDD was $85 to $90. Today? Not much cheaper at all, maybe by $5 to 10$. Considering that HDDs are going to account for the majority of your purchase price, especially on budget-centric builds, it’s not surprising to anticipate that this year’s price would be in the neighborhood of last years price. In last year’s build, I wound up pricing out two different sets of HDDs, which I’ve also done again this year. I’ve also decided to reduce the number of drives from six down to four total, since the motherboard lacks enough SATA ports for more. For the lowest price, I picked out 2TB HDDs for this particular build. But for people who want a bit more storage, I’ve also including pricing for 3TB drives.
I operate under the assumption that all HDDs will fail, many of them much sooner than you anticipate. When selecting drives, I simply tend to pick the cheapest drives that I can find unless there’s some really terrible reviews or articles on the drive. Because I’m wary of bad batches of HDDs, I tend to pick two different models, that way you can configure an array to survive two simultaneous drive failures. This might be a bit paranoid on my part, but I think it’s a healthy dose of paranoia.
2TB:
3TB:
| 2014 EconoNAS HDDs | ||||
|---|---|---|---|---|
| Drive |  |
 |
 |
 |
| NAS Size | ||||
| Quantity | ||||
| Price Per HDD | ||||
| Subtotal | ||||
Update (01/22/2015): Just this month the online backup company, Backblaze, updated their study of the 40,000+ HDDs across their infrastructure. After reading over this I was dismayed to find out that the Seagate ST3000DM001 I recommended in the 12TB configuration is a complete stinker. And by complete stinker, I mean failure rates in the range of 40.8% to 45.4%. And even more disappointing is the fact that there is a higher failure rate across all models of 3TB hard drives. Despite this blog being a little out of date, I wanted to make sure and update to warn people against using 3TB drives. My suggestion to add storage to this NAS would be to either buy more 2TB drives or consider 4TB drives like I did in the latest DIY NAS: 2015 Edition.
Alternatively, you could go with the 12TB configuration from above by putting four 3TB HDDs into the box. Paying for that additional 4TB would wind up costing an additional $63. Personally, I think this is a worthy option. The 12TB flavor of last year’s EconoNAS blog wound up in the neighborhood of $750. Building a 12TB NAS is a much better deal this year than it was in 2013. There’s a reason for this—in last year’s blog I reached 12TB by doing six 2TB drives. In this year’s blog, I achieved it by selecting four 3TB drives. The additional drives in last year’s blog added a bit of extra money not reflected above. However, those additional drives also gave you more options for your ZFS configuration and could be configured to be even more fault tolerant. Nevertheless, it was nice to see some considerable savings across two roughly equivalent NAS configurations; this year’s 12TB configuration wound up being over $100 cheaper than what it cost in 2013.
Final Price: $571.84
Assembly and Burn-In
As always seems to be the case, I wound up a few minor components short. The motherboard only came with 2 SATA Cables, and the power supply only had two SATA-style power connectors on it. I was forced to make a run to my local computer store and pick up those couple incidental supplies. Keep this in mind when building your NAS; most motherboards and power supplies aren’t going to have enough to accommodate the number of hard drives you’re putting into your NAS, so it’s worthwhile to have some extra cables and adapters lying around when you go to put it together.
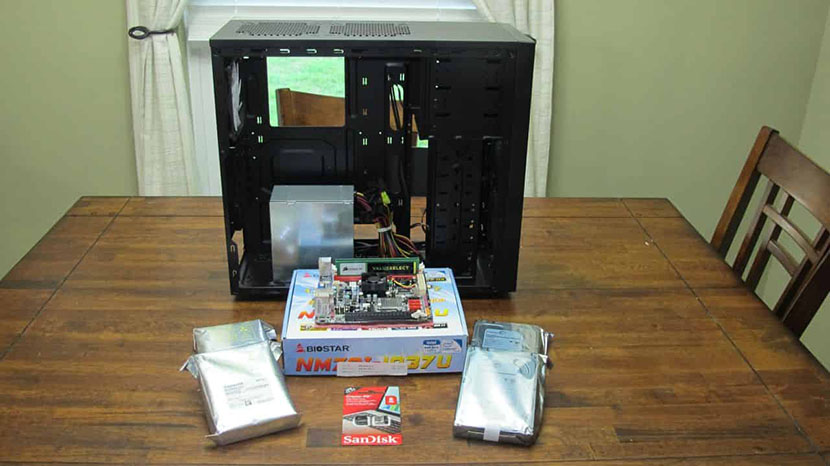
Assembly was a piece of cake and it was a bit comical. Putting the tiny mini-ITX motherboard into the ATX Mid-tower case made the inside of the case feel like a vacant warehouse. The case probably takes up more room inside of the case than the motherboard does. The comparably priced Mini-ITX cases usually only had room for 1-2 HDDs, so to buy a case that would hold 4 (or more) drives would have cost quite a bit more than the NZXT Source 210 and wouldn’t have the room for future expansion. Right now the case has room for at least 7 more drives (4x3.5” bays and 3x5.25” bays) available. I would’ve really liked a smaller footprint, I just wasn’t really willing to pay the premium for it. I used a couple zip strips to do a tiny bit of cable management, mostly because I was worried about things jostling loose whilst in transit to the lucky winner.
Immediately after assembling the new machine, I used the SanDisk Cruzer Fit 8GB and installed UltimateBootCD on it and booted off of the USB drive to test the RAM for defects with MemTest86+. I started running this on Wednesday night and let it run through 3+ passes. I was pleased to see that 0 errors were captured by MemTest86+ during those passes. Once I had some confidence in the RAM, I used one of the CPU burn-in utilities on the UltimateBootCD and let that run overnight. The next morning, it was still humming along with no errors reported at all. For the upcoming weekend, I was ready to do the installation, configuration, and some real-world use of FreeNAS.


FreeNAS Configuration
After the burn-in period was complete, I went ahead and got FreeNAS loaded up on the 8GB Flash Drive and booted up. FreeNAS obtained a DHCP address immediately and was ready to go. I logged into the web interface and started getting things set up. I wound up putting the four drives into a RAID-Z2 volume, created a single dataset on that volume and then set up a CIFS share so that Windows computers could see it. The steps I followed for setting up the CIFS shares came from the documentation on CIFS from the FreeNAS WIKI. Here’s a bit of a step-by-step of how I accomplished this configuration:
- Set up the initial Root Password
- Created a RAID-Z2 Volume named volume1 comprised of all four drives
- Set up a weekly ZFS scrub of volume1 to run on Sunday mornings
- Added a dataset named storage to the /mnt/volume1 Volume
- Created a user named ‘brian’ and set the password to match my desktop machine.
- Created a group named ‘StorageUsers’ and added the account above to the group.
- Changed permissions on /mnt/volume1 and made sure the StorageUsers group had Read/Write/Execute
- Enabled the CIFS service.
- Created a Windows share named storage, mapped it to /mnt/volume1/storage and made sure the Browsable to Network Clients box was checked.
After all of this, the net result of the configuration is a NAS device with 8TB of total space, roughly 4TB of which is usable. The volume is configured in such a way that it could survive the failure of two hard drives at the same time. I created a 20.0 GB test file to copy to/from the EconoNAS and used it to grab some screenshots of the throughput and system activity.


Conclusion
What I typically do after arriving at a final price is I go out immediately and look at similarly priced NAS machines to see how competitive I am with those devices. A search of Amazon on 8TB NAS and shows that the off-the-shelf devices start a bit lower than our price point. But none of those devices have many of the features or capabilities of FreeNAS. In fact, many of the cheaper off-the-shelf NAS devices don’t feature any kind of redundancy and fewer drives, which means more of your data is in jeopardy and is only a failed drive away from a disastrous loss. As the off-the-shelf systems add some of the functionality available from FreeNAS, their price rapidly climbs and exceeds what I’ve managed to build here. Plus you have to take into consideration the numerous other purposes that a computer (as opposed to an off-the-shelf NAS) can be put to. The FreeNAS Plug-in library allows you to extend the features of FreeNAS’ features beyond what would be typically expected from a NAS.
Personally, I’m a tiny bit disappointed that I wasn’t able to beat the price of the 2013 EconoNAS build ($505), and I also wish it didn’t have two fewer SATA ports. However, in this build the total storage has increased by 25%, RAM has increased by 100%, and it’s now using a low-power Mini-ITX motherboard. Those $50 wind up buying you quite a lot, much more than you’d be able to purchase separately.
As always, when working on a budget and building a system with the bottom line in mind, corners get cut. However, the end result is that the features and hardware of the 2014 EconoNAS (thanks to FreeNAS) wind up far exceeding what you can get in an off-the-shelf NAS from your nearby big-box retailer or even online from your favorite websites. All in all, I’m very pleased with the results. If you’re a home user looking for an inexpensive way to build a powerful NAS, than I definitely encourage you to look at FreeNAS and encourage you to use this hardware, especially the price, as a reference in designing your own NAS.
Giveaway
After spending a good chunk of Saturday crawling through social media. I’m excited to say that we’ve got a winner for the give-a-way of the 2014 EconoNAS. The lucky winner is: Shaun Bender!!! I’ll be boxing up the 2014 EconoNAS this week and get it shipped to Shaun. Hopefully, Shaun will take some “action” shots of the EconoNAS in action and tell us a little bit about what his plans are. Whatever information Shaun shares back with us, I’ll update this blog with it!
Updates
09/05/14: It’s been almost three months since this blog was published, so I thought I’d come in and update the prices on the parts. I was disappointed to find out that the total price had risen by about $20-25 from the last update! The RAM ($20) wound up being the biggest riser in price, followed by the motherboard ($5). The 2TB hard drive prices remained pretty steady, which isn’t all that surprising. However, if you were interested in the 3TB drives the two that I quoted both changed pretty dramatically, one increased by nearly $25 per drive and the other fell by about $8. At those prices, I’d ditch the Western Digital WD 3 TB WDBH2D0030HNC-NRSN for a more reasonably priced drive. Since my first NAS Build blogs, I think this is the first time that I’ve seen the prices rise dramatically.
1/22/15: Updated the HDDs section to put in warnings about the higher failure rate of 3TB drives, especially the craptastic ST3000DM001.