Right around thirteen years ago, I started picking out parts for my very first DIY NAS and wrote a blog about it. To my surprise, that quickly became my most popular blog topic! Then, as time passed by, readers began asking me: “If you were building a DIY NAS today, would you still pick the same parts?” And an honest answer to that question was usually “No!” Better parts were available at better prices.
Just about every year since, I’ve been sharing different DIY NAS builds. And with each new build, I strive to build a DIY NAS that meets the following criteria:
- 6 drive bays
- Small form factor
- Integrated, passively cooled CPU
- An emphasis on reasonable power consumption
- Capable-enough hardware for hosting virtual machines and/or containers
- Doesn’t obliterate the bank account
In the end, what I wanted to do was to create a compact server that could quietly sit in my office while meeting my storage and modest homelab-related needs. In a perfect world, this could be done without demolishing my bank account.
- DIY NAS: 2024 Edition and the 2024 EconoNAS
- One 3D-printed NAS wasn’t enough, so I printed two more!
- DIY NAS: 2023 Edition
- Printing and Assembling the MK735, a 3D-Printed DIY NAS Case
Motherboard and CPU
When planning a new DIY NAS build, picking out a motherboard is usually the most critical component. Nearly all of my criteria for an awesome DIY NAS build come down to the capabilities of the motherboard. Generally speaking, this has been a big challenge. When I started building DIY NAS machines, there were lots of motherboards with enough SATA ports to meet my needs, but the small form factor ones were expensive. Today, the small form factor motherboards are still expensive, but they rarely have SATA ports any longer!
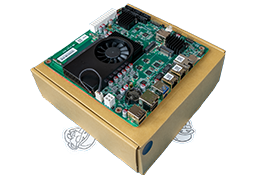 Thankfully, two years ago I became aware of a company that made an interesting NAS motherboard, Topton PC, that was being sold on AliExpress. I don’t normally like shopping on AliExpress, but I took a chance and wound up being really happy with using that motherboard in the DIY NAS: 2023 Edition. Topton continues releasing really interesting motherboards that work great in a DIY NAS, so I keep using them. In fact, I even sell some on my eBay store for people like me who’d rather buy from someone more local.
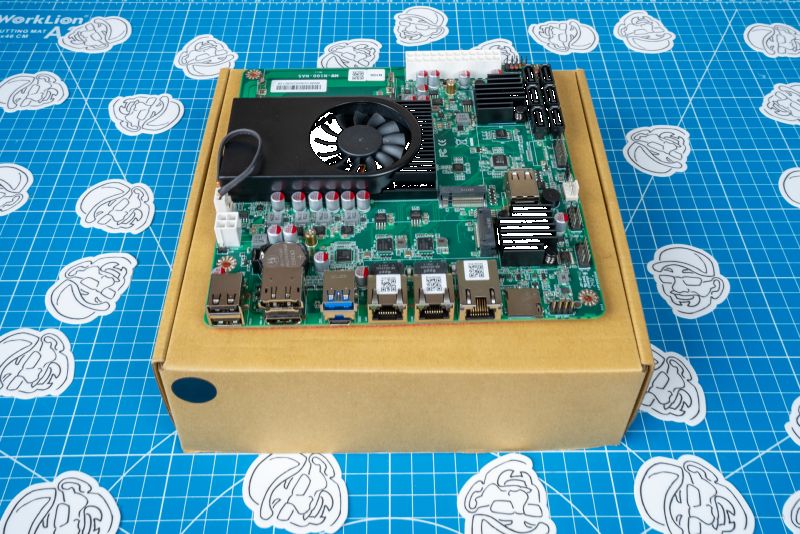
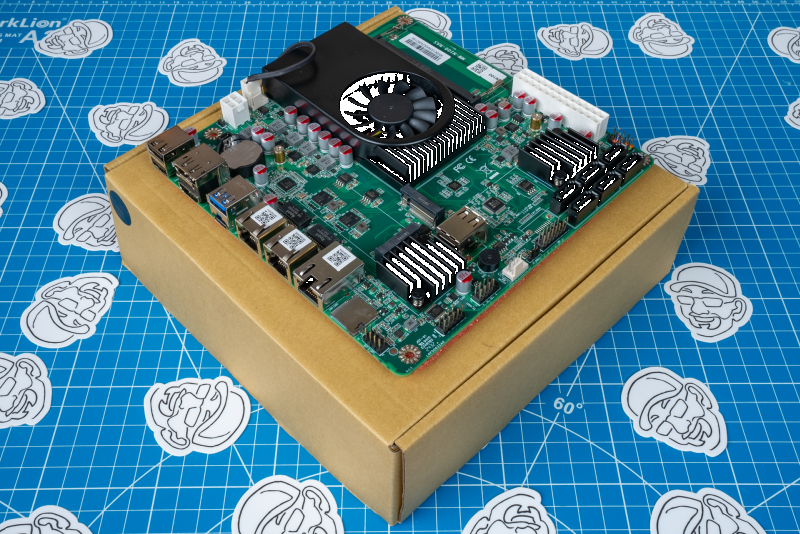
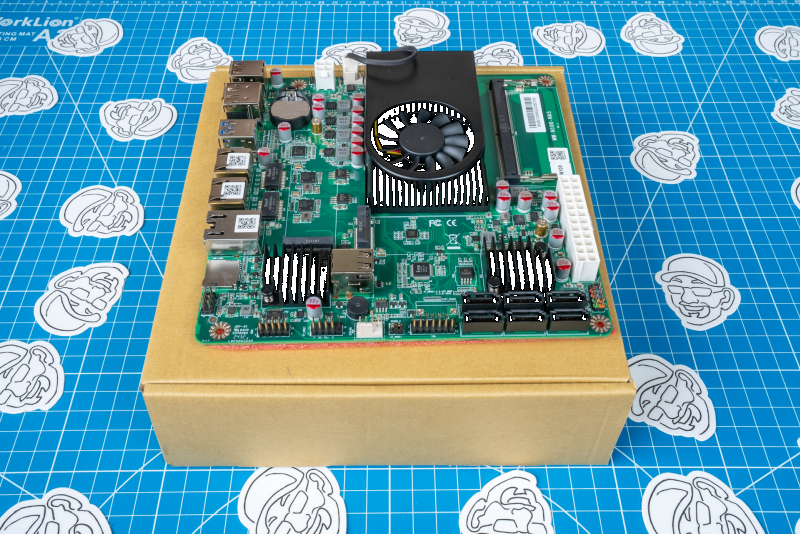
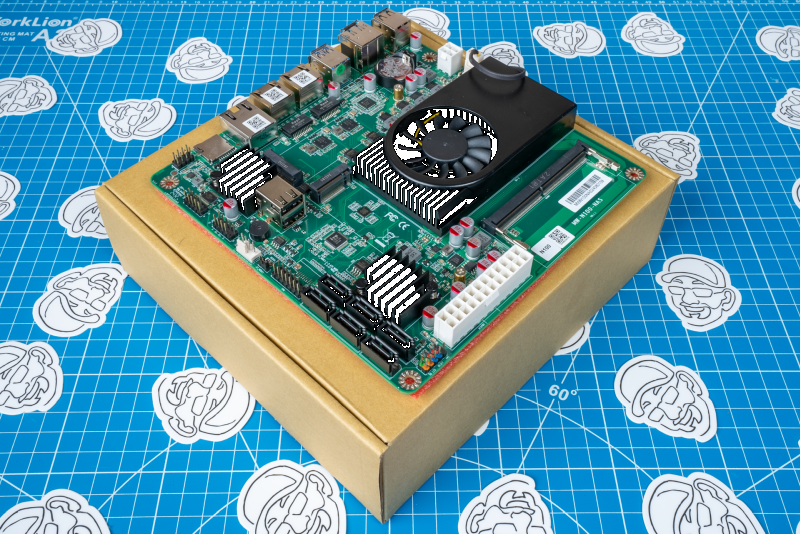
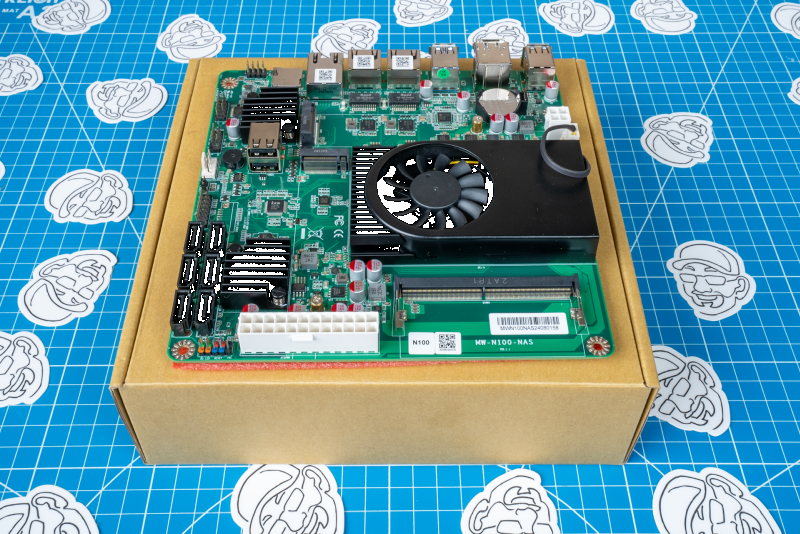
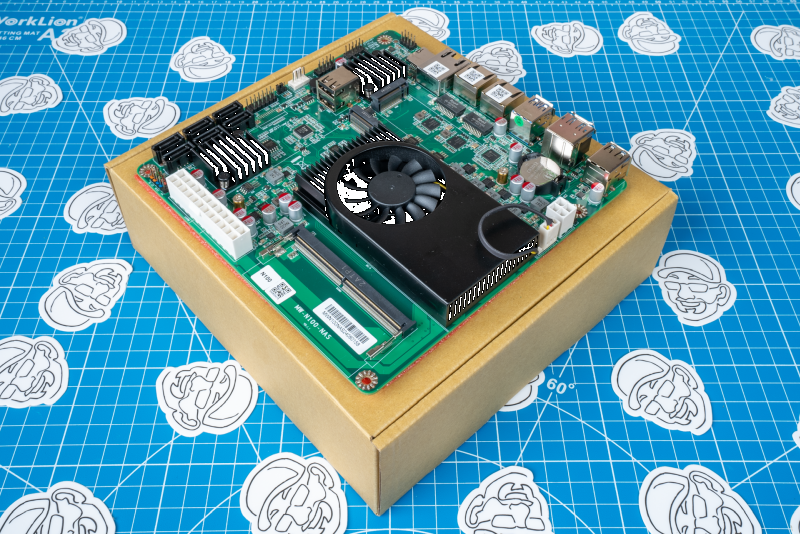
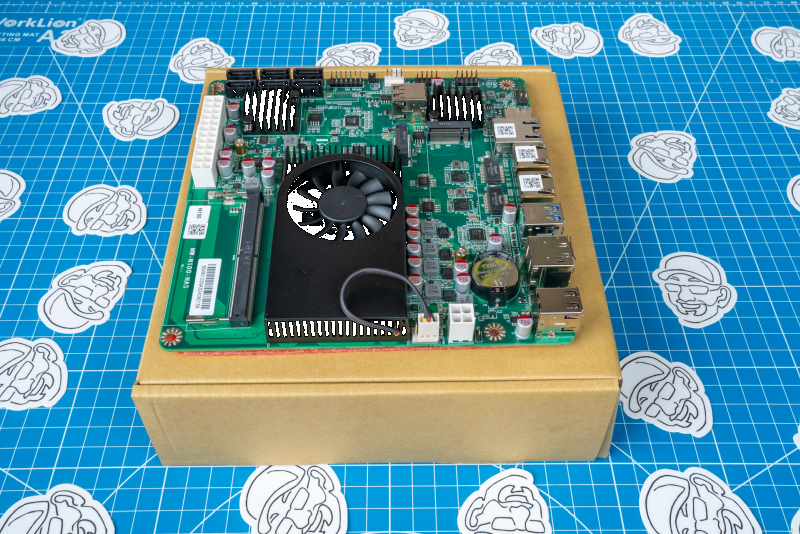
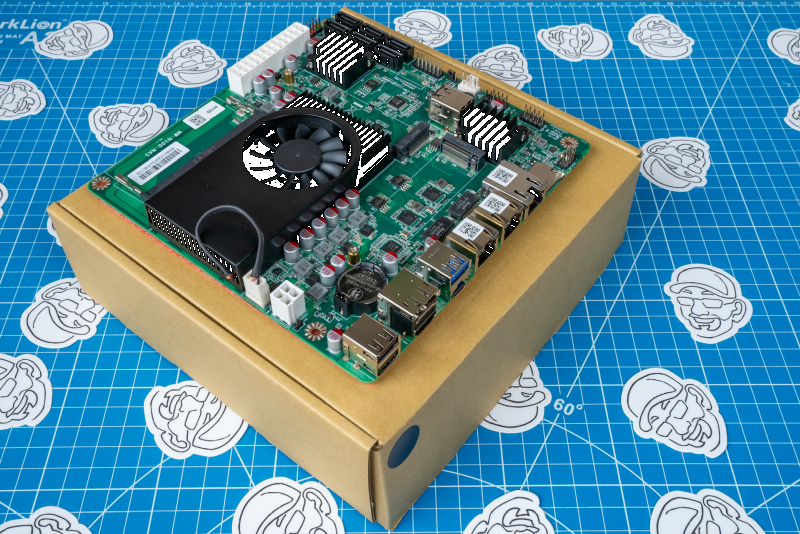
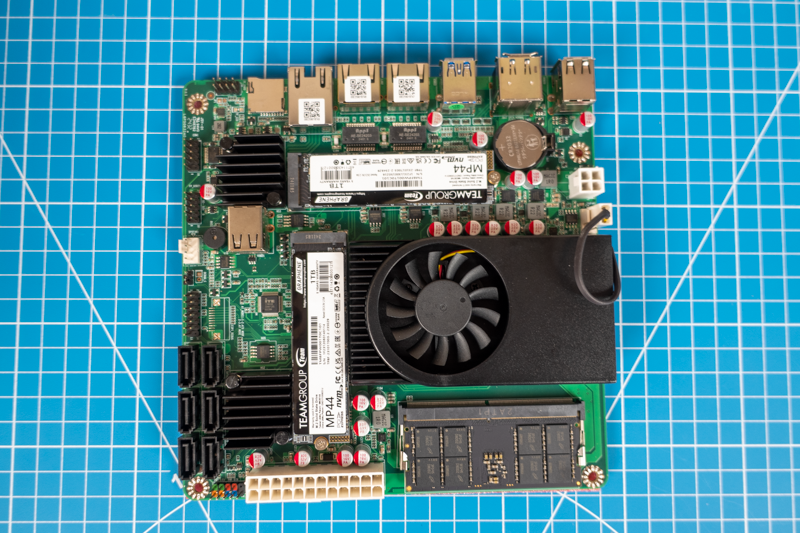
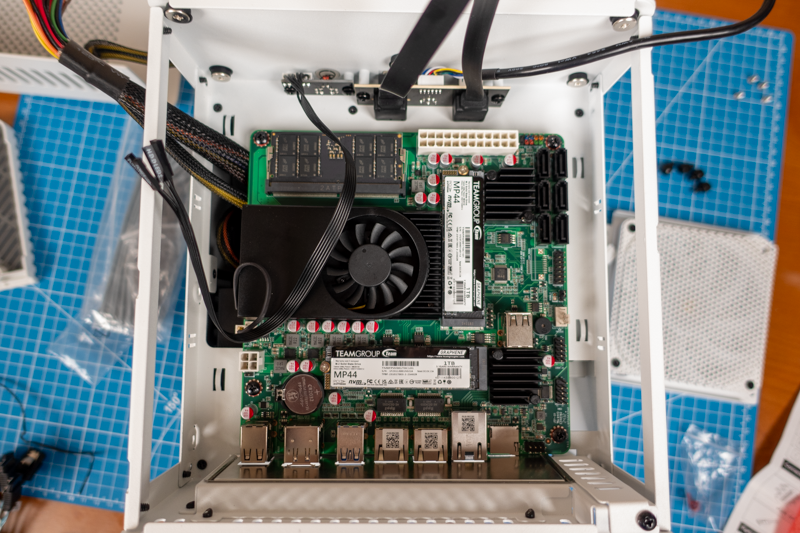
This year, Topton released what I think looks to be my favorite DIY NAS motherboard of all time, the Topton N18. When I first found out about the Topton N18 motherboard, I knew right away that I was going to use it in my next DIY NAS build and that I was going to stock it in my eBay store as well. Here are the features that make it perfect for my ideal DIY NAS:
- Mini-ITX Form Factor
- Intel® Processor N100
- 4 cores / 4 threads / Max Turbo 3.4GHz
- 6 W TDP
- Integrated GPU with Intel Quick Sync Video
- 1 x DDR5 SO-DIMM
- 6 x SATA 3.0 Ports
- 2 x M.2 NVMe Slots (PCIe 3.0 x1)
- 1 x 10Gbps NIC (Marvell AQC113C)
- 2 x 2.5Gbps NICs (Intel i226-V)
- Cost: $229.99 (Get an additional $10 off with
TACO-TARIFFcoupon!)
Update: 4/1/2025: This is NOT an April Fool’s Day Joke. The Topton N18 motherboard now includes additional CPU options! Options that I recently listed on my eBay store. Currently, I’m stocking the following options: N100, N150, and i3-N305.
Even though I think this motherboard is perfect for a DIY NAS, the are still a couple things about it that were disappointing. For starters, the single DDR5 SO-DIMM slot is disappointing, especially given that DDR5 SO-DIMMs currently max out at 48GB. The integrated CPU also isn’t passively cooled, having its own integrated fan. But all of the motherboard’s other features–especially the onboard 10Gb network adapter–more than made up for these minor disappointments.
Case
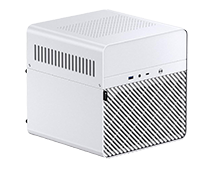 I wound up landing on small form factor DIY NAS builds because I had a small “office” thirteen years ago. I still really appreciate the value of a small form factor case, but this is one criteria that’s definitely less critical for me. In fact, I recently migrated my NAS into the largest case I’ve ever put my NAS in. But I still strive for Mini-ITX builds. The bad news for DIY NAS builders is that fewer and fewer cases are being made to hold numerous hard drives. In fact, I bet if you took an inventory today, there’s probably more Mini-ITX cases with room for ZERO hard drives by a wide margin.
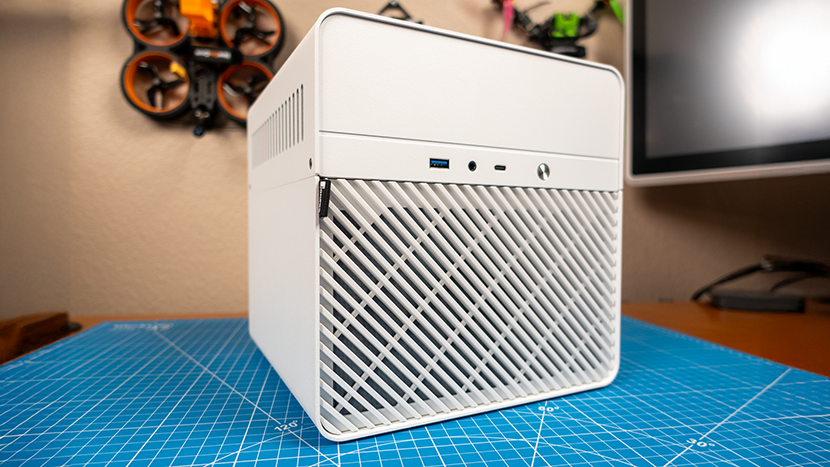
If you review my DIY NAS builds, I think you’ll find that it’s not uncommon to see multiple builds wind up in the same case. Sometimes that’s because I really like that case, but other times its becase there just aren’t that many cases for us to choose from. Thankfully, JONSBO came along and has released quite a few (at least 5) different small form factor cases which are fantastic for DIY NAS builders.
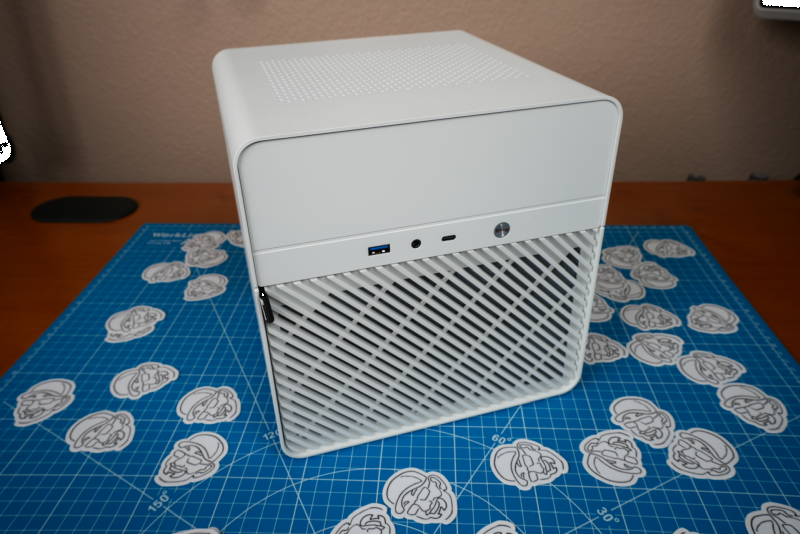
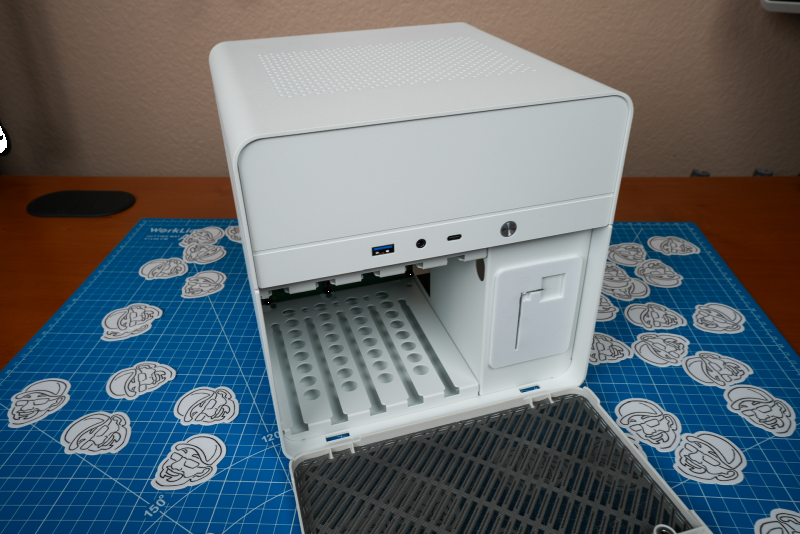
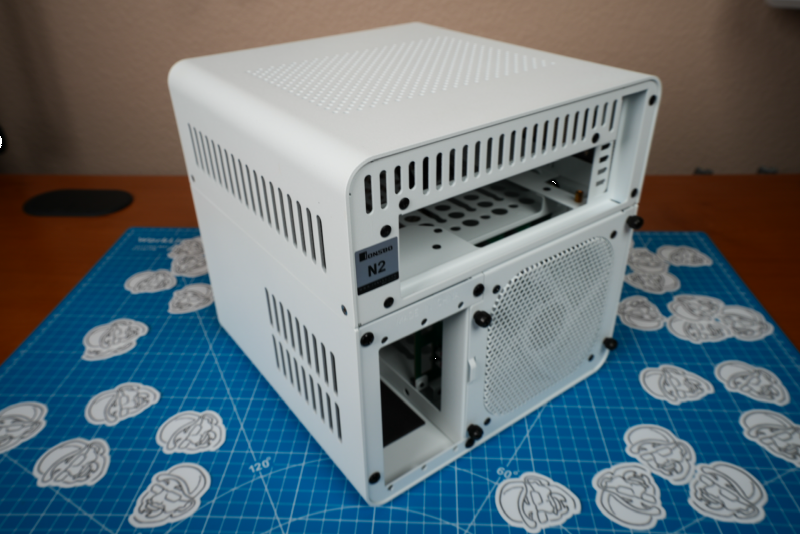
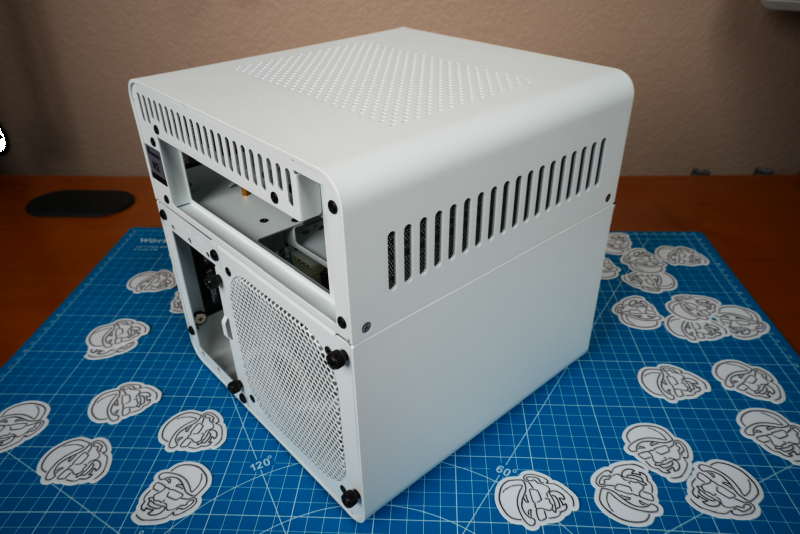
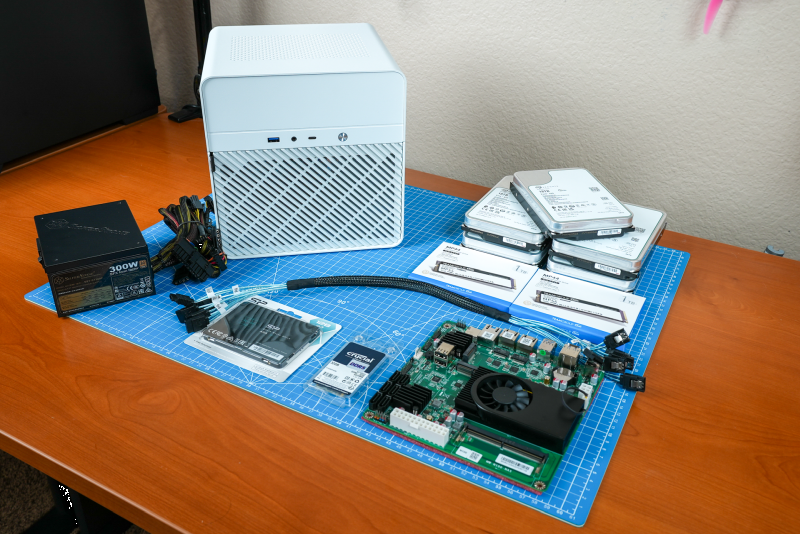
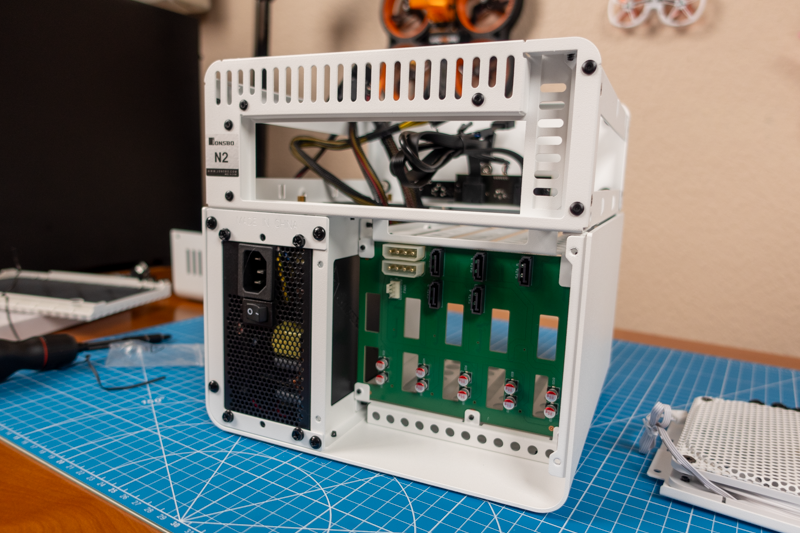
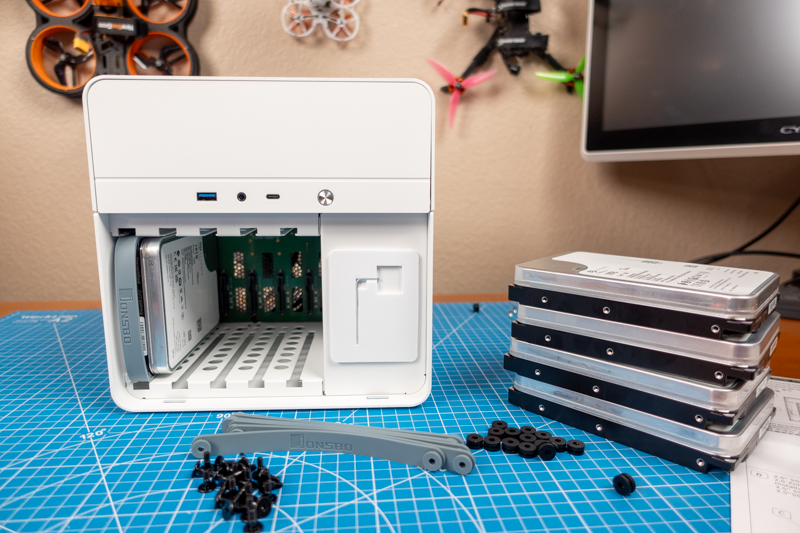
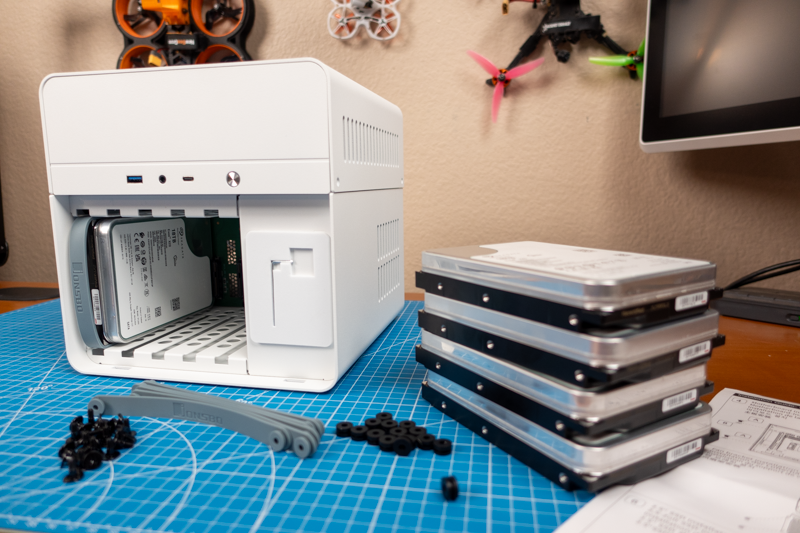
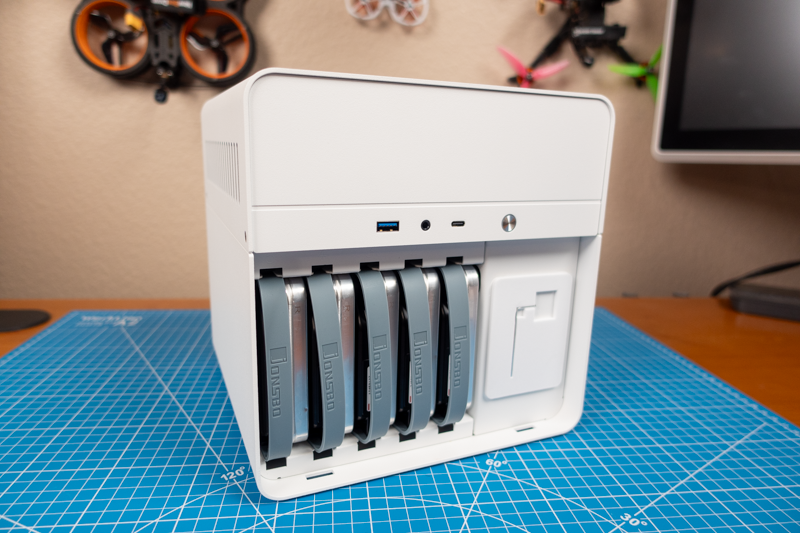
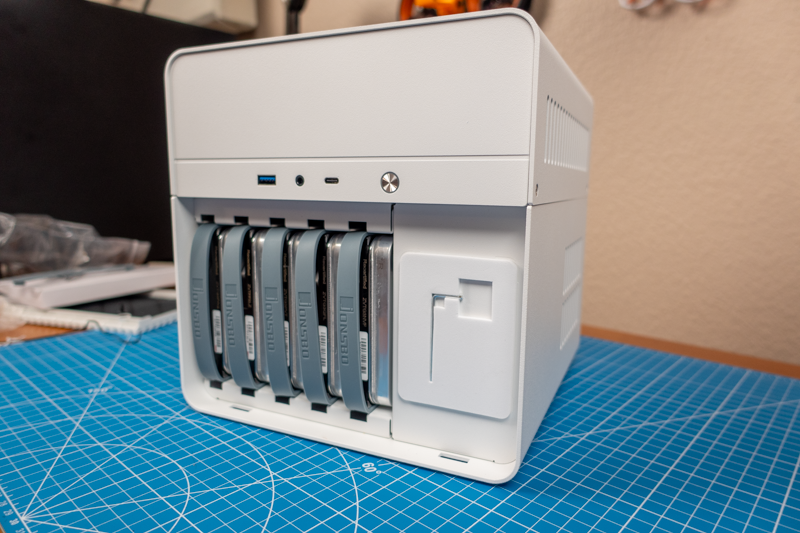
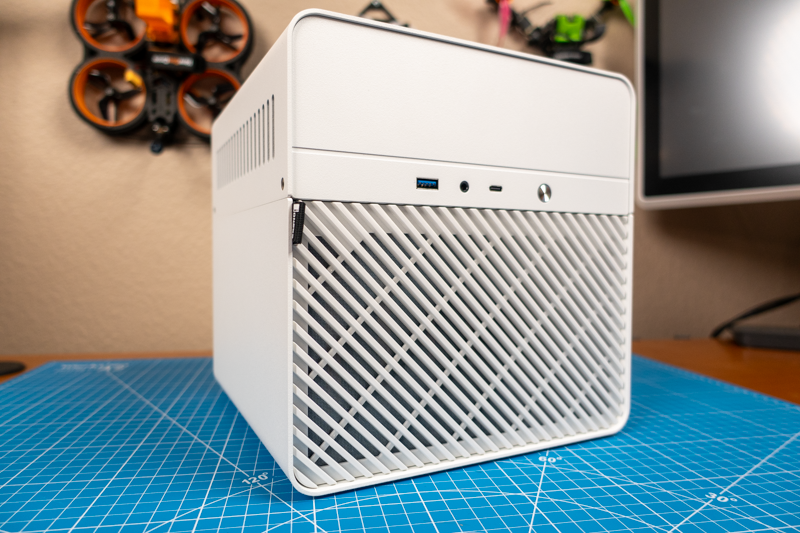
I picked the JONSBO N2 case for the DIY NAS: 2025 Edition. It has fewer hard drive bays than I would prefer, but given that the Topton N18 only has six SATA 3.0 ports on it, the 5 drive bays of the JONSBO N2 seemed to be a good match. Plus, only having 5 drive bays saves some space, and the JONSBO N2 winds up being quite compact with its dimensions measuring at 222.5mm x 222.5 x by 224 mm.
RAM
In looking at motherboards (or MiniPCs) that feature the Intel Processor N100, they all seem to have the same limitation: a single SO-DIMM slot. As I mentioned earlier, this is a bit of a bummer. I chose to put 64GB of DDR4 RAM in the DIY NAS: 2024 Edition, and I would’ve liked to meet or exceeded that in the DIY NAS: 2025 Edition, but I couldn’t.
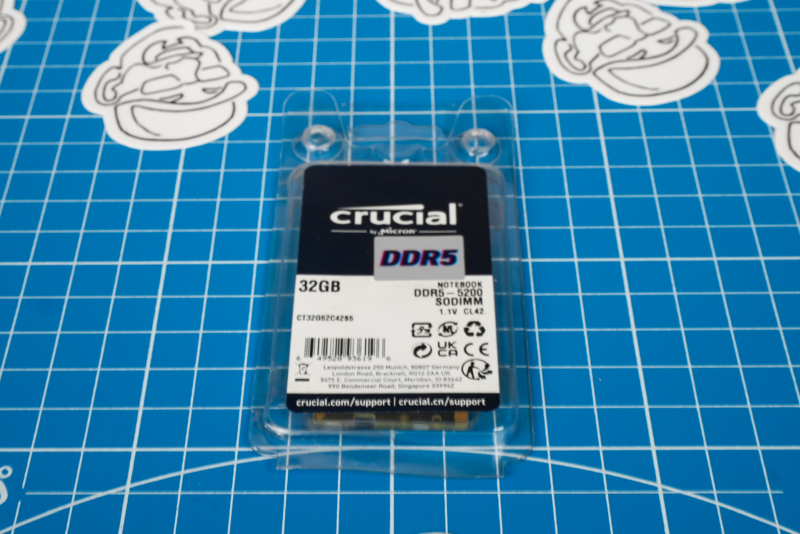
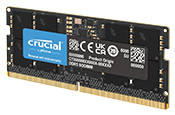 I chose a 32GB DDR5 5200MHz SO-DIMM by Crucial for this year’s DIY NAS. Currently, a 48GB stick is the largest DDR5 SODIMM out there, but 32GB is definitely adequate for a DIY NAS, and as DDR5 RAM becomes more prevalent, I expect to see 64GB SO-DIMMs hit the market and be a good upgrade further down the road.
As I’m writing this, I see that an equivalent 48GB DDR5 SO-DIMM from Crucial is only $20 more. The price on this has really declined since I purchased the hardware for the DIY NAS: 2025 Edition! After building and using this year’s NAS, I’m quite content with 32GB of RAM, but I wanted to point out that this 48GB SO-DIMM seems to have a better value proposition, assuming your budget can absorb its slightly higher cost.
Storage
The most expensive and critical components of a DIY NAS are its storage devices, particularly the storage devices where you keep your data. In recent years, I decided not to buy hard drives for my DIY NAS builds. When building a DIY NAS, you really need to understand your data usage, accumulation of data, and then choose your drives for yourself.
To keep things interesting, I like to do something unique with each DIY NAS, and to make this year’s NAS unique, I decided to pick out some drives. I wanted to max out all of the Topton N18’s storage devices, so I bought a SATA SSD to act as the boot device, two NVMe SSDs for fast storage of things like virtual machines or containers, and five hard disk drives for the bulk of the storage.
Boot Drive
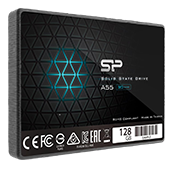 As a longtime TrueNAS user, the single component that I see DIY NAS builders overthink most frequently is the drive that TrueNAS is going to be installed on. The TrueNAS hardware requirements list a 16GB solid state drive (SSD) as what’s suggested. Don’t overthink the boot drive–it’s practically disposable for TrueNAS. The only thing that is important on the boot drive is your TrueNAS configuration database. If you regularly back up your TrueNAS configuration database, you can replace a failed boot drive in minutes by reinstalling TrueNAS on the boot disk, importing your pool(s), and restoring your configuration database backup.
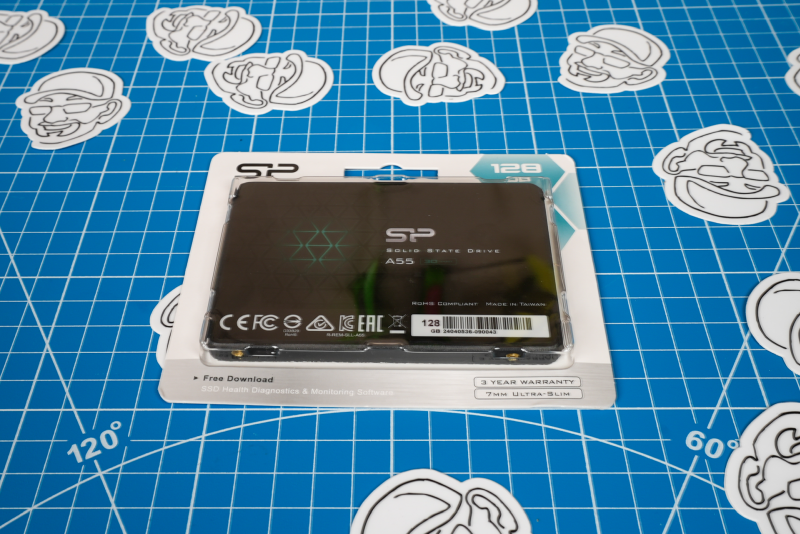
I’ve used the Silicon Power A55 128GB SSD in a prior DIY NAS build and was happy with it, so I picked it out for the DIY NAS: 2025 Edition, too. It is a no-frills SATA SSD that gets the job done for under $20.
Normally, I like to buy two boot drives and create a mirror to maximize uptime. This practice started years ago when you still could run FreeNAS from a USB drive and those USB drives were prone to failure. Since moving my TrueNAS to SSDs, I’ve not had a boot drive fail. The reliability of SSDs plus my desire to increase the storage capacity of this year’s DIY NAS resulted in me forgoing a second boot device.
App and Virtual Machine NVMe SSDs
 Over the years, the cost and capcity of flash storage devices have reached tempting levels. A quality 4TB SATA SSD has fallen below the price that I paid not too long ago for 4TB HDDs.
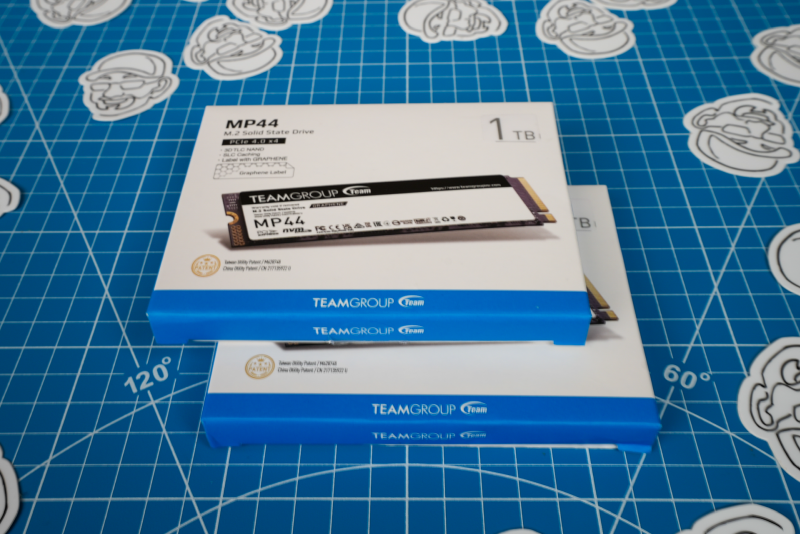
Similarly, a large subset of DIY NAS builders have an appetite for speedy storage to do things with their NAS like editing video, streaming media, or self-hosting other services. As a result, I wanted to put a pair of NVMe SSDs in this year’s DIY NAS to handle those tasks. To do this job, I picked out a pair of Teamgroup MP44 1TB NVMe SSDs.
It’s important to remember that the M.2 slots on the Topton N18 motherboard are PCIe 3.0 x1 slots. Most M.2 slots are x4 slots. If you’re buying different NVMe drives for use with this motherboard, then don’t overpay for the fastest-possible NVMe drives. With regards to NAS throughput, PCIe 3.0 x1 is still quite quick at .985 GB/s, but this is a bottleneck to keep in mind.
Bulk Storage Hard Disk Drives
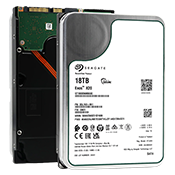 If you need lots of storage, then you will be buying hard disk drives. The price-per-terabyte on hard drives is advantageous. Especially as you buy larger and larger hard–but not the largest–hard drives. The current capacities of hard drives is a big part of the reason that I felt comfortable with “only” having five drive bays in the JONSBO N2 case.
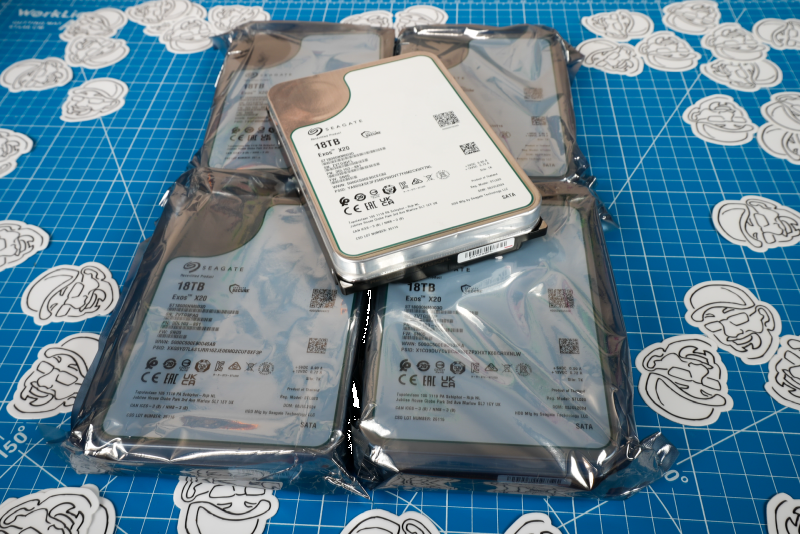
Because of their size and because you should be building redundancy into your NAS, storage is always the most expensive item when building a DIY NAS. Roughly 65% of the cost of the DIY NAS: 2025 Edition came from storage alone. And that number would’ve been a lot higher had I not been willing to gamble a bit on buying recertified Seagate Exos X20 18TB Enterprise hard drives.
In the past year, I’ve bought quite a few (more than 10?) used or recertified hard drives from ServerPartDeals.com and GoHardDrive.com. After burning in these drives, using some of them for around a year, and even experiencing the RMA process, I think they’re a good choice. Especially if you do what I’ve done–buy more drives to increase the amount of redundancy in your arrays.
SATA Cables
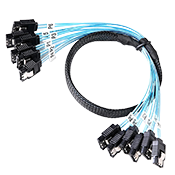 A very minor gripe that I have about the Topton motherboards, including the Topton N18, is that they are bare bones. You’ll find no SATA cables package along with these motherboards. But in all my years of DIY NAS building, I can’t think of any motherboard that came with enough SATA cables to use all of its SATA ports.
For the DIY NAS: 2025 Edition, I found that I needed two different SATA cables:
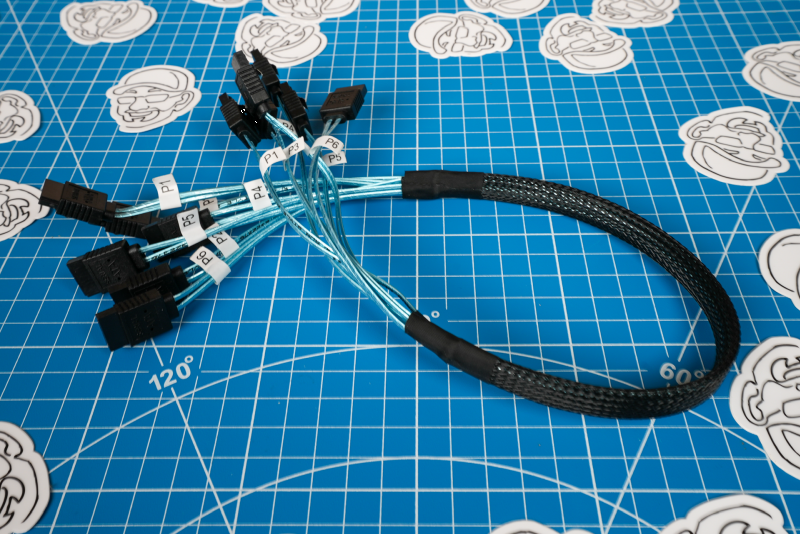
- A six-piece bundle of SATA cables long enough to reach down to the JONSBO N2’s SATA backplane.
- A single thin 8-inch SATA cable to reach the boot drive, which is mounted alongside the motherboard.
I especially like the bundle of cables even though there’s one unused cable in the bundle. I also like that these cables are thin, which makes them easier to cable manage. If you wanted to save a few dollars, this six-pack of 18-inch SATA cables, which would be a little more work to cable manage, would definitely get the job done too.
Power Supply
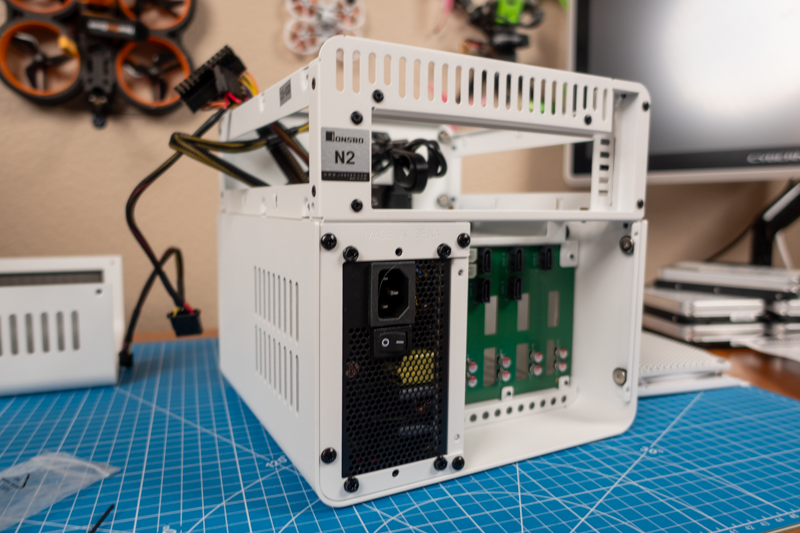
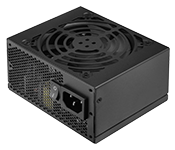 The JONSBO N2 case indicates that a SFX power supply is required and that it needs to be shorter than 150mm. Just like with small form factor cases, there’s a price premium to pay for small form factor power supplies, and if you’re interested in trying to match the system’s power consumption to a power supply’s efficiency, it might be a little challenging to find a power supply for this kind of machine, as most SFX power supplies seem to be designed with a more power-hungry gaming PC in mind.
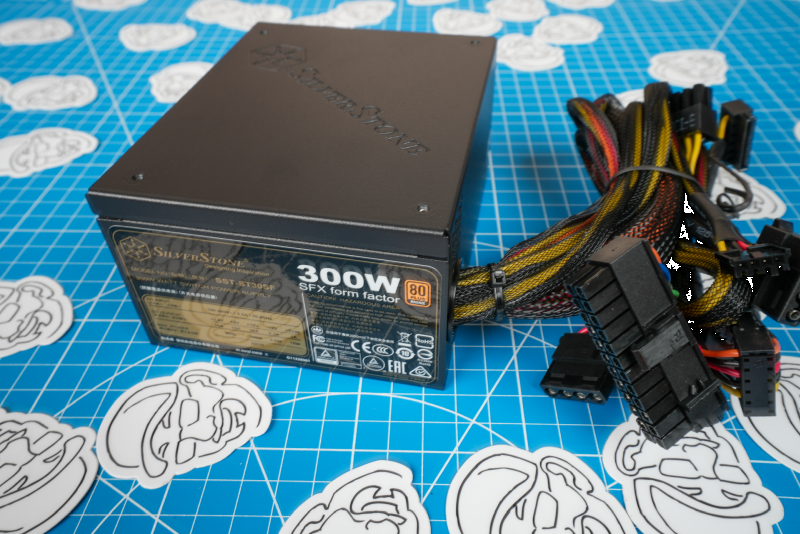
I chose the SilverStone Technology STS30SF-V2 for this year’s DIY NAS. At 300W, it should be more than capable of supplying power to this year’s DIY NAS.
If you’re building the DIY NAS: 2025 Edition, please make sure you read about the challenges posed by the SilverStone Technology STS30SF-V2 in the hardware assembly section. After reading about my experience, you may wish to choose a different power supply!
Internal USB Adapters
The front of the JONSBO N2 case has both a USB 3.0 and USB C port, but the Topton N18 motherboard has a single USB 2.0 header. Normally, I just recommend that DIY NAS builders ignore–or even remove–a case’s front panel USB ports that don’t align with what’s available on the motherboard.
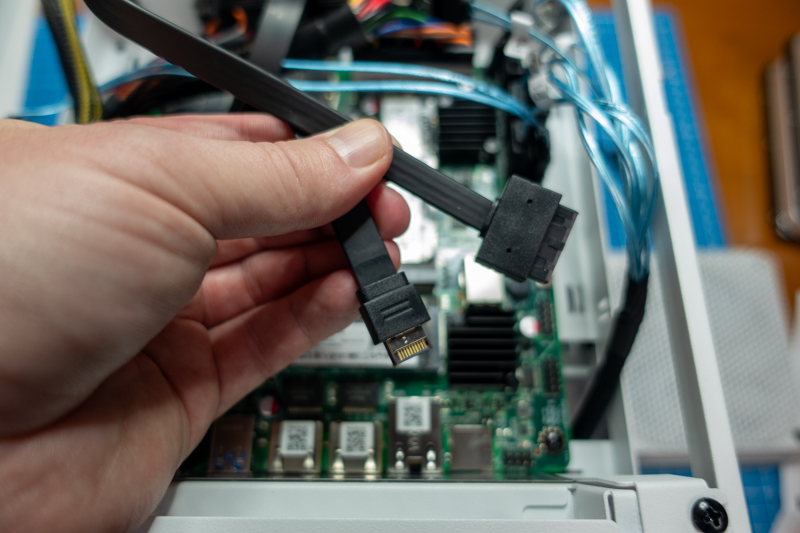
What I wound up doing is unnecessary, but because of my plans for the DIY NAS: 2025 Edition, I didn’t want the case’s USB ports to be empty or unusable. So I bought a variety of USB splitters and adapters to adapt the JONSBO N2 front panel’s USB 3.0 and USB 3.2 ports down to the USB 2.0 header available on the Topton N18 motherboard:
- Internal USB 2.0 Splitter
- USB 2.0 (9 pin) to USB 3.0 (20 pin) Adapter
- USB 2.0 (9 pin) to Type E Adapter
This is a lot of work and money to spend to make the JONSBO N2’s front panel USB connections functional. And while they are indeed functional, it’s important to point out that they’re constrained to both the speed and power that a single USB 2.0 header can provide, which isn’t very much!
While I’m glad I invested the time and money into making this happen, I don’t think that the benefits particularly justify that investment. I’m not certain I’d recommend that others make the same decision that I did.
TrueNAS SCALE
 I’ve personally been using TrueNAS SCALE since its first beta release in the middle of 2021. While I primarily use my NAS just for storage, I was curious about SCALE’s promise of converging some of the things that I was doing with other machine(s) in my house onto my NAS. But mostly, I was excited by the move from FreeBSD (used by TrueNAS CORE) to Debian Linux (used by TrueNAS SCALE). A lot of my difficulty in putting these DIY NAS builds together was finding hardware support under FreeBSD, which was quite often challenging. Since switching to TrueNAS SCALE, hardware compatibility has become less of a concern for me, and building DIY NAS machines has become much easier for all of us.
More exciting, the latest release of TrueNAS SCALE, Electric Eel, has two new features that I’m very interested in:
- RAID-Z expansion: Allows the expansion by adding a disk to an existing ZFS raidz vdevs. This feature is huge for DIY NAS builders, as it opens an option to expand the capacity of their pools that aligns better with personal use.
- Migration from Kubernetes to Docker: I personally found the Kubernetes (k3s) implementation of container management under TrueNAS SCALE to be challenging–and every time I sought my own answers, I came up empty. The unfortunate result of this was that TrueNAS SCALE users were too dependent on either the official app catalog or third-party-app catalogs.
Final Parts List
| Component | Part Name | Qty | Cost | |
|---|---|---|---|---|
| Motherboard | Topton N18 N100 NAS Motherboard | specs | 1 | $229.99 |
| CPU | Intel Processor N100 | specs | 1 | N/A |
| Memory | Crucial RAM 32GB DDR5 5200MHz SO*DIMM (CT32G52C42S5) | specs | 1 | $99.99 |
| Case | JONSBO N2 | specs | 1 | $149.98 |
| Power Supply | SilverStone 300W SFX Power Supply (ST30SF-V2) | specs | 1 | $81.88 |
| Boot Drive | Silicon Power 128GB A55 SATA SSD | specs | 1 | $15.99 |
| Storage Drives | Recertified Seagate Exos X20 18TB Enterprise HDD (ST18000NM003D) | specs | 5 | $228.88 |
| Apps/VM Drives | Teamgroup MP44 1TB NVMe SSD | specs | 2 | $69.99 |
| SATA Cables | ADCAUDX 6pc .5M SATA Cable Bundle | N/A | 1 | $13.68 |
| ADCAUDX 5pc .2M SATA Cable | N/A | 1 | $9.99 | |
| USB Adapters | Internal USB 2.0 Splitter | N/A | 1 | $9.09 |
| Internal USB 2.0 to USB 3.0 Adapter | N/A | 1 | $7.59 | |
| Internal USB 2.0 to Type E Adapter | N/A | 1 | $9.46 | |
| Price without Storage: | $627.64 | |||
| Total Price: | $1,908.02 | |||
Hardware Assembly, BIOS Configuration, and Burn-In
Hardware Assembly
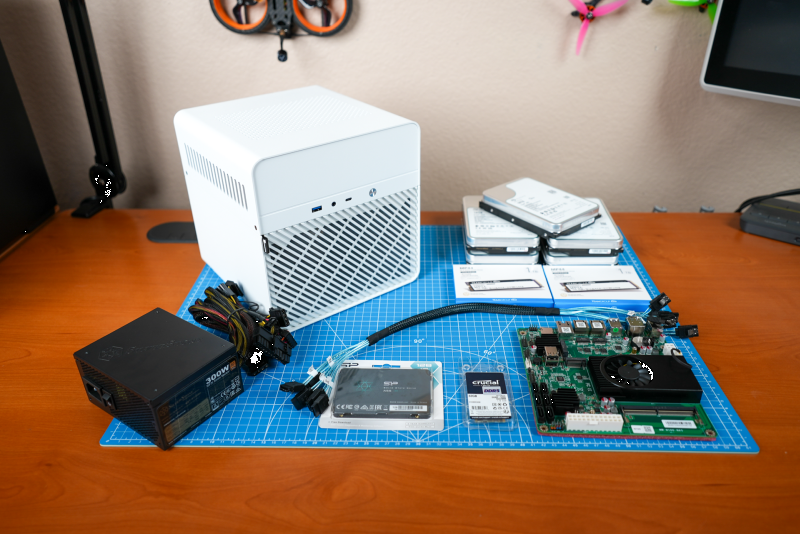
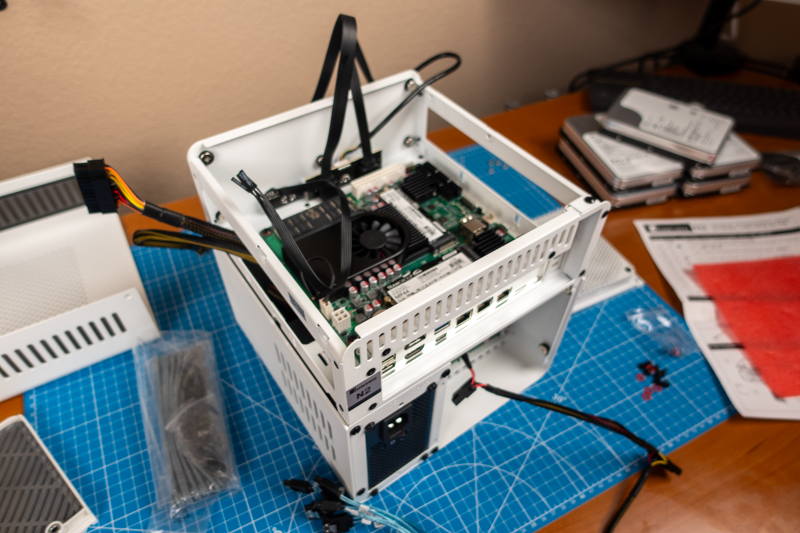
In the grand scheme of things, the assembly was fairly noneventful. Once all the parts came in, it took me a couple hours to put the DIY NAS: 2025 Edition together and photograph the entire process. The first time I pressed the power button, the machine promptly passed the power on self test (POST) and took me straight into the BIOS.
However, the combination of the Topton N18 motherboard, JONSBO N2 case, and SilverStone Technology STS30SF-V2 power supply created two different challenges that I wanted to share.
USB Front Panel
As I mentioned earlier, in order to make the JONSBO N2’s front panel USB ports “functional,” I wound up spending some money on an internal USB 2.0 hub and a pair of USB adapters to adapt the two USB ports (USB C and USB 3.0) on the JONSBO N2 down to the single USB 2.0 header available on the Topton N18.
I did it for my own reasons, but I don’t necessarily recommend it for others. I don’t think those two front-panel USB ports on the JONSBO N2 will provide enough benefit–especially at USB 2.0 speeds–to justify the cost of the additional USB hardware that I bought. But I am glad that those two front-panel USB ports on the DIY NAS: 2025 Edition are functional!
Power Supply Challenges
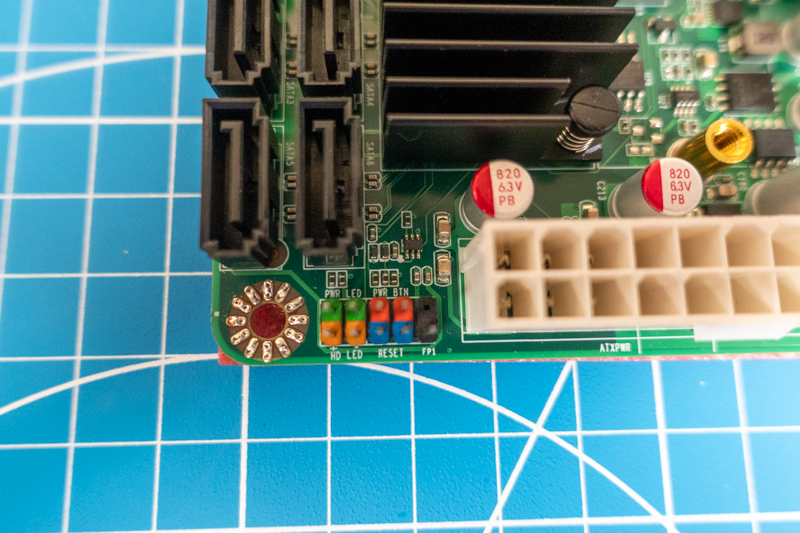
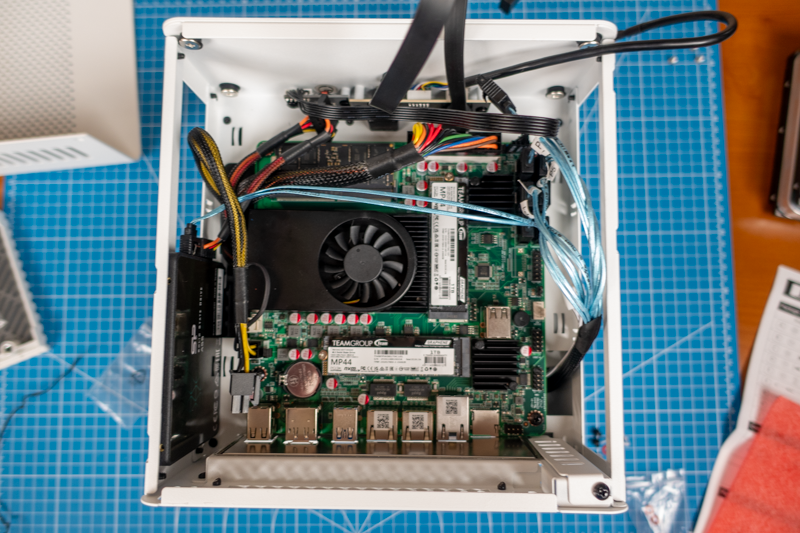
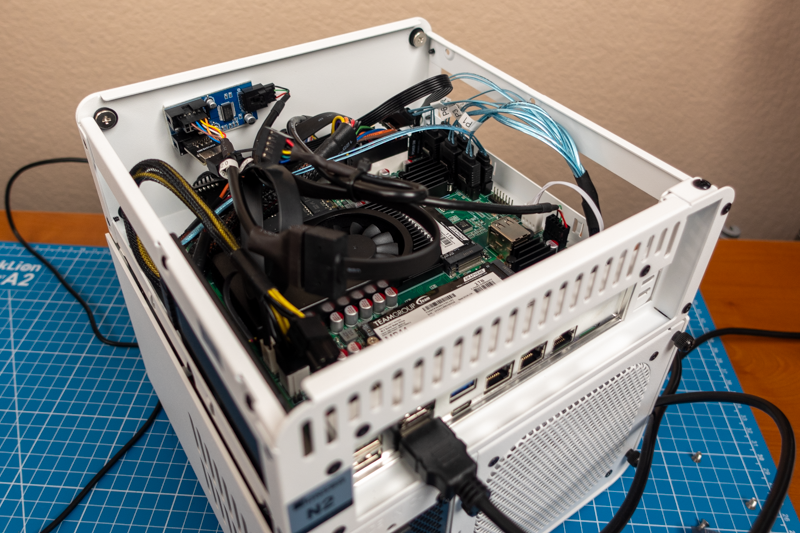
With the SilverStone Technology STS30SF-V2 oriented in its ideal position, the 24-pin ATX cable is just barely long enough to plug into the Topton N18 motherboard. It was a tight enough fit that I wound up brainstorming alternative solutions:
- Choose a different SFX power supply with a longer 24-pin ATX cable.
- Buy a 24-pin ATX extension cable.
- Rotate the power supply 180 degrees in the case to provide some extra length in the ATX cable.
Of the three solutions, the third was my favorite. Rotating the power supply would provide some extra length on the ATX cable, but it also meant that the power supply’s intake fan would be drawing its air from behind the drives rather than from the fresh air outside the case. From a cooling standpoint, this was suboptimal, as the air from behind the drives has been warmed up as it passed by the hard drives.
In the end, I was able to make the SilverStone Technology STS30SF-V2’s 24-pin ATX cable stretch far enough and position it just right so that I could snap it into the ATX power connector on the Topton N18. I even removed and reinstalled the ATX cable a couple times to see how viable it was. I’m happy enough with how it worked that I decided not to pursue any of the alternatives.
If you’re interested in building something similar to the DIY NAS: 2025 Edition, then keep what I encountered in mind. If I had to do it all over, I’d probably stick with the SilverStone Technology STS30SF-V2’s cable, but I’d be tempted to buy a different 300W SFX power supply with a slightly longer ATX cable.
BIOS Configuration
As it is with my other DIY NAS builds, my goal is to make as few changes in the BIOS as are needed. And that’s exactly what I needed to do with the DIY NAS: 2025 Edition. Other than updating the time and date, the only changes I made in the BIOS were adjusting the boot order and ensuring that the machine turns on after a power loss.
Burn-In
I like to do a little bit of burn-in testing on my DIY NAS builds. Generally speaking, I want to quickly test the hardware to make sure everything’s put together correctly and hopefully stress out any dodgy parts so that I’m not surprised later down the road.
Here’s what I wound up doing with the DIY NAS: 2025 Edition:
- Ran 10 error-free passes of Memtest86+.
- Executed Spearfoot’s Disk Burn In Script against all the recertified Seagate Exos X20 18TB Enterprise hard drives.
- After setting up new pools, I performed a series of benchmarks on the new pools locally and across my network.
If you wanted to be extra diligent, running some kind of CPU stress test like Prime95 would be a good idea too. My objective in running these tasks is to build some confidence in the server’s ability to perform its duties.
Initial TrueNAS SCALE Setup
- Enabled the following services and set them to start automatically.
- SMB
- SSH
- NFS
- Enabled password login for the
truenas_adminuser.- Note: If I were planning to use this DIY NAS long-term, I wouldn’t have done this. Using SSH keys for authentication is a better idea.
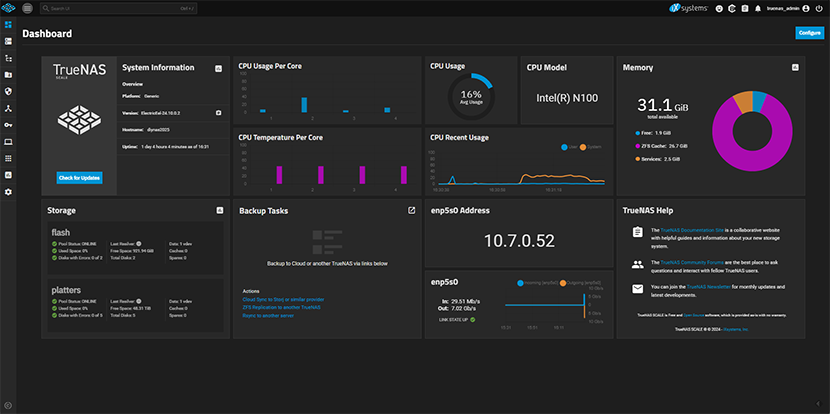
- Edited the TrueNAS Dashboard widgets to reflect the 10Gb interface (
enp5s0). - Created a pool named
flashwhich consisted of mirrored vdev using the Teamgroup MP44 1TB NVMe SSDs. - Created a pool named
platterswhich consisted of a single RAID-Z2 vdev using all five of the Seagate Exos X20 18TB HDDs. - Configured the Apps to use the
flashpool for the apps’ dataset. - Made sure that the System Dataset Pool was set to
flash. - Confirmed that there were Scrub Tasks set up for the
flashandplatterspools. - Set up S.M.A.R.T. tests for all of the drives:
- Weekly Short Test
- Monthly Long Test
Because I don’t have plans to use this NAS for the long term, the setup described above is pretty basic. If I were planning to use the DIY NAS: 2025 Edition here at home, there’s some additional setup that I’d definitely be doing:
- Set up a Let’s Encrypt certificate.
- Hook up the NAS to a compatible UPS, enable the UPS service, and configure the UPS service to shut down the NAS before the battery runs out of juice.
- Set up system email alert service..
- Create replication tasks to back up critical data to my off-site NAS.
- Add the new NAS to my Tailscale tailnet using the Tailscale app from the official catalog.
- As the NAS is seeded with data, create and maintain a suite of snapshot tasks tailored to the importance of the different data being stored on the NAS.
Benchmarks
As my focus is building a NAS server at home, I opted to narrow the focus on the benchmarks to things that align well with its purpose: data throughput and power consumption.
Throughput
For throughput testing, I like to do three tests. First, I benchmark the network throughput using iperf3. Second, I benchmark the throughput of the pool(s) locally on the NAS. And then third, I set up SMB shares on each of the pools and then benchmark the throughput when using those shares.
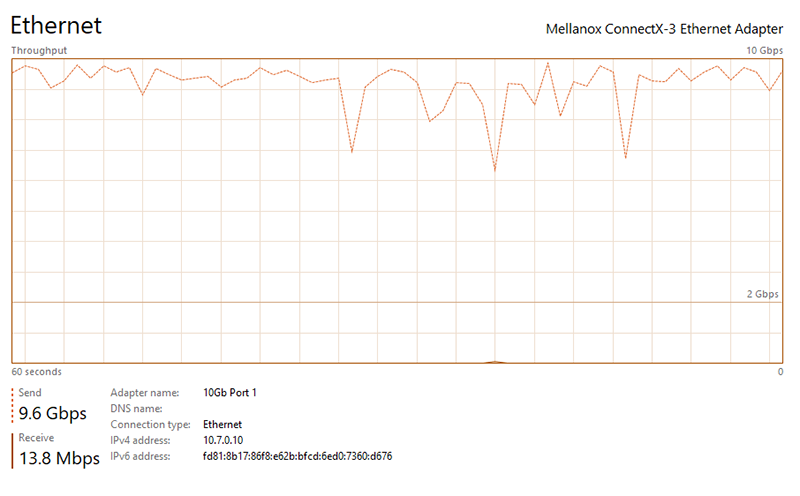
I’m wildly excited that the Topton N18 NAS motherboard has its own 10Gbps network card. At the Topton N18 motherboard’s price, this is a tremendous value. Expectedly, I was able to use iperf3 to saturate that network connnection in both directions.
Tom Lawrence from Lawrence Systems has an excellent video about benchmarking storage with FIO and shared the FIO commands from his video in their forums. These are often a reference point for me when testing ZFS pools’ throughput. However, in that same video, Tom says something very wise:
All of these benchmarks provide a lot of data, but how useful that information is to you is debatable. Your real-world use is likely to be very different than how I’ve set up these benchmarks. But I hope what the benchmarks ultimately display is that the DIY NAS: 2025 Edition is very capable of taking care of your storage needs.
| Tool | Pool | Test Size |
Random Write IOPS |
Random Read IOPS |
Sequential Write (MB/s) |
Sequential Read (MB/s) |
|---|---|---|---|---|---|---|
| FIO | flash |
4G | 14053.81 | 27664.48 | 2926 | 4668 |
| FIO | flash |
32G | 20337.87 | 9143.60 | 851 | 1770 |
| FIO | platters |
4G | 12976.14 | 26895.75 | 1636 | 4653 |
| FIO | platters |
32G | 9233.98 | 277.2 | 485 | 686 |
| CrystalDiskMark | flash |
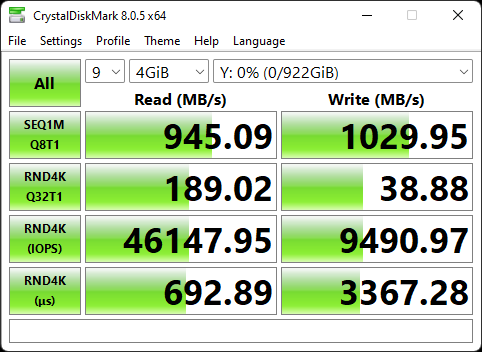
4GiB | 9490.97 | 46147.95 | 945.09 | 1029.95 |
| CrystalDiskMark | flash |
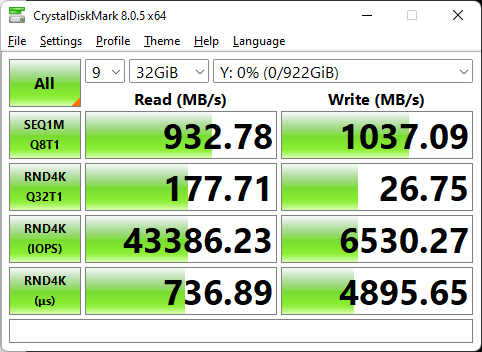
32GiB | 6530.27 | 43386.23 | 932.78 | 1037.09 |
| CrystalDiskMark | platters |
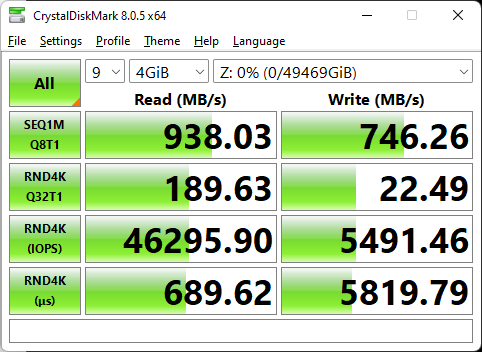
4GiB | 5491.46 | 46295.90 | 746.26 | 938.03 |
| CrystalDiskMark | platters |
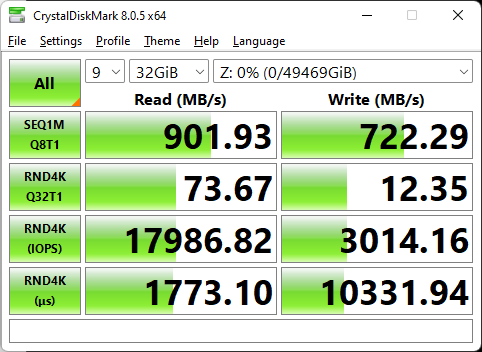
32GiB | 3014.16 | 17986.82 | 722.29 | 901.93 |
Knowing the throughput of the ZFS pools themselves is helpful, but what I’m really interested in is the throughput of the NAS itself over the network. To test this, I created an SMB share for a dataset on the flash pool and an SMB share for a dataset on the platters pool, too. On my Windows machine, I mapped a drive to each of these shares and then used CrystalDiskMark to benchmark those mapped drives:
- Y:\ is mapped to a share on the
flashpool (1TB NVMe SSDs in a Mirror vdev) - Z:\ is mapped to a share on the
platterspool (5x 18TB HDDs in a RAID-Z2 vdev)
All of the benchmarks confirmed what I expected–the DIY NAS: 2025 Edition cooks! It was fun watching the 10Gbps network interfaces on my NAS get saturated when reading and writing to the shares on the flash pool. It was nearly as exciting to see that the reads from the platters share nearly saturated the 10GbE and the writes to the platters share were impressive 722–746 MB/s, too!
Power Consumption
One not-so-obvious cost of running a DIY NAS is how much power it consumes. While I specifically tried to pick items that were efficient in terms of power consumption, it’s also important to realize that all the other bells and whistles on the awesome Topton N18 NAS motherboard consume power, too. And then the biggest consumer of power in a NAS is almost always the hard disk drives.
Thanks to my tinkering with home automation, I have a plethora of smart outlets which are capable of power monitoring. I used those smart outlets for most of my power monitoring. But I also have a Kill a Watt P400 that I also use for some of the shorter tests:
- Power consumed during a handful of specific tasks:
- Boot up
- Idle
- RAM Burn-in (10+ passes of Memtest86+)
- Disk Burn-in (Short SMART Test, running badblocks, and then a long SMART test.)
- A local pool benchmark using FIO
- A network throughput benchmark using SMB
- Total consumed during the build, burn-in, and use of the DIY NAS: 2025 Edition.
| Task | Duration | Max Wattage | Avg. Wattage | Total Consumption |
|---|---|---|---|---|
| Idle | 3 hr. | 59.7 W | 43.3 W | 0.13 kWh |
| Boot | 5 min. | 81.9 | 58.75 | 0.01 kWh |
| RAM Burn-in | 35.92 hr. | 64.3 W | 58.8 W | 2.11 kWh |
| HDD Burn-in | 279 hr. | 81.8 W | 62.9 W | 17.55 kWh |
| FIO Benchmark | 9.5 hr. | 86.6 W | 63.2 W | 0.60 kWh |
| SMB Benchmark | 30 min. | 88.7 W | 60.0 W | 0.03 kWh |
| Total | 350 hr. | 88.7 W | 55.7 W | 19.50 kWh |
Overall, I think that the power consumed is quite reasonable. My personal DIY NAS machine in the same time span used 43.75 kWh of power, which is more than double the power (224%) that the DIY NAS: 2025 Edition consumed. This is even more remarkable when you consider that nearly the entire time span, all 5 of the hard drives were spinning in this year’s DIY NAS and my NAS was relatively idle!
What am I going to do with the DIY NAS: 2025 Edition?!
While my DIY NAS is definitely aging, this year I added a new SSD pool and swapped it into a new case. An upgrade will definitely be in the future, but it’s not going to be the DIY NAS: 2025 Edition!
Typically, I’ve raffled off DIY NAS builds, but unfortunately the value of this year’s DIY NAS exceeds a threshold with the IRS, and I’m not willing to collect the necessary tax information to run that giveaway. So I’ve been thinking of another method to get the DIY NAS: 2025 Edition into the hands of one of my blog’s followers.
So here’s what I’m going to try: a promotional auction on my eBay store! Here’s how that auction will work:
- On Monday, December 2nd at 8:00AM CST I will list the DIY NAS: 2025 Edition on my eBay Store as an auction with a reserve price of $2,000.
- I will lower the reserve price by $1 for all of the following social media engagement:
- New follower on Bluesky (@briancmoses.bsky.social), Mastodon (@[email protected]), or Facebook.
- New EconoTier (or higher) patron on Patreon.
- New subscriber to my blog’s mailing list.
- Share/boost/repost/quote post/like/etc. any of the following social media posts.
The auction will only run for 10 days! Hopefully the duration of the auction gives everybody the chance to drive the reserve price all the way down to $1, and the winner of the auction will get a fantastic NAS for an even better price. If the auction ends without meeting its reserve price, then I’ll simply relist the NAS on my eBay store.
Update: The auction is over with the high bid being $1,775. Overall, I think the auction’s winner wound up getting a fantastic deal, but what do you think? Leave a comment down below what you felt the DIY NAS: 2025 Edition was worth!
Final Thoughts
I absolutely love the DIY NAS: 2025 Edition. The features of the Topton N18 motherboard and the capacity of current hard disk drives really complement each other when it comes to my DIY NAS ideals for a DIY NAS build.
I’m especially excited about the capabilities of the Intel N100 CPU and its built-in iGPU. The N100 has become a very popular choice for folks building their own DIY NAS and/or homelab servers. The Topton N18’s addition of a 10GbE network card via the Marvell AQC113C is also fantastic, especially when you consider that the price of NICs with the Marvell AQC113C chipset are about $70 on Amazon!
Lastly, I am astonished at the price of the DIY NAS: 2025 Edition. I’ve been doing this for quite a while, but I’m still astonished that I was able to build a DIY NAS that has 92TB of gross storage capacity, 10Gbps networking, and in small form factor for under $1,750. And without disks, the cost is just over $600!!
But what do you all think? Are you as excited about the DIY NAS: 2025 Edition as I am? If you’re planning to build a DIY NAS, would you build something similar? Or would you go a different direction? Share your DIY NAS thoughts in the comments, or tell us about them in the #diynas-and-homelab channel in Discord!

 </a>
</a>