
In a previous blog, I raved about how awesome Pi-KVM is. If you’re not aware, Pi-KVM is an open-source project that allows you to turn a Raspberry Pi into an IP-KVM.
You plug the Pi-KVM into your network and into a computer and then from anywhere else on that network, you can remotely control that computer as if you’re sitting in front of it, including doing things like accessing the remote machine’s BIOS.
When I did my initial research, I learned that building a Pi-KVM can be done incredibly inexpensively–it would cost less than $80 to build one from the recommended parts list. By building mine from a CanaKit Raspberry Pi 4 Model B (4GB) Pro Kit, I wound up spending quite a bit more than that $80. Regardless of how much I spent, I felt like I got a great value out of what I built.
- Part One: Pi-KVM: an inexpensive KVM over IP
- Part Two: Pi-KVM: Controlling a 4-port KVM and setting up Tailscale
Affiliate Disclaimer: Some of the links on this website are affiliate links, meaning, at no additional cost to you, I may earn a commission if you click through and make a purchase. I only recommend products that I believe will add value for my audience. Please understand that I have experience with all of these companies' products, and I recommend them because they are helpful and useful, not because of these small commissions.
Enhancing my Pi-KVM Setup
After building a Pi-KVM for Pat for Christmas, I was hooked and quickly built one for myself. Following that, I built another one that I could easily use with other computers outside of my office. Most notably, I wanted one to use in my “recording studio” where I do most of the work in assembling my DIY NAS builds.
I also began contemplating improving the Pi-KVM I was planning to use with my DIY NAS and my homelab servers in my office. When I started out, I planned on just sharing the same Pi-KVM with both machines, but the more I thought about it, the more I realized that I wanted to avoid having to swap the cables between the two servers.
This got me thinking. Either I’d need to build yet another Pi-KVM, or find a KVM switch that I could trigger from Pi-KVM to swap between the two hosts.
Adding a 4-port KVM Switch, the ezcoo EZ-SW41HA-KVM
Thanks to Novaspirit Tech on YouTube and his Q&A video about the Pi-KVM, I was already aware of what I wanted to try next. Among the topics discussed in the video was an inexpensive 4-port KVM switch made by ezcoo, the ezcoo EZ-SW41HA-KVM. This KVM switch has its own USB management interface which allows for firmware updates and switching which port is active on the KVM switch.
What set this particular switch apart from others was that Pi-KVM has functionality built-in that can issue the commands to the ezcoo EZ-SW41HA-KVM. You can configure the web interface’s elements to suit your needs and then pick which of the four ports is active with your Pi-KVM.
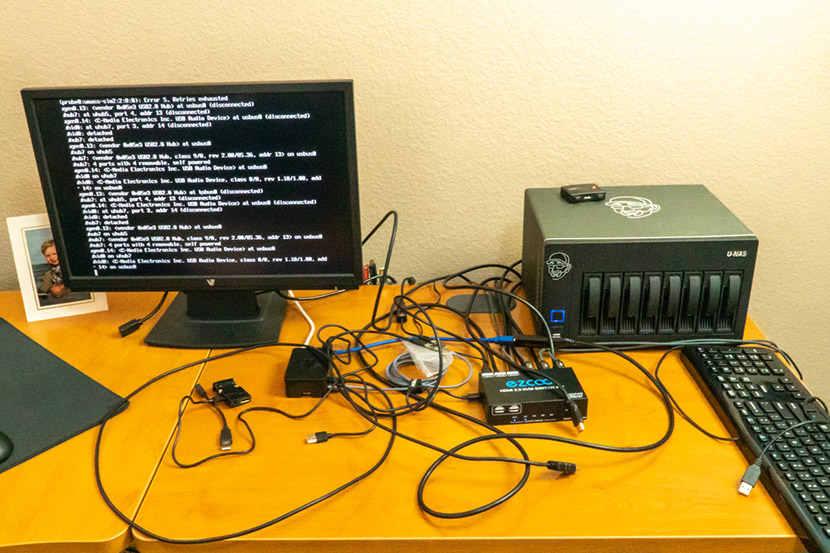
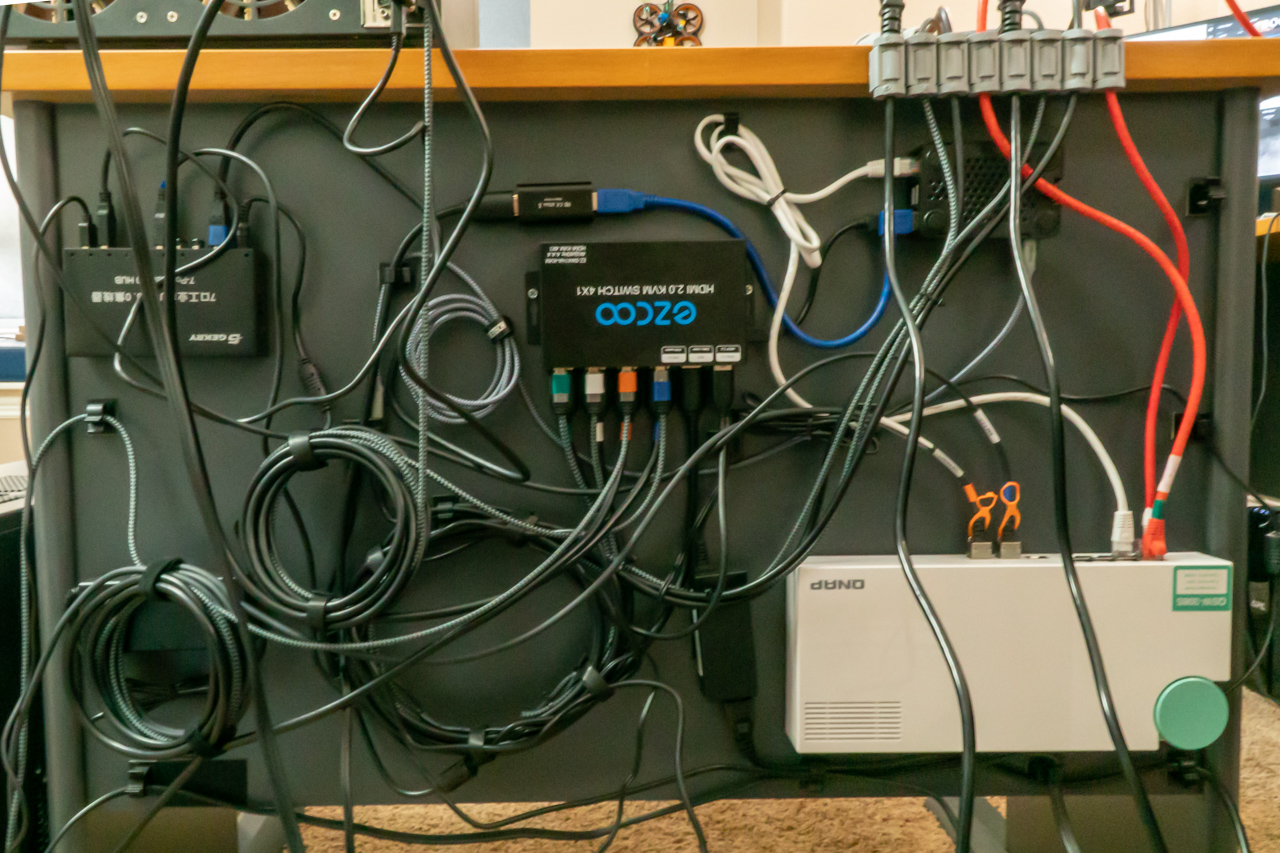
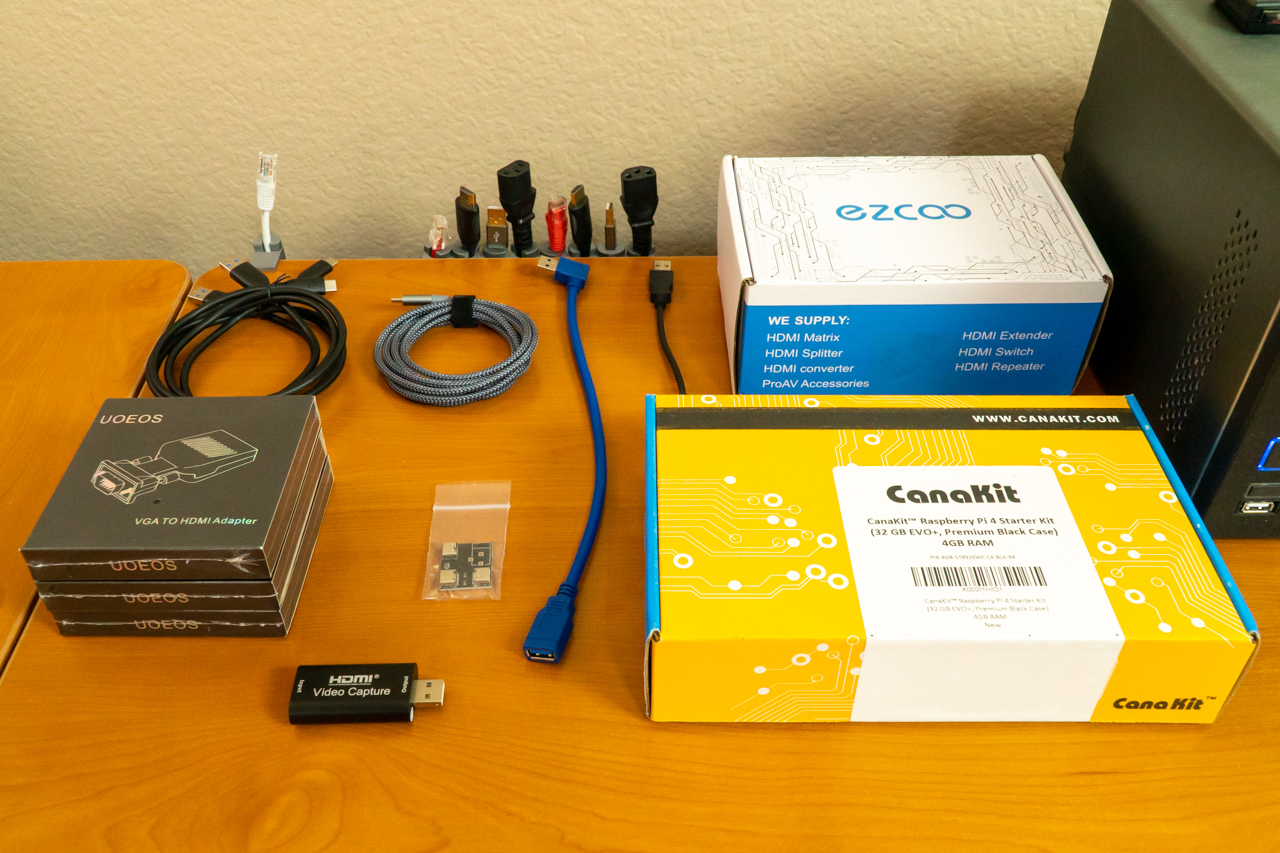
By using my Pi-KVM, the ezcoo EZ-SW41HA-KVM, some HDMI cables, some USB A to B cables, a couple VGA-to-HDMI adapters, and a generous helping of obsessive-compulsive cable management, I now have a 4-port IP-over-KVM setup functioning.
Parts List
- All the parts from my Pi-KVM setup
- An ezcoo EZ-SW41HA-KVM ($89.99)
- 2x Rankie HDMI Cable 2 Pack, 6 Feet ($16.96 total)
- 4x USB A Male to USB B Male USB 2.0 Cable ($29.96 total)
- 2x VGA-to-HDMI Adapters ($17.98 total)
A Pi-KVM can be built for under $80, and for an additional $150, your Pi-KVM can be extended to work with up to 4 different computers. This was ideal for me because I often wind up tinkering with a third—and sometimes fourth—computer at my desk, particularly when I’m working on one of my DIY NAS builds.
Setting up Tailscale on my Pi-KVM
Tailscale is a simple and easy-to-use VPN service built atop Wireguard. By installing and configuring a device, you can access that device over a secure VPN connection on any machine that you’re running the Tailscale client on. Pi-KVM has incorporated Tailscale as a configurable option. Once it is set up and on your Tailscale account, you can access your Pi-KVM from another machine as long as it is connected to the Internet.
![]() Being able to remotely access your Pi-KVM is a handy way to remotely access a machine without having to directly expose it to the Internet. This isn’t a critical feature to me, but I think it’s really quite interesting. I don’t really access anything on my network from outside of my house, but having that as an easy option is really intriguing.
Being able to remotely access your Pi-KVM is a handy way to remotely access a machine without having to directly expose it to the Internet. This isn’t a critical feature to me, but I think it’s really quite interesting. I don’t really access anything on my network from outside of my house, but having that as an easy option is really intriguing.
Pat’s been telling me to check out Tailscale for ages. Every time that he tells me about it, it has sounded really interesting–but I didn’t really have a good use-case for it. But now that I’ve set it up for using with my Pi-KVM, I know that it’s a matter of time before I’m using it with other machines too!
What’s Next?
After writing two blogs about it, I’m still quite excited about the Pi-KVM project. Pi-KVM is working on their own hardware to build in a bunch of extra features and are preparing to have the hardware manufactured. I’m excited enough about what’s been shared that I’ve signed up to preorder that hardware. As I have been working on this second blog, Novaspirit Tech published a video reviewing the Pi-KVM v3 hardware. Here are a few things I plan to do with my Pi-KVM:
- Build another Pi-KVM for use on my workbench in my studio
- Set up network passthrough to share the Raspberry Pi’s wireless interface for use where a network drop isn’t convenient.
- Upgrade one (or more?) of my Pi-KVMs to the version 3 of the hardware
- Other ideas? What would you do with a Pi-KVM that I haven’t considered yet? Please share your ideas in the comments, I’d love to see them!
Final Thoughts
Between building and using three different Pi-KVMs, reading about the Pi-KVM version 3 hardware, and now seeing it in action, I am doubling down on my previous position. I have no reservations whatsoever about capitalizing on the opportunity to pre-order the version 3 hardware once I can. I’m also happy that I can help support Pi-KVM on Patreon.

Pi-KVM is an awesome project. Pi-KVM has joined OctoPi and HomeAssistant at the top of my list of favorite Raspberry Pi projects. I’m excited to see what’s in store for the future of Pi-KVM.
- Part One: Pi-KVM: an inexpensive KVM over IP
- Part Two: Pi-KVM: Controlling a 4-port KVM and setting up Tailscale
Giveaway
I think that Pi-KVM is an interesting enough project that as part of this pair of blogs, I’m going to give away three kits which will hopefully get someone well on their way to building their own Pi-KVM. Each kit will contain:
- A Raspberry Pi 4 Model B (2gb)
- A customized (vandalized?) 3D-printed case for the Raspberry Pi 4 Model B
Here are the giveaway details (Note: _There’s a new way to enter that’s unique to this blog!):
briancmoses.com: Raspberry Pi 4 Model B (2GB version) with Customized 3D-Printed Case Giveaway