So, at the the end of 2012 we decided to go ahead and buy a new computer. I had a pretty firm budget: $1300 total; $1000 for the computer and $300 for the monitor(s). My other goal in the upgrade was to improve system performance by at least three times. In my prior article, I took a bunch of benchmarks to gauge just how “fast” my current machine was.
Newegg vs. Amazon
If you’ve read prior articles, or you know me at all, then you know I’m a huge Newegg fan. I’ve bought parts from them for over the past decade. Not every part, just the majority of them. Recently, my friend Pat hooked us up with Amazon Prime. Because of the holidays, I was pretty excited to get free two day shipping on all of my computer parts. In doing my research, Amazon was cheaper on quite a few of the same components that I was looking at on Newegg. However, in the end it’s probably a moot point, as Amazon is charging sales tax in Texas and that probably ended up eating up most of the items’ price savings.
Meeting the “Upgrade” Requirement
In order to call it an upgrade, a few components need to carry on from the prior machine. In my case, there’s not much worth carrying forward. Almost the video card, but I definitely want to upgrade that. The power supply I bought to drive that video card will definitely move forward, as will the hard disk drive for some additional storage. And finally, I’m going to use my Windows 7 license. As an additional bonus, I have a 2 TB hard drive that I’ve been using in an external enclosure that was made unnecessary by my FreeNAS box. I’ll use as some storage as well.
CPU, RAM and Motherboard
 I spent 95% of my research time agonizing over which direction to go-AMD vs Intel, which motherboard chipset and how much RAM. Well, the RAM part was easy, seeing as how I remember spending $400 of my hard-earned busboy money on a whopping 4MB of RAM into my first hand-me-down computer ages ago. I went ahead and decided to max out the RAM by buying 32GB of Corsair Vengeance (4x8GB) DDR3 1866 MHZ (PC3 15000) for $179.99
After pouring over pages of benchmarks and reviews of the latest AMD and Intel CPUs, I decided that I wanted 8 cores and that it seemed like AMD is giving the best bang-for-buck. In this case, I decided to go and pick up the AMD FX-8350 FX-Series Black edition for $189.99.
I spent literally hours trying to decide between the AMD chipsets that support the AM3+ CPU. The 970, 990X and 990FX all seemed to be pretty equivalent for what I wanted to do. There’s very little chance that I’ll be doing SLI anytime in the near future, so most of the additional benefits of the 990X and 990FX are lost on me. However, in reading reviews on the various 970 boards, it seemed like support of the FX-8350 CPU was spotty; if you had an older revision of the board it required flashing the BIOS to get it to boot. Rather than risk buying something that was going to require me to jump through hoops, I looked at the 990X boards and found them to be marginally less expensive than the 990FX boards. For $137.99 I picked up a Gigabyte GA-990FXA-UD3, which definitely had all of the DIMM slots, 6.0Gb/s SATA ports and PCI Express x16 slots that I needed.
Budget remaining: $492.03
Videocard
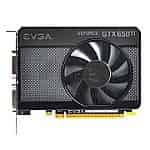
 My primary goal on buying a video card was to make sure to double the number of CUDA Cores currently available on my current Geforce GTX 460. In looking at the prices, that seemed to be the sweet-spot in my bang-for-buck calculations. I ended up deciding that the Geforce GTX 650 Ti seemed to be the right family of cards to be shopping in. Because my current card had 1 GB of video RAM, I decided to double that up as well by looking at video cards with 2GB of video RAM. For $169.99 I chose the EVGA GeForce GTX 650 Ti 2048MB.
Budget remaining: $322.04
Storage
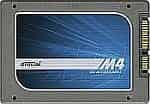
 Storage is one of the areas in which I decided to splurge. I knew that I wanted an SSD, but I was leaning towards a smaller SSD to use for caching. But because prices have fallen down below $1 per gigabyte I decided to use an SSD as my primary storage device. Currently, I fluctuate around 200Gb of usage for everything installed on my PC and there’s lots of fat to be trimmed out of there. Because of that, I felt that I could very easily buy a Crucial m4 256GB 2.5-Inch Solid State Drive to use as my primary storage. The SSD set me back $209.99
Budget Remaining: $112.05
Case
 Because I was bringing over the power supply from my prior computer, I only needed a shell of a case. The budget was starting to feel a little bit tight, so I employed a friend and Google to search for the best “budget” case with a slew of internal hard drive bays and that would fit my motherboard. For $39.99 I found a NZXT Technologies Source 210 Computer Case (Black) which seemed to fit the bill.
Budget Remaining: $72.06
Odds and Ends
The CPU I bought didn’t include a cooler, so I picked up a Cooler Master Hyper 212 Plus for $24.71. Because I picked Amazon, I thought it made sense to go ahead and include sales tax to my bottom line which came in at $76.54
Budget Remaining: $-29.19
The Fine Print
I didn’t quite make my $1000 budget. There’s certainly a bit of fat that I could trim from the computer; a less expensive motherboard, slower RAM, and a smaller SSD all jump out at me as items that could’ve been less expensive, saving me quite a few dollars. However, I had another goal of tripling my existing system performance, and ultimately that wound up being more important to me than a small overage on the budget. Besides, there’s got to be at least a hundred dollars of “old” parts which are coming over from the upgraded computer. If I really wanted it to look like I stayed inside my budget, I’d find a way to give myself credit for those pieces.
Complete Parts List
- AMD FX-8350 FX-Series Black edition
- Gigabyte GA-990FXA-UD3
- Corsair Vengeance (4x8GB) DDR3 1866 MHZ (PC3 15000)
- EVGA GeForce GTX 650 Ti 2048MB
- Crucial m4 256GB 2.5-Inch Solid State Drive
- NZXT Technologies Source 210 Computer Case (Black)
- Cooler Master Hyper 212 Plus
- Antec 500W Power Supply (from previous computer)
- Seagate Barracuda 500GB Hard Drive (from previous computer)
- Western Digital 2TB Hard Drive (random unused hard drive hanging around)
