
The first time I attended TheLab.ms’s monthly home brewing group, I just observed and sampled the prior month’s creations– from that point on, I was hooked. Based on the group’s suggestions, I decided to build a keezer for serving my beer from and a fermentation refrigerator, aka “The Brewterus”. Among my criteria for the keezer was my ability to use both carbon dioxide and nitrogen in order to serve beers. Most beers are carbonated, but a few beers (particularly Guinness) are nitrogenated. Nitrogenated beers tend to have what is described as a creamier and smoother feeling in your mouth as well as a less bitter taste, since carbon dioxide is acidic.
Because I planned to serve nitrogenated brews from time to time, Pat suggested that when I don’t have a home-brewed nitrogen beer around, I should consider nitrogenating a cold-brew coffee and serve it on tap. As an experiment, we brewed a small one-gallon batch of cold-brew coffee and tried it out of the keezer and it was delicious! In fact, it was so delicious that I further modified the keezer so that I could add a dedicated cold-brew coffee tap.
Affiliate Disclaimer: Some of the links on this website are affiliate links, meaning, at no additional cost to you, I may earn a commission if you click through and make a purchase. I only recommend products that I believe will add value for my audience. Please understand that I have experience with all of these companies' products, and I recommend them because they are helpful and useful, not because of these small commissions.
What is Cold-Brew Coffee?
Essentially, a cold brew coffee is coffee brewed using water that’s at room temperature or cooler over a longer period of time, usually at least 12 hours. What’s the big deal in that? To me, the biggest difference is the fact that the cold-brew coffee is less acidic than traditional coffee. I personally find cold brew-coffee quite a bit easier and more enjoyable to drink. Without pretending to have a doctorate in food chemistry, it appears that coffee’s fatty acids are much more water-soluble at higher temperatures.
Cold-brew coffee should not be confused with iced coffee. Iced coffee is brewed hot and then poured over ice to crash-cool it. Depending on the amount of coffee brewed and the amount of ice in the cup, this could also result in a drink that’s a bit watered down. But the same acidic taste that hot coffee has would also be present in iced coffee.
Beans from Craft Coffee
Pat is my local coffee expert, and a few years ago for Christmas, we bought him a subscription to Craft Coffee. Not really knowing anything about coffee, we were a bit concerned that the gift would miss its mark, but we’ve been pleasantly surprised to find that Pat’s continued his coffee subscription all this time. The beauty of Craft Coffee is that you answer a questionnaire about what kinds of coffee you like to drink and their properties, and then have a variety of options which include shipping you small bags of different coffees that align to your preferences monthly (or on some other duration of your choosing). In Pat’s various blogs about coffee he’s always spoken highly of the coffees, he has received as a result of his Craft Coffee subscription.
Based on their options, I wound up going with the Single Origin - Roaster’s Choice coffee. The advantage of a single-origin coffee is that all of the beans come from the same source instead of a blend of different beans as selected by the roaster. It’s my understanding that the geographic subtleties of a particular coffee bean are more pronounced with single-origin coffees. Single-origin beans tend to be roasted lightly, which also suit a personal preference of mine.
Our first shipment arrived on a Friday; in the box we found 72 ounces of coffee divvied up in six different twelve-ounce bags. Opening the box set free quite a bit of coffee-laced aroma, filling our kitchen with its pleasant smell. The Craft Coffee bags have a small hole that allow you to smell the coffee after a gentle squeeze on the bag. I smelled the bag first and tried to pick out the different subtle scents I could identify. I’ve always been a sucker for the way coffee smells, but this was quite a bit better. Firstly, it smelled quite fresh, which shouldn’t be surprising to me as I’ve probably almost always had stale coffee. The coffee also smelled a bit sweet with an undertone of something tangy. I couldn’t quite put my finger on what the scents reminded me of, but it definitely smelled fruity and quite citrus-like.
| Craft Coffee, Brooklyn, NY | |
|---|---|
| Producer | Bebes washing station |
| Origin | Obura Wanonara, Papua New Guinea |
| Variety | Typica, Bourbon Caturra |
| Elevation | 1,500-1,700 meters above sealevel |
| Process | Washed |
| Sweet, fruited and floral with notes of apricot, allspice, green tea, mild currant and lemon curd with grapefruit-like acidity. | |
Want to give Craft Coffee a try? I certainly recommend it! Using the code of ‘brian1544’ will get you 15% off of your order! Even better? It might even help supplement my own cold-brew coffee addiction!
Materials Used
- 52 ounces of Craft Coffee
- 6 gallons of Crystal Geyser spring water
- 6-gallon Glass Carboy
- Cornelius Keg
- Auto-Siphon
- Cheesecloth
- 3-piece airlock
Recipe
Ultimately, what we decided to do was to use 52 ounces of the coffee to go with 5 gallons of water. Because I’m impatient and didn’t want to spend the afternoon dispensing water from our refrigerator, I went ahead and bought 6 gallons of Crystal Geyser Spring water which was on sale at our local grocery store for $0.89 a gallon. Spring water was the choice because it seems that it’s the superior choice for coffee brewing due to its mineral content.
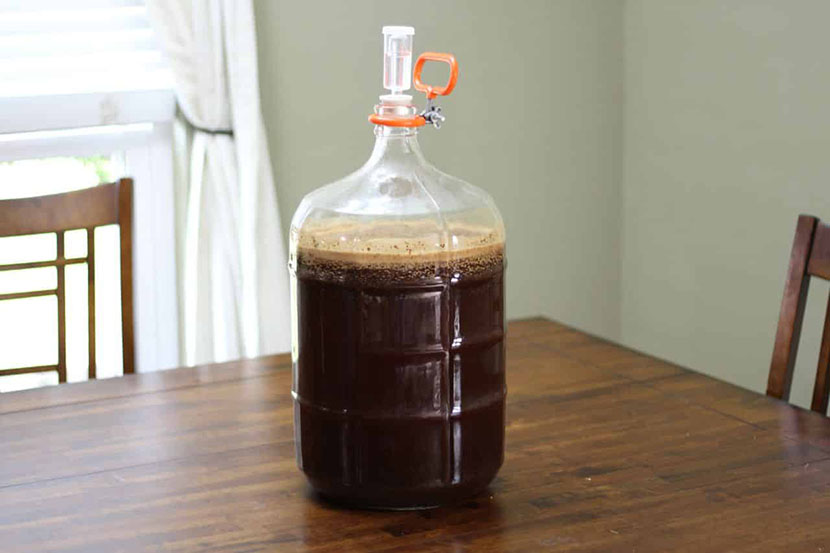
First we dumped all of the coffee grounds into the glass carboy and filled it up with 4 gallons of the spring water and capped the carboy off with a threepiece airlock, although I think the use of the airlock was probably overkill on our part. Most cold-brew coffee recipes simply refer to covering the concoction while it rests. I hoisted the carboy into the Brewterus, which I had set at 52 degrees Fahrenheit. The Brewterus was set at that temperature for the final stages of fermentation of Das DoppelGanger, my most recent home-brewed beer. My understanding of cold-brewing coffee is that the brewing happens at any temperature which isn’t as hot as the ideal temperature of 205 degrees Fahrenheit. Most cold-brew recipes indicate that room temperature is a satisfactory temperature, which is what led me to believe that the 52 degrees in the Brewterus would be quite fine.
Roughly a day and a half later, I used my siphon to begin transferring the cold-brew syrup into the Cornelius Keg. I used the cheesecloth to strain out any of the coffee grounds that got sucked up by the siphon. I was a bit surprised when I was only able to siphon 3 gallons’ worth of cold-brew coffee syrup out of the carboy. I was prepared for the fact that a large amount of water would be retained forever by the coffee grounds, but I was a bit startled when those 52 ounces of coffee grounds wound up retaining a quarter of the water we added to the carboy.
This is where I’d worried that I made a pretty sizable mistake. Rather than taste the syrup and then dilute it down to my preference, I simply emptied my two remaining gallons of spring water into the keg. It wasn’t until just after the water drained from the last bottle that I thought to myself; I wonder if that’s too much water to add? My concern at this point was that I’d overly diluted my cold-brew syrup with the spring water. In the future, I plan to taste test more frequently as I add water to the syrup.
During the cold-brew process, Pat had used his French press and brewed us a couple cups of the month’s Craft Coffee. Prior to nitrogenating the cold-brew coffee syrup, I used a ladle to scoop up a glass of the cold-brew coffee. In my clear glass, my cold brew coffee appeared to be a bit more opaque than what had been in the French press but in drinking the two, I found that they tasted quite different but that difference in taste could be expected due to the difference in the brewing method. I decided that I’d go ahead and hook it up to the nitrogen gas and do a taste test again in a few days.
After giving Pat a sneak preview a day or two later, most of my fears were assuaged when Pat said that he found the cold-brew coffee itself to be every bit as drinkable as the cups of French press coffee we’d drank while preparing the cold-brew concoction. This is especially exciting because Pat had not been very keen on neither of our earlier cold brew experiments.


First Impression
Why wait for that final taste test until later on? It takes a while for the pressure of the Nitrogen gas to be absorbed into the contents of the keg. Normally for my beers, I crank up the pressure and wait a couple days, and that has typically involved using carbon dioxide, which is much more soluble in liquids than nitrogen is. I keep my nitrogen at a much higher pressure (~50psi) in part to try and account for that solubility and to increase the amount of gas in the coffee when dispensing. At any rate, it takes a few days under pressure for the nitrogen to infiltrate the coffee and create that awesome cascading effect and wonderful mouthfeel.
My first conclusion? This coffee from Craft Coffee is every bit as delicious as Pat told me it’d be and that he’s been writing about in his blogs. The entire time I’ve been considering cold-brewing coffee and serving it out of my keezer, Pat’s been encouraging me to get my own subscription from Craft Coffee, and boy am I glad for that recommendation! I’ve tried this month’s coffee through a plain old drip coffee pot, brewed via a French press, and in cold-brew form. In every single form, no matter how badly I might’ve accidentally made it, I’ve enjoyed the coffee. I’m not sure how quickly I can drink five gallons of cold-brew coffee, but once it’s gone I’ll certainly be excited for whatever Craft Coffee sends my way next. My favorite feature of the Craft Coffee subscription is the variety of beans they’re capable of sending out and that every month will be different. I’m excited to see what comes next month. Want to give Craft Coffee a shot? Use my code brian1544 and get 15% off!
My most import conclusion from my first impression? Cold brew coffee is tasty and different! Because of the colder brew temperature, the final product is very much different than either hot coffee or iced coffee. It’s quite a bit smoother and tastes less bitter or acidic. Brewing a gallon of your own cold-brew coffee would be pretty easy. Buy a gallon of spring water and pour off some room for the grounds (save the poured-off water). Then put 10.4 ounces of coarsely ground coffee beans into your gallon of water and fill it back up to the top. Let the grounds and water set between 24 and 36 hours in the fridge. Finally, use some cheesecloth and another pitcher and carefully pour your cold-brew syrup out of the container through the cheesecloth to filter out the grounds. Get as much syrup out of the gallon of water as possible and then taste your brew–add additional water to taste in case it is too strong. Voila! Your own concoction of cold-brew coffee! It should keep in your fridge for roughly two weeks without problems.
Final Thoughts
In addition to everything I said above, nitrogenating the cold-brew coffee puts the whole thing over the top; it was enjoyable by itself, but once it was finished being nitrogenated, it became delicious! Watching the nitrogen cascade up the glass to build the frothy head is mesmerizing. Secondly, the crema from that head and the nitrogen that’s infiltrated the cold brew creates a very cream-like texture and mouthfeel that is quite similar to the crema formed by milk in an espresso. It’s pretty awesome that it takes me about 20 seconds in the morning to pour myself a cold-brew coffee before I begin my adventures.
Depending on how quickly we can drink the cold-brew coffee, I expect to turn this into a running series of blogs. For each new coffee that Craft Coffee sends me, I intend to whip up a keg of cold brew coffee out of what they provide. Considering that the warmest months are sneaking up on us, it’ll be a nice treat to have on hand!