

I have been running Stable Diffusion with some success at home for quite some time thanks to the AUTOMATIC1111 fork from lshqqytiger . I’ve used it to generate images to complement some of my content creation. But as a Windows 11 user with a Radeon 7900XTX GPU, I’ve learned that this combination can be equal parts frustrating and disappointing.
Affiliate Disclaimer: Some of the links on this website are affiliate links, meaning, at no additional cost to you, I may earn a commission if you click through and make a purchase. I only recommend products that I believe will add value for my audience. Please understand that I have experience with all of these companies' products, and I recommend them because they are helpful and useful, not because of these small commissions.
Like many other people in this space, I’ve been fascinated with Flux.1 from black forest labs. I used Flux.1 to generate a few images for the Topton DIY NAS motherboard rundown blog that I wrote for Butter, What?! and knew immediately that I wanted to leverage Flux in my content creation, but I couldn’t yet run Flux locally thanks to my combination of operating system and GPU.
Both of my DIY NAS and homelab servers are small form factor, which means they lack enough available PCIe slots and the physical space in the case to fit a full-size GPU, which made moving my AI workflow off my desktop computer challenging. In early August, I posted a poll about my AI predicament on Patreon with a few options for my AI workflows in mind. Ultimately, I didn’t like any of those options. They seemed expensive, the benefits of their outcomes were questionable, and as a result I wasn’t certain I’d get value out of any of them. At the conclusion of that poll, I decided I was not willing to disrupt my status quo.
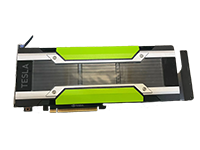 But then I learned of this Nvidia Tesla M40 with 24GB of VRAM for $85 on eBay and found inspiration. The form factor of my DIY NAS and homelab servers limited me, but I could still build a whole new machine!
I decided to cobble together an additional homelab server using parts that I had left over from various upgrades, and I’d buy at least one of these Nvidia Tesla M40 GPUs.
Hardware
In the last 2 years, I’d swapped out the motherboard and CPU in my desktop PC and had entirely replaced my old homelab server, plus I had a handful of various other parts taking up space in my closet from various impulse buys of parts that would have worked nicely in a prospective DIY NAS build.
I had a spare CPU–an AMD Ryzen 7 1800X–but I opted to replace it with something more modern that included an integrated GPU, consumed less power, and outperformed my spare CPU.
Here’s a table of the parts that I wound up purchasing for this homelab server for hosting my AI endeavors.
| Component | Part Name | Qty | Price | |
|---|---|---|---|---|
| Motherboard | MSI B350 Tomhahawk Arctic | specs | 1 | $0.00 |
| CPU | AMD Ryzen 5 5600G | specs | 1 | $142.00 |
| RAM | Corsair Vengeance LKXP 64GB DDR4 3200MHZ RAM | specs | 1 | $104.99 |
| GPU | Nvidia Tesla M40 GPU Accelerator | specs | 1 | $84.99 |
| GPU Accessories | Tesla M40 Cooling Duct PCI Bracket for Tesla M40 Tesla M40 Power Cable |
1 1 1 |
$0.00 $8.99 $12.99 |
|
| OS Drive(s) | Samsung SSD 850 EVO 120GB SSD | specs | 2 | $0.00 |
| VM/Container Storage | Silicon Power 128GB SATA SSD | specs | 2 | $0.00 |
| Other Storage | Teamgroup MP44L 1TB NVMe SSD | specs | 1 | $0.00 |
| Case | NZXT Source 210 | 1 | $0.00 | |
| Cooling | Wathai 12038 120mm x 38mm 5300RPM PWM Fan PWM Fan Controller and PSU |
1 1 |
$19.99 $9.89 |
|
| Power Supply | SilverStone Tek 550W SST-ET550-G | specs | 1 | $0.00 |
I wound up spending just short of $300 total and could’ve saved even more money had I been a bit thriftier with my used parts. It’s not an incredibly powerful machine, but I expect it is more than up to the task to host my various AI workflows.
Setting up Proxmox, Forge, and Oobabooga
I decided that I wanted to host all of my self-hosted AI services on Proxmox VE and that I would host each of the services within Linux Containers. I’ve jotted down some notes as I put all of this together.
While I think these steps are pretty solid, please understand that I didn’t write them intending them to be used as some kind of detailed how-to guide.
Proxmox
- Disabled Secure Boot in the BIOS.
- Installed Proxmox to a ZFS mirror of the two Samsung 120GB SSDs.
- Executed
apt install -y dkms pve-headersfrom the host’s console. - Ran the Proxmox VE Post Install Script from the host’s console.
- Debian Bookworm Nvidia Driver install.
- Validated the Nvidia driver installation by running
nvidia-smi. - Added additional storage to Proxmox:
- A ZFS Mirror of the two 128GB SSDs (storage for the LXCs)
- A single disk stripe of the 1TB NVMe (additional scratch storage)
- (Optional) Added the new Proxmox VE node as part of a “cluster” with my existing Promox VE machine.
Forge
- Used the Debian LXC Helper Script to create a new Debian LXC container named, “Forge”.
- From the Forge container’s console, used the Tailscale Helper Script to install Tailscale.
- Enabled Tailscale SSH inside the Forge container.
- Install Nvidia Drivers in the newly created Forge container.
- Add the Nvidia Configuration to the Forge container’s configuration.
- Rebooted the Forge container
- Validated the Nvidia driver installation by running
nvidia-smi. - Created a new user to run Forge and added it to sudoers.
- Install dependencies:
sudo apt install git wget google-perftools python3 python3-venv libgl1 libglib2.0-0 - Installed the Forge fork of the Automatic111 project by running
git clone https://github.com/lllyasviel/stable-diffusion-webui-forge - (Optional, but required for Tesla M40) Edited the
webui.shscriupt to hack through the fact that VGA or Display does not show up in what’s returned for the Tesla M40 inlspci:- Find the line that reads
gpu_info=$(lspci 2>/dev/null | grep -E "VGA|Display")and add a # at the begining of the line to comment it out. - Then add a new line which reads:
gpu_info=$(lspci 2>/dev/null | grep -E "NVIDIA")
- Find the line that reads
- Use Tailscale serve reverse proxy:
sudo tailscale serve -bg --https=443 localhost:7860 - (Optional) Added some space from the 1TB NVMe to the Forge container by backing up the folder, mounting the new storage in place of the
/modelsfolder, and moved the model folder’s contents back onto this new storage. - Populated
/stable-diffusion-webui-forge/models/Stable-diffusionwith the following Flux.1 models: - Started Forge by running
.\webui.sh --listenand validated it was accessible locally and via Tailscale.
Oobabooga
- Used the Debian LXC Helper Script to create a new Debian LXC container named “Oogabooga (sic)”.
- From the Oogabooga container’s console, used the Tailscale Helper Script to install Tailscale.
- Enabled Tailscale SSH inside the Oogabooga container.
- Install Nvidia Drivers in the newly created Oogabooga container.
- Add the Nvidia Configuration to the Oogabooga container’s configuration.
- Rebooted the Oogabooga container
- Validated the Nvidia driver installation by running
nvidia-smi. - Created a new user to run Oobabooga and added it to sudoers.
sudo apt install git wget- Installed Oobabooga by pulling down its repository:
sudo git clone https://github.com/oobabooga/text-generation-webui - Use Tailscale serve reverse proxy:
sudo tailscale serve -bg --https=443 localhost:7860 - (Optional) Added some space from the 1TB NVMe to the Oobabooga container and mounted the new storage in place of the empty
modelsfolder. - Downloaded the
gemma-2-2b-it-Q8_0.gguffrom bartowski/gemma-2-2b-it-GGUF and placed it in the models folder. - Run
./start_linux.sh --listenand made it sure it was accessible locally and via Tailscale.
Cooling the Nvidia Tesla M40
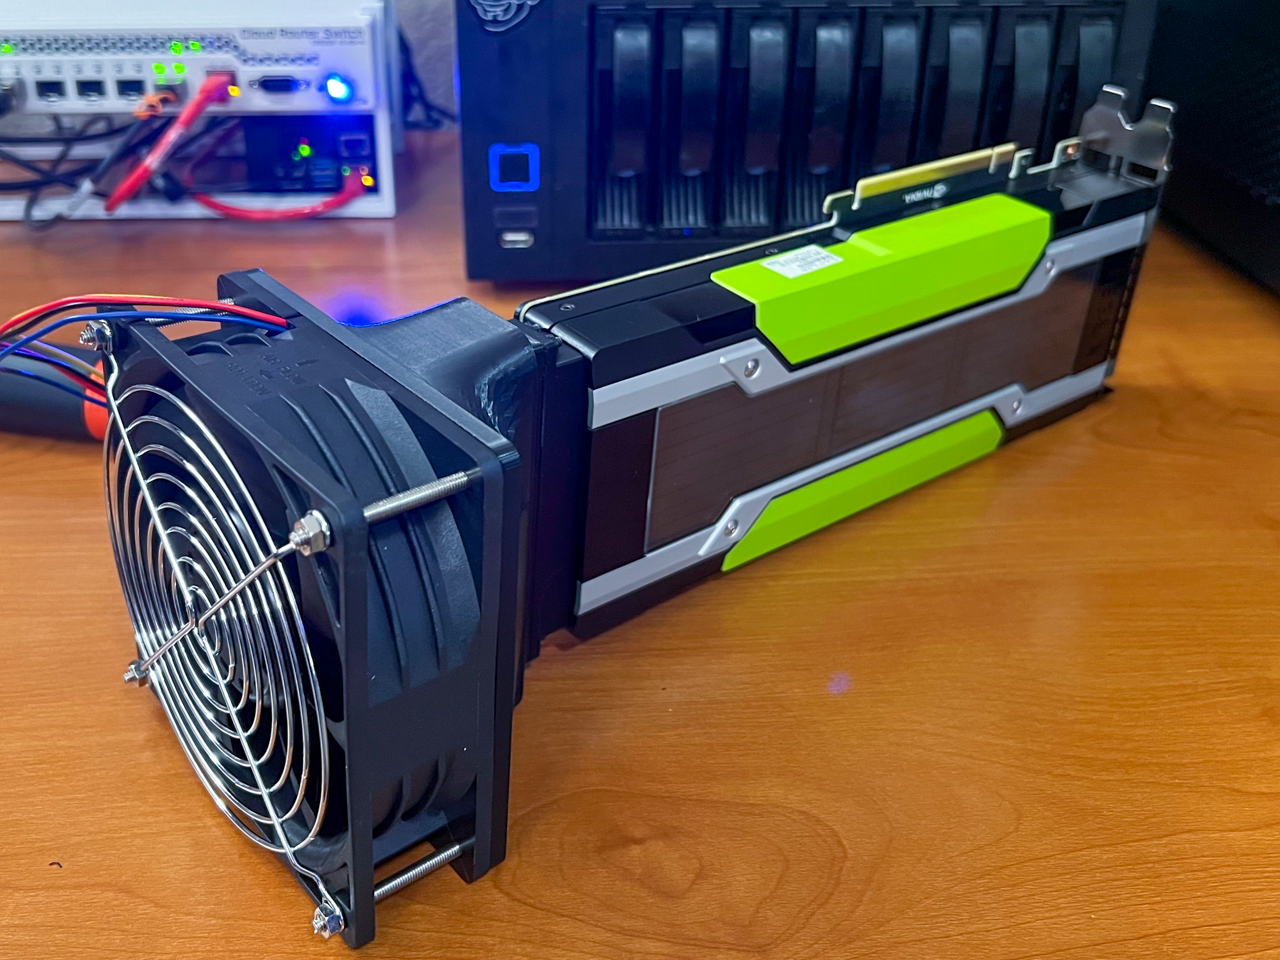
Before I bought the Nvidia Tesla M40, I knew that I was going to need to cool the GPU. The Tesla M40 is designed to be installed in a server behind a wall of screaming fans pushing frigid datacenter air across the GPU’s heatsinks. I wound up 3D-printing a clever M40 cooling duct and initially installing a 120mm Noctua NF-P12 case fan.
However, I found that this wasn’t enough cooling. Once I started generating some images, the temperature on the GPU immediately shot up to like 88C and seemed to begin to throttle performance. As it reached 90 degrees Celsius, the GPU’s reported power draw would drop significantly while the image generation bogged down. I installed CoolerControl on the host and set up a fan curve that had my Noctua NF-P12 spinning at 100% once the GPU reached 70 degrees Celsius. This helped performance a lot. I saw the GPU consume more power and process things faster, but it was still thermal throttling and limiting power draw to around 130–140W of its 250W max.
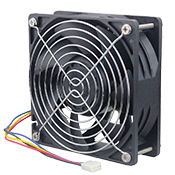 So I bought this beast of a 120MM PWM cooling fan and a fan power supply and controller because I was concerned that the fan would draw more power than my motherboard could supply.
When the computer started up, I heard the fan running at 100%, and instant regret kicked in. At full blast, it was loud. But using CoolerControl, I was able to modify the fan curve so it maxxed out at 40%, which prevented the GPU from throttling while it was churning out images and thankfully wasn’t any louder than the other machines in my office.
How does it perform? Am I happy with it?
Take this section with a grain of salt! I don’t really know the first thing about benchmarking a GPU’s performance or tweaking the performance for different AI workloads. To make matters worse, I only have two machines that I’ve used to run any kind of AI, and those machines are quite disparate.
All of that being said, the very fact that I’m making any kind of attempt at benchmarking this Tesla M40 suggests that it measures up to my experiences doing the same with my Radeon 7900XTX.
Image Generation
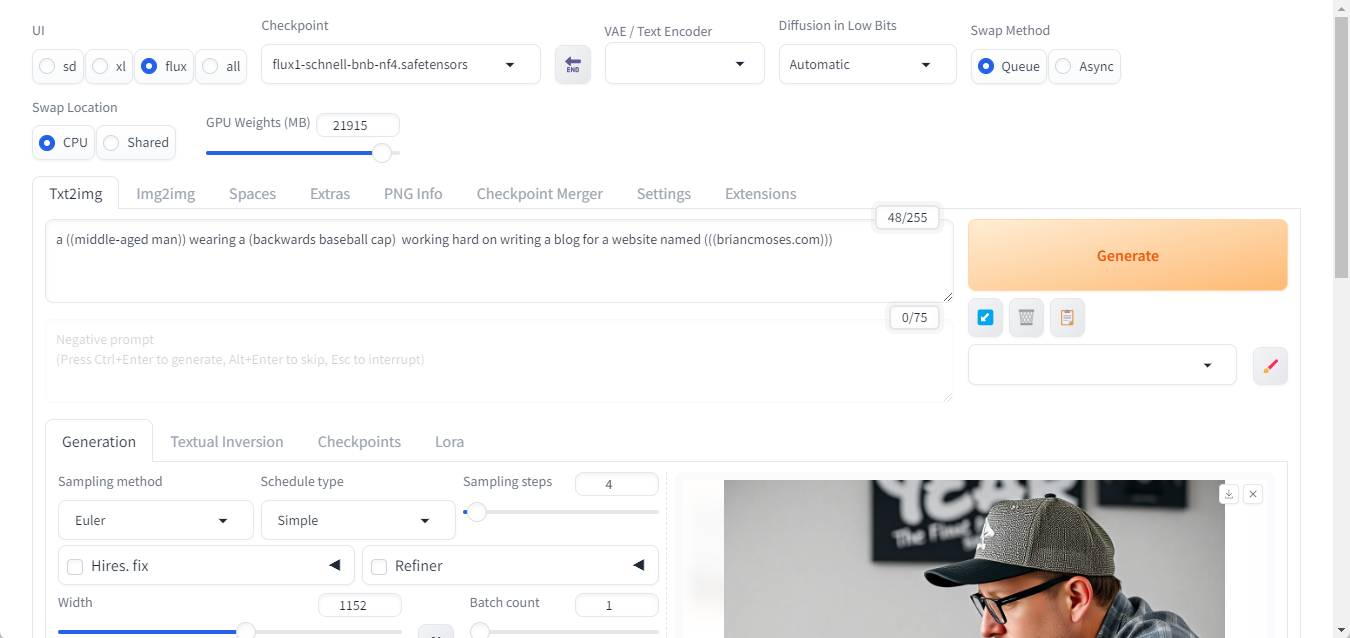
For starters, I think I should reiterate that my goal was image generation via Flux.1, which at the time of writing this blog, I couldn’t do with my desktop PC. My new spare-parts machine was slowly but steadily generating images with Flux, which was a huge win!

To find out how it measured up to my desktop machine, I fired up AUTOMATIC1111 on my desktop PC (Animal) and on my new Forge container (Forge), set them each to use the same model(s) and on identical settings, and started cranking out some images!
| Prompt | Batch Size |
Batch Count |
Total Images | Image Sample | Speed | Time (MM:SS) |
|
|---|---|---|---|---|---|---|---|
| Forge | ((USS Enterprise)) ((the next generation)) photorealistic |
1 | 1 | 1 | image | 1.03 it/s | 00:20 |
| Animal | ((USS Enterprise)) ((the next generation)) photorealistic |
1 | 1 | 1 | image | 1.30 s/it | 00:27 |
| Forge | A ((little league baseball game)) with (bleachers full of fans) |
1 | 12 | 12 | image | 1.02 it/s | 04:04 |
| Animal | A ((little league baseball game)) with ( bleachers full of fans) |
1 | 12 | 12 | image | 1.28 s/it | 05:18 |
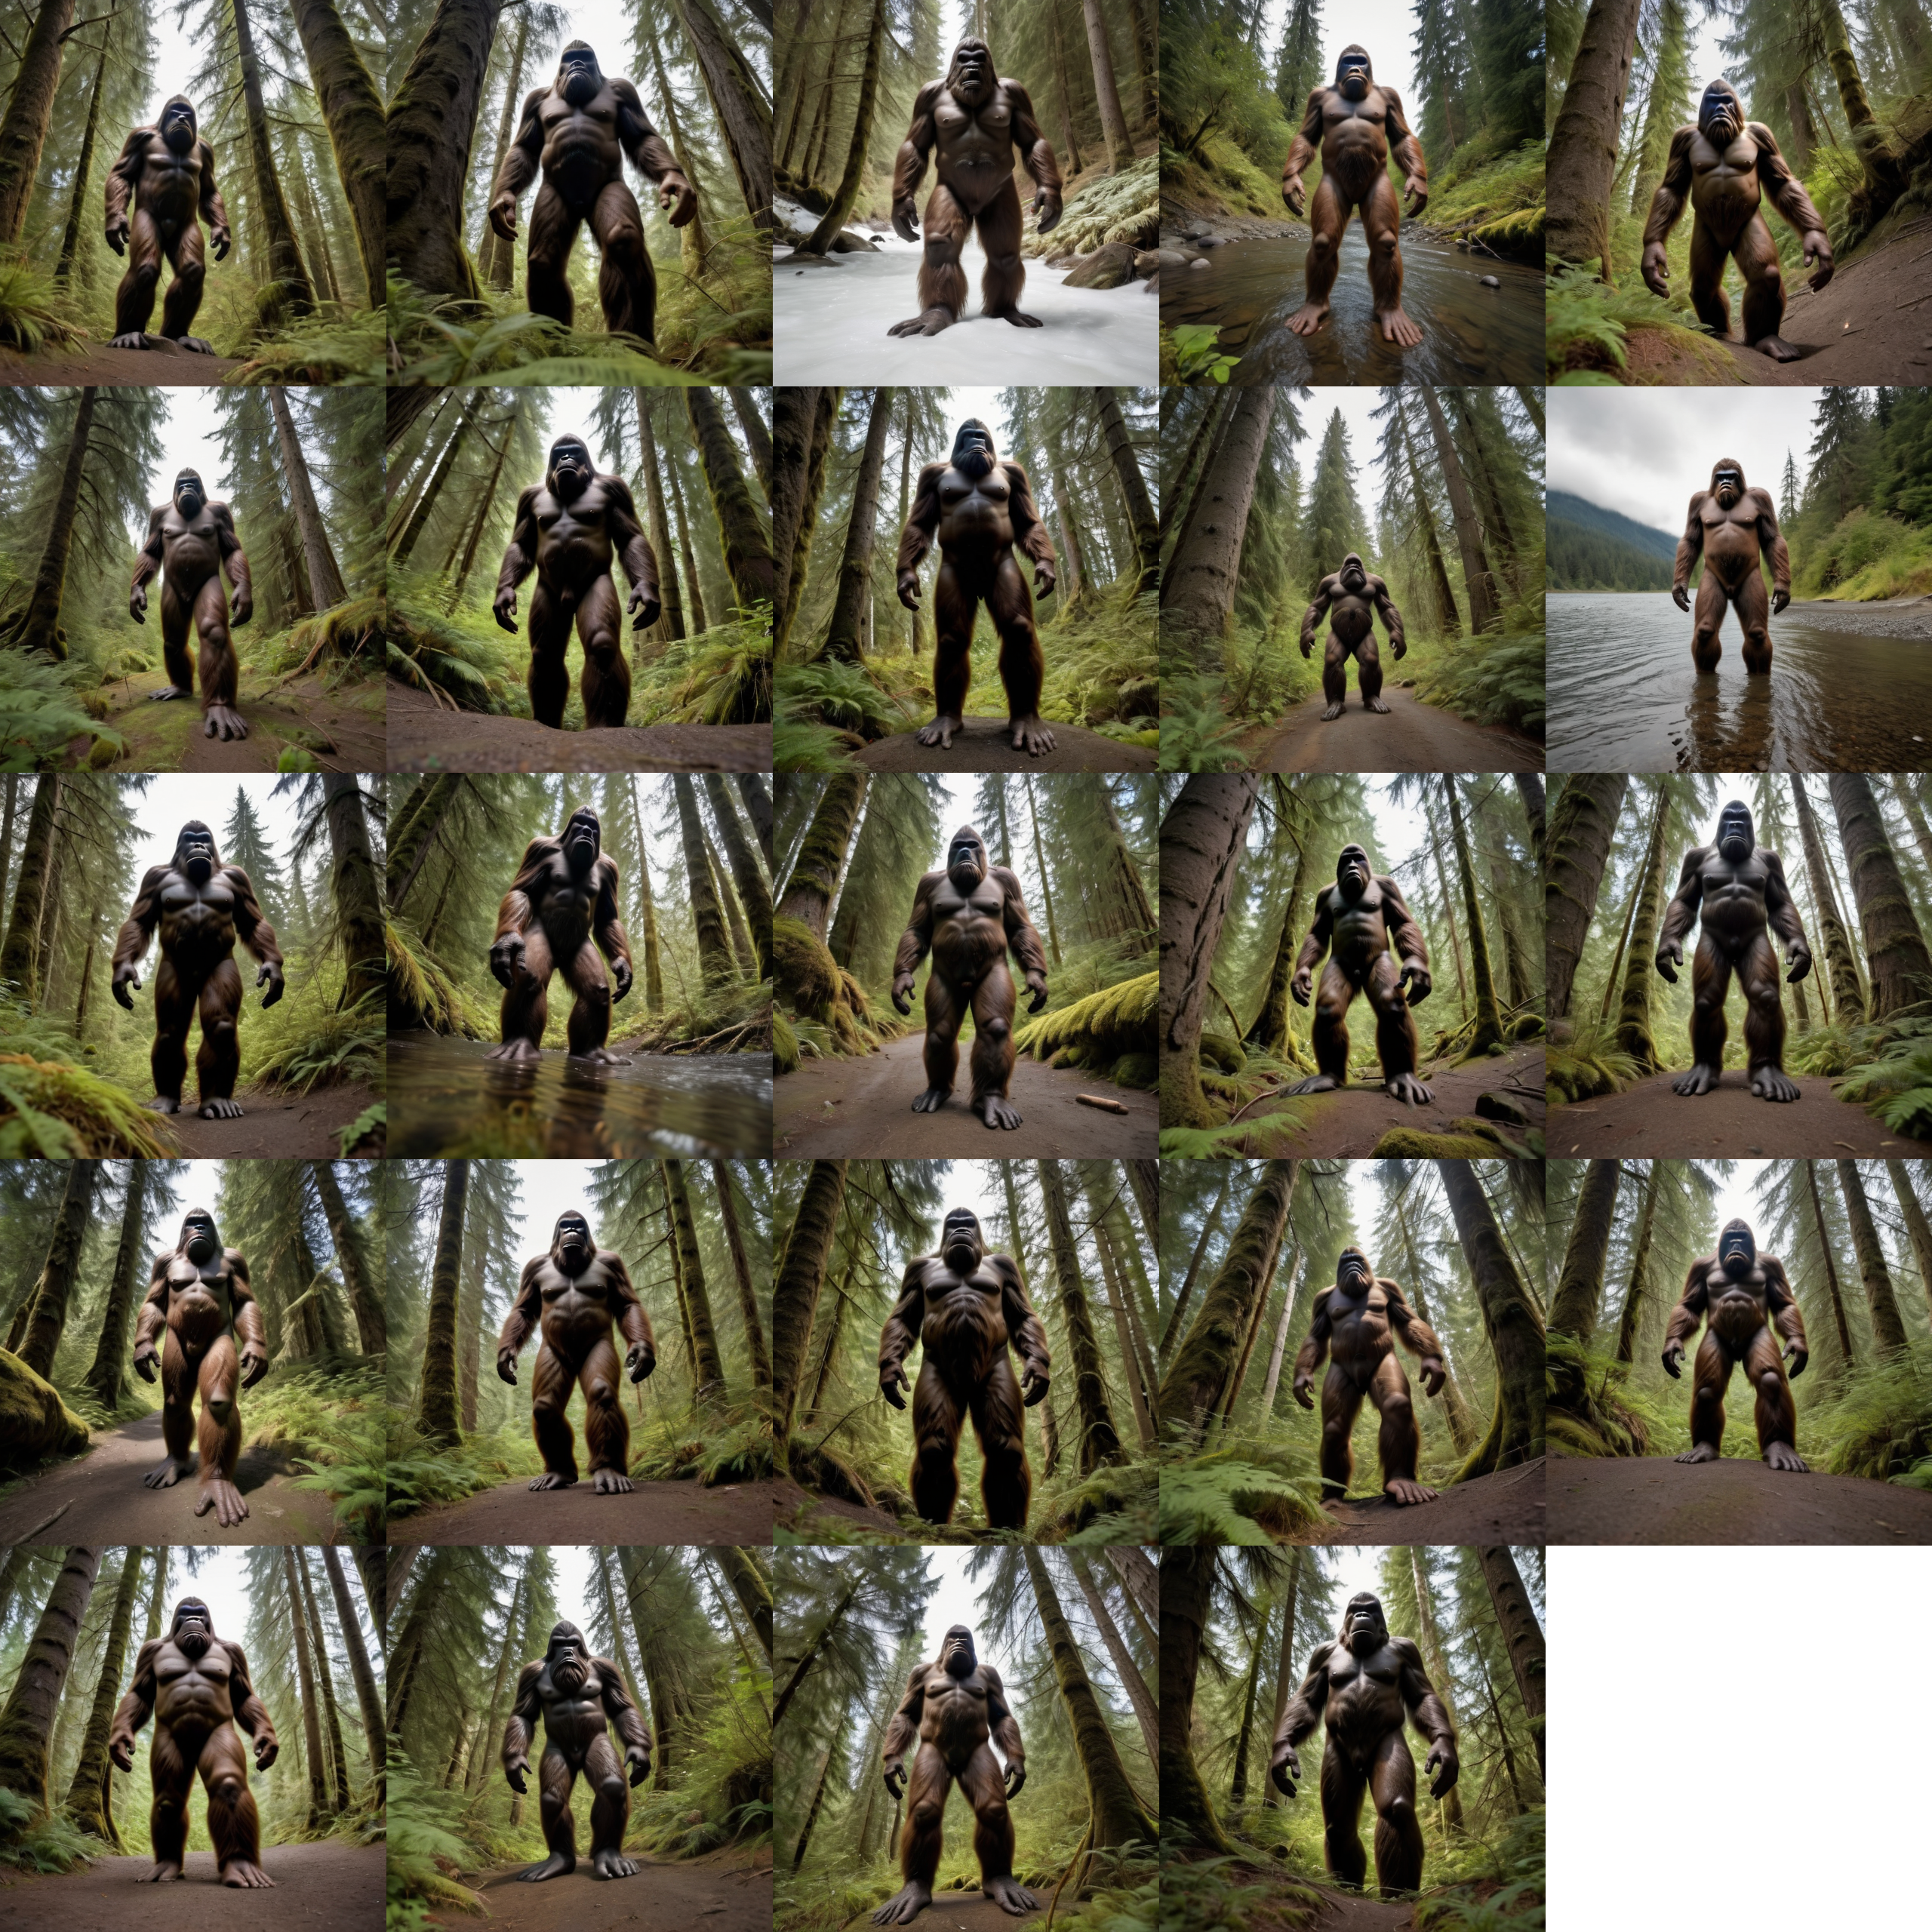
| Forge | (wide angle) (shallow depth of field) photo of ((((bigfoot)))) in the (pacific northwest) |
8 | 3 | 24 | image | 6.60 s/it | 06:52 |
| Animal | (wide angle) (shallow depth of field) photo of ((((bigfoot)))) in the (pacific northwest) |
8 | 3 | 24 | Fail | Fail | Fail |
| Forge | a (bearded middle-aged man) wearing a ((blue baseball cap)) while tasting ((a flight of beers)) |
4 | 5 | 20 | image | 2.15 s/it | 03:09 |
| Animal | a (bearded middle-aged man) wearing a ((blue baseball cap)) while tasting ((a flight of beers)) |
4 | 5 | 20 | Fail | Fail | Fail |
| Forge | a (((frustrated man))) ((screaming at a computer)) on his (wooden desk) |
2 | 10 | 20 | image | 1.71 s/it | 05:54 |
| Animal | a (((frustrated man))) ((screaming at a computer)) on his (wooden desk) |
2 | 10 | 20 | image | 2.65 s/it | 08:52 |
Note: As image generation slows down, the measurement of speed flips from iterations-per-second (it/s) to seconds-per-iteration (s/it).
To be honest, I was a little surprised at the results. When AUTOMATIC1111 on my local machine worked, I expected its superior hardware to outperform my spare-parts server. My desktop has a much more powerful CPU (Ryzen 9 5900X), faster RAM, and a much more modern GPU (AMD Radeon 7900XTX) than my janky AI server. But that’s not what happened here. When generating images, my new spare-parts server regularly outperformed my desktop computer!
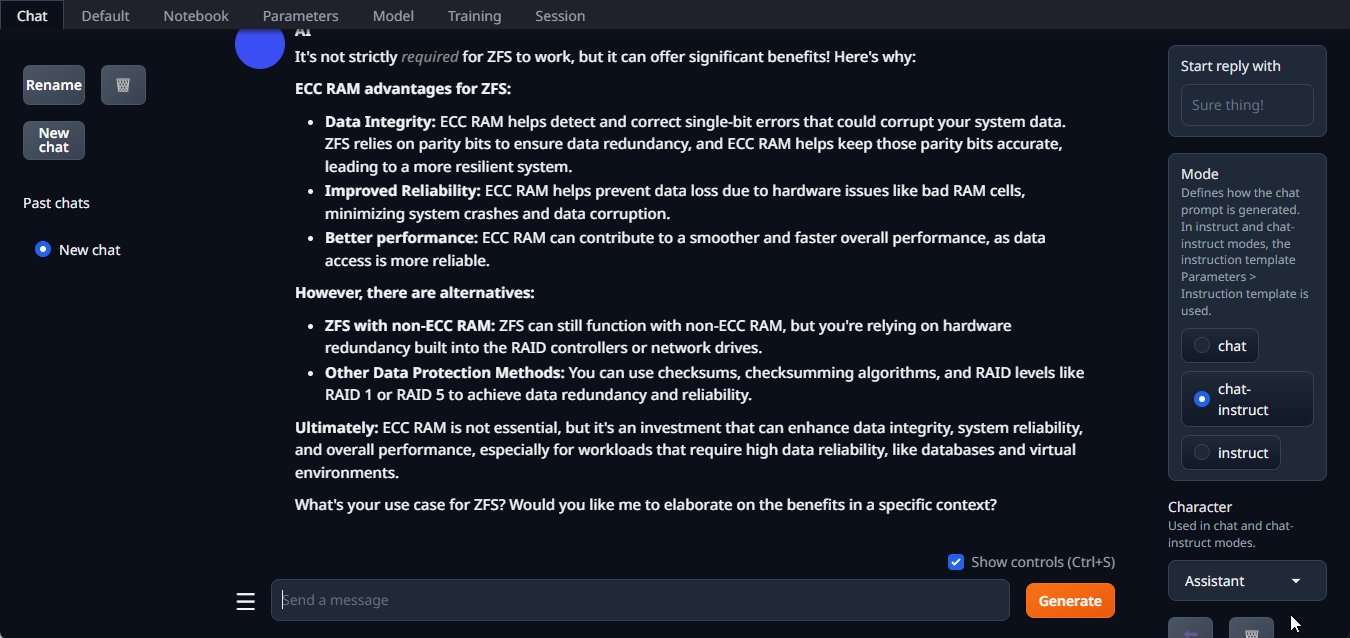
Text Generation
At first, I was not tremendously impressed with the text generation that I wound up doing in Oobabooga, and because I’ve subscribed to ChatGPT for a long time, I’ve never done any text generation locally on my desktop PC. I tinkered with quite a few different models and had results as slow as 2 tokens/second and as fast as 20 tokens/second.
- GPT-4o Mini Vs. My Local LLM
- Harnessing the Potential of Machine Learning for Writing Words for My Blog
It’s my impression that with these large language models (LLMs), the speed of the GPU is very important. The Tesla M40’s is nearly a decade old. I decided that the models that were hitting 12 or more tokens/second were useable, and I was happy with their outputs. I plan to continue tinkering with different models and hope to find something that’s speedier.

If you’ve got a suggestion for a LLM that you think I should try, let me know in the comments or in Discord!
You probably shouldn’t do this, but I am glad that I did!
I really love that just as I was considering spending a considerable amount of money upgrading my homelab machine with a modern GPU, I found an $85 dollar Tesla M40 GPU with 24GB of VRAM. Combined with a bunch of spare parts lying around the house, I was able to tinker with image generation and text generation without breaking the bank.
Unless you’ve got a ton of spare parts lying around the house and room to set up yet another PC, I’m not sure if I’m a good example to follow. It’s also important to keep in mind that the Tesla M40 is a great value because it is capable and it is quite inexpensive, however its capabilities pale when compared to modern GPUs
Final Thoughts
I started this wanting to learn whether I’d find ways to make use of putting a GPU into a homelab or DIY NAS machine. Having done this today, I absolutely can envision that my next upgrade of either my DIY NAS or homelab servers will include at least one PCIe x16 slot for a GPU a lot like this Nvidia Tesla M40.
What do you guys think? If you were interested in adding a more capable GPU to your DIY NAS or Homelab server, would you just bite the bullet and buy something full price? Or would you try out something inexpensive like a used Nvidia Tesla M40 like I did? Leave a comment or tell us what you think in the #machine-learning channel in our Discord server!