If you recall, I reviewed an Exway X1 Pro Riot eSkateboard at the beginning of the year. Since then, I’ve been getting more and more active with the skateboard–especially once Pat leveled up the shenanigans with his electric unicycle a few months ago.
 Because I’m a Type 1 Diabetic, I have been bringing along a small backpack on our rides and loaded down with my Diabetic supply carrying case (a.k.a. “The Diabetes”), some assorted snacks, and my water bottle. Once Pat bought his newest electric unicycle, he showed up with his own small backpack laden with his quadcopter and FPV gear–and I was very envious, as it had never occurred to me to bring along my quadcopter gear before!
The next time we went out, I extracted all of my critical diabetic supplies from their case and left it at home. I had just enough room in my small backpack to also include:
- Tinyhawk Freestyle
- Fat Shark HDO2 FPV Goggles
- Taranis X9D Radio
- A handful of 1S 450mah LiPo batteries
What we’d stumbled upon is that not only could we have a decent time going out on our personal electric vehicles, but we could use them to get to places where we couldn’t (or wouldn’t) reach on foot with our usual bulky quadcopter bags.
There’s always a catch!
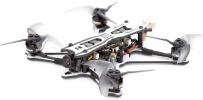 Don’t get me wrong, the Tinyhawk Freestyle is a fantastic little quadcopter at its price. I routinely encourage my friends who are curious about getting into FPV quadcopters to seriously consider buying this as their first quadcopter. Note: Now that the Tinyhawk Freestyle 2 is out, I’ll be encouraging people to buy it instead! As much as I liked my Tinyhawk Freestyle, I had a couple complaints:
- The video transmitter (VTX) is underpowered: At only 25mw, the VTX was underpowered enough that I was constantly having issues flying out of range in the places that we have been flying while on rides.
- It is fragile: The quadcopter’s electronics are mounted in nylon screws and standoffs and the motors haven proven to be quite soft. As a result I’ve found that the Tinyhawk Freestyle has needed a number of repairs.
I’d realized that I’d simply outgrown my Tinyhawk Freestyle and started plotting my own custom micro-quadcopter build to replace it. I was tempted to try the Tinyhawk Freestyle 2 since it addresses one of my major complaints by upgrading the VTX, but I decided it wasn’t that much more money to build something way better.
An upgrade was on the horizon
In riding my skateboard with Pat, I’d discovered that I wanted a small quadcopter that I could easily carry in on a ride, on a hike, or as carry-on luggage to take with us on vacation. I started listing out things that I wanted to see in my next quadcopter:
- Something small and light with 3-inch or smaller propellers
- Flight characteristics more comparable to my 5-inch quadcopters
- As–or more–durable than my 5-inch quadcopters
- As few compromises in VTX and camera quality as possible.
- Using a TBS Crossfire receiver
- Capable of recording stabilized high definition video
Right off the bat, I knew everything except the quality high definition video was doable. However, I was extremely skeptical on getting decent high definition video out of something so small. Both Pat and I had built HD-capable 3-inch quadcopters before using his Kestrel frame and been incredibly disappointed in both Caddx’s and Runcam’s high definition products–they just really couldn’t compete with our GoPros.
I immediately said that the stabilized high definition video was a pipe dream, that investing the money or time in it would be a fool’s errand. Regardless, I was disappointed–I’d really wanted the option of capturing video of places that I might not be as able to bring my other quadcopters to.
Enter the Toothpick
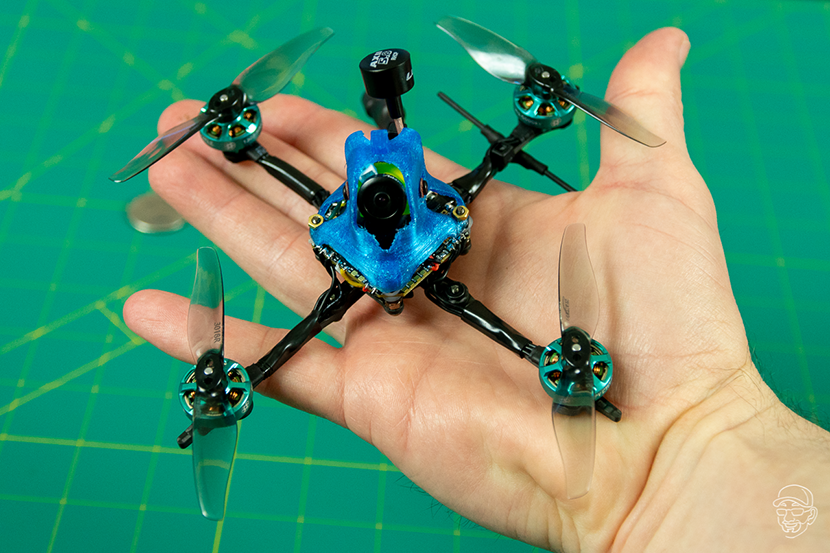
KababFPV is one of my favorite quadcopter content creators. My 5-inch favorite quadcopter is built around one of his frames, and I’m a Patron of Kabab’s on Patreon. Kabab has been talking about Toothpick quadcopters build for a while, and he actually came up with the Toothpick term, defining a whole new class of quadcopters. In Kabab’s own words, he describes the Toothpick as “…intended to be this super fun, super light, super safe, super legal thing you can fly everywhere.” In listening to what I wanted my new quadcopter to be, Pat suggested I pay closer attention to Kabab’s toothpick build, and it did not take me long at all to decide that I wanted to incorporate Kabab’s concepts into my own toothpick build.
Frame
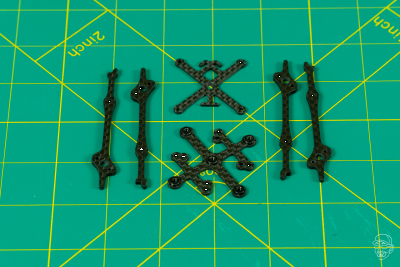
I think the most important and impressive part of my new quadcopter is the Toothpick 3 Frame (TP3). It is small, it is light, and for as small as it is, it is quite sturdy. The arms are made out of 2.5mm carbon fiber which are sandwiched between a 1.5mm carbon fiber top plate and bottom plate.
As a result, the TP3 frame should be pretty easy to disassemble and repair, which is a huge benefit considering how difficult/annoying it can be to work with micro quadcopters.
Motors and Propellers
When it comes to the performance of the quadcopter, the motors are probably equally as important as the frame. I opted to adhere to Kabab’s recommendation and went with the FPVCycle 1303 5000KV Motor, a motor that Kabab himself helped design and test specifically for his toothpick build.
 The motors are super smooth, and the secret sauce for this quadcopter’s performance is its power-to-weight ratio. The power that these motors put out makes the quadcopter feel as if it is performing at much like one of my 5-inch quadcopters.
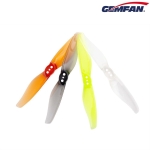
For propellers, I’ve picked up a handful of the Gemfan Bi-bade 3018 and Gemfan Tri-blade 3016 propellers. For the battery size I picked–3 cell 450mah–Kabab had recommended using the bi-blade propellers, which are the only propellers I’ve used so far the 20 or so times I’ve flown it.
Flight Controller
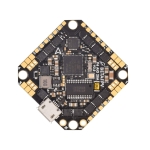 In choosing a flight controller, I deviated from Kabab’s suggestions. I opted to go with the BetaFPV Toothpick F4 V2. At the time that I started buying parts, the recommended flight controllers were becoming difficult to find and the BetaFPV Toothpick F4 V2 was a new product that’d been well reviewed in a number of places. I was also curious about its higher amperage rating. Particularly in that it might mean an additional degree of reliability for my own build–or to prove out that this might be a good choice for an even bigger build, like something with motors big enough to drive 4-inch propellers.
FPV Camera, Video Transmitter, and Antenna
 Because I’d decided that the high definition video was a feature I was going to have to compromise on, I decided that I’d be happy to just record my FPV footage using my DVR, the ImmersionRC PowerPlay. Because of this, I decided that I wanted both a premium camera and video transmitter (VTX) to improve that DVR footage as much as I possibly could.
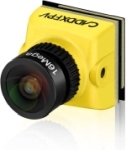
For the camera, I chose the Caddx Baby Ratel over the recommended Runcam Nano 3 largely because our friend, Brian, had built. We call him “young Brian,” but he’s more well known by attackthedefault on YouTube. I was impressed by the quality of the picture when I had tuned my goggles into his quad and even more impressed when I learned that the camera only weighed 4.6g.
When it came to choosing a quality micro video transmitter, the TBS Unify Pro32 Nano 5G8 is regularly identified as the best. The fact it can broadcast at 400mw and barely weighs anything (1g) made choosing it a simple decision. Especially since it is a tremendous upgrade over what’s currently in my Tinyhawk Freestyle.
 In fact, this weekend I found just how impressive the TBS Unify Pro32 Nano 5G8 really is. I’ve been having issues for weeks with the video feed in my goggles: I keep losing signal and running into degraded signal in places where I didn’t use to have problems. However, I didn’t have any of those problems with my tiny quadcopter and simply assumed that I needed new VTXes for my other quadcopters. I confirmed this weekend that it was my goggles’s video receiver that was the issue by borrowing Pat’s goggles. But I’m really impressed that the TBS Unify Pro32 Nano 5G8 performed well enough that I was fooled into thinking my other quadcopters’ VTXes were to blame.
Lastly, for the FPV antenna I picked the Lumenier Micro AXII U.FL 5.8GHz Antenna (RHCP). I use a smorgasbord of different AXII antennas for sending and receiving video signals in my quadcopters and on my goggles. In fact, after using Lumenier Micro AXII in this quadcopter, I’ve decided that it’s probably going to be what’s used on all of my quadcopters in the future, not just this micro one.
Receiver and Antenna
 I’m a big fan of the TBS Crossfire radio module added to my Taranis X9D+, and I use a variety of Crossfire receivers in nearly all of my quadcopters. As a result, one of my biggest complaints about whoop-style quadcopters has been the fact that none of them came with Crossfire as an option. Sure, it could be added separately–but why go through that work to make the micro quadcopter heavier with redundant hardware? Especially in a quadcopter class where weight is incredibly important.
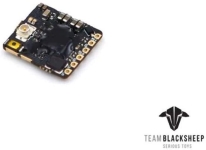
Building my own Toothpick meant I had the freedom to add a TBS Crossfire Nano receiver. And by manufacturing the TBS FPVCycle MiniMortal T Crossfire Antenna, TBS seems to be realizing there’s a demand for their products on micro-sized quadcopters too.
Canopy and Battery
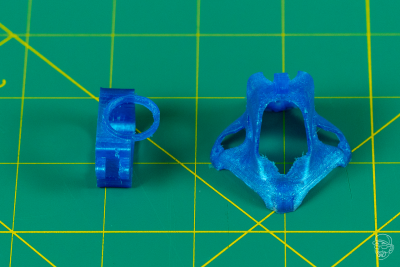
Kabab’s suggested parts list included using a BeeBrain V2 Canopy which is both super lightweight and an inexpensive option. I chose instead to put my 3D Printer to work and use something different. I wound up choosing to print the Toothpick PicklePod. I preferred its design and features–especially the camera mounting options–over the BeeBrain.
To power my Toothpick quadcopter, I wound up buying a bunch of the GNB 3S 11.4V HV 450mah batteries to add to my battery collection. There wasn’t any special reason that I picked this particular 3S 450mah battery other than the fact that it was one that was readily available when I was ready to make a purchase.
High Definition Camera
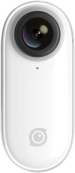 You might be asking yourself right now, “Didn’t Brian say he scrapped the idea of high definition video recording?” And you know what? I did! I apologize if I’ve misled you. As I was waiting for parts to get back in stock and to ship, I learned that Insta360 had upped the maximum recording length on their Go camera to 5 minutes, which immediately made the Insta360 Go camera a viable option for my toothpick quadcopter!
The Insta360 Go is a high definition action camera which allows you to process and stabilize the recording in either a mobile app or desktop application. The stabilization is very much like what I already do with Reelsteady Go and the footage from my GoPro cameras taken atop my 5-inch quadcopters. I’ll tackle this in a future blog, but I’m tremendously excited about the possibilities opened up by the Insta360 Go.
Final Parts List
| Component | Name | Count | Weight | Cost |
|---|---|---|---|---|
| Frame | ToothPick 3 Frame | 1 | 10g | $17.99 |
| Motors | FPVCycle 1303 5000kv | 4 | 6g | $12.99 |
| Flight Controller | BetaFPV Toothpick F4 V2 | 1 | 6.63 | $59.99 |
| Propellers | Gemfan 3018 Bi-blade Props | 1 | 0.75g | $3.99 |
| FPV Camera | Caddx Baby Ratel | 1 | 4.6g | $30.99 |
| Video Transmitter | TBS Unify Pro32 Nano 5G8 | 1 | 1g | $29.95 |
| Video Antenna | Lumenier Micro AXII U.FL | 1 | 1.6g | $19.99 |
| Receiver | TBS Crossfire Nano RX | 1 | 0.5g | $24.95 |
| Receiver Antenna | TBS FPVCycle MiniMortal T | 1 | 0.9g | $3.99 |
| Battery | GNB 3S 11.4V HV 450mah | 6 | 42g | $10.49 |
| Canopy | Toothpick PicklePod2 | 1 | ||
| HD Camera | Insta360 Go (optional) | 1 | 18.3g | $199.99 |
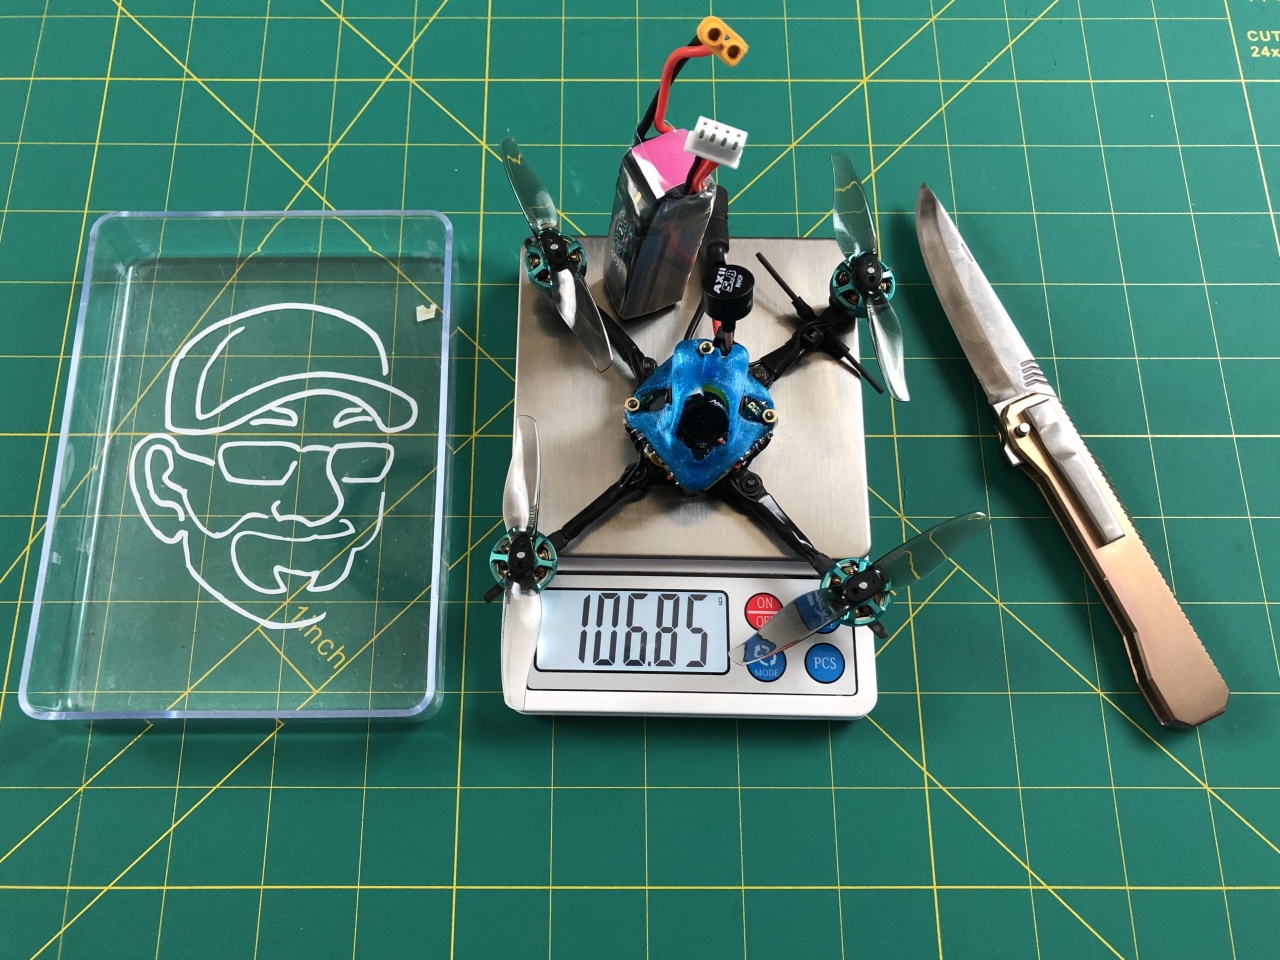
| TOTAL | 107g | $254.29 |
Please Note: The total weight comes from being weighed after we got done assembling it and that weight does not include the Insta360 Go. In a similar vein, the calculated total price only includes one battery and one set of propellers.
Hidden Costs
Before rendering a verdict on whether or not I think that I did a good job (Spoiler Alert! I did a good job!), I think it’s prudent to make sure to mention hidden costs. We wound up spending quite a bit of time and frustration assembling this quadcopter and getting it configured and tuned. But beyond that, extra frustration was spent on waiting for parts to be in stock and dealing with the world’s economy hitting a major speed bump.
I don’t know about you all, but I place a tremendous amount of value on my free time. That’s why I’ve been such a big fan of the Tinyhawk Freestyle and would’ve seriously considered the Tinyhawk Freestyle 2 had it been released before I had convinced myself to build my own 3-inch Toothpick quadcopter.
But did I really do a good job?
I think I did, yes. I accomplished everything that I set out to do–even something that I’d said wasn’t going to be feasible: recording stabilized high definition video. I’ve managed to build a Swiss Army knife of a quadcopter, the Toothpick quadcopter:
- is small enough I can carry it lots of places I wouldn’t want to take the rest of my quadcopter gear
- performs quite similarly to my 5-inch quadcopters
- can capture stabilized high definition video
- performs well at longer ranges
- will be durable
I’ve been trying really hard to think of a good way to write this, but each time I have tried rewriting it, it sounds like a backhanded compliment. My 3-inch Toothpick build doesn’t fly better than my bigger quadcopters and it doesn’t record better high definition video than my bigger quadcopters either, but it enables me to lightly pack my quadcopter gear, hop on my skateboard, ride six or seven miles, and fly my quadcopter somewhere I may never have even considered–and may never have the opportunity to fly again. I mean this in the most complimentary way possible. It’s a jack of all trades, but master of none. Mission accomplished!
How do you all think I did? Does a tiny 3-inch quadcopter that can record stabilized high definition video interest you at all? Let me know what you think in the comments below!


