
Update (9/18/2020): IFTTT is implementing paid service model and severly limiting their “free” offering. As a result, I’m ditching IFTTT and replacing it with Home Assistant and I recommend you do the same!
Back when I was involved with our local makerspace, I really wanted to help show off the 3D Printers that the makerspace had purchased. At that time, access to the printers and Pat’s 3D-Printing expertise were among the best reasons to become members of the makerspace. As the guy with the keys to the makerspace’s social media accounts, I really wanted people to share pictures and videos of everyone’s 3D prints so that we could showcase what our members had been up to.
In fact, I was so enamored with the printers’ outputs–I had expressed my intentions of finding a way of capturing pictures of what people printed and automate the sharing of those prints. Unfortunately, the enclosed-style printers that they had at the makerspace (and that I bought to use at home) simply prevented getting a decent picture of the items printed on the printers.
Fast-forward a year or two and I’ve decided to upgrade my old Qidi Technology I – Dual Extruder 3D Printer with something newer. I opted to upgrade to a Prusa I3 MK3 3D Printer. Among its features was an open design that was infinitely more friendly to capturing the time-lapse photography that I had been wanting to do previously.
Affiliate Disclaimer: Some of the links on this website are affiliate links, meaning, at no additional cost to you, I may earn a commission if you click through and make a purchase. I only recommend products that I believe will add value for my audience. Please understand that I have experience with all of these companies' products, and I recommend them because they are helpful and useful, not because of these small commissions.
Enter OctoPrint, Octolapse and OctoPrint-IFTTT
OctoPrint
![]() For those of you unfamiliar, OctoPrint is a fantastic print controller for your 3D printers. OctoPrint runs on a Raspberry Pi and manages your 3D printer; it’s got a fantastic feature set and I can’t recommend it enough to anyone who owns a 3D printer. The moment I’d completed my purchase of the Prusa I3 MK3, I started shopping for a Raspberry Pi, and wound up buying a CanaKit Raspberry Pi 3 B+ Kit whose job it’d be to manage my new 3D printer.
For those of you unfamiliar, OctoPrint is a fantastic print controller for your 3D printers. OctoPrint runs on a Raspberry Pi and manages your 3D printer; it’s got a fantastic feature set and I can’t recommend it enough to anyone who owns a 3D printer. The moment I’d completed my purchase of the Prusa I3 MK3, I started shopping for a Raspberry Pi, and wound up buying a CanaKit Raspberry Pi 3 B+ Kit whose job it’d be to manage my new 3D printer.
My first 3D print on the Prusa I3 MK3 was Pat’s Mounting Brackets with Swivel for Logitech C270 and C920 Web Camera which works so nicely with the inexpensive IKEA Tertial work lamp.
After a little bit of work, I had my Logitech C922 Webcam attached to the Tertial work lamp in place of the lamp, and mounted to my 3D printer’s stand and ready to record time-lapses of all my prints.
OctoPrint has some time-lapse photography features built right into it, but it’s pretty basic. The pictures are taken throughout the print job and the print head was frequently in different positions, oftentimes obscuring the printed object. I’d dug around the Internet a bit and learned that people have improved the quality of their own prints’ time-lapse photography by working with their slicing programs to generate the appropriate GCode on every single layer change. What they do is send the code to move the bed and print head to the same position on each layer and get that to coincide with the time-lapse photography.
Octolapse
Thankfully, there are options for people who don’t want to have to monkey with settings to insert custom GCode on every layer, like me. A very handy OctoPrint plug-in exists named Octolapse. As I understand it, Octolapse interprets and analyzes the GCode uploaded and handles inserting the correct GCode to improve your time-lapse videos. Just working through the few set-up steps improved my videos dramatically!
But after viewing a few of my first couple time-lapse videos, I still had a few complaints about what I was seeing:
- Too Darn Bright: My beer-stein lamp is right next to the 3D Printer, and while it’s a fantastic source of light to keep my office lit to what my specifications are, it was washing out everything in the videos of my prints.
- Lights turning on and off!: Over the duration of my prints, my home automation had been turning the lights in my office on and off. In the time-lapse, every now and then you’d see a chunk of frames with the lights in either position and it annoyed me that the videos’ lighting wasn’t consistent the whole way through.
- Not Automated Enough: I was thrilled to be getting the time-lapse of my 3D prints captured, finally. But I was still disappointed that I was having to manually find the files, download them to my PC, and share them on my own.
The first two problems were solved pretty easily by just manually turning the lights off and keeping them off during my prints. But as I was turning lights off and manually uploading time lapse videos to my social media accounts, I wondered what it’d take to do this in a more automated fashion.
OctoPrint-IFTTT
And then, out of nowhere, OctoPrint let me know via a notification that a brand-new plug-in had been published, OctoPrint-IFTTT. I’ve been using IFTTT for a smorgasboard of automated activities for years now and I eagerly installed the new plug-in and got started tinkering with it.
Now about those lights!
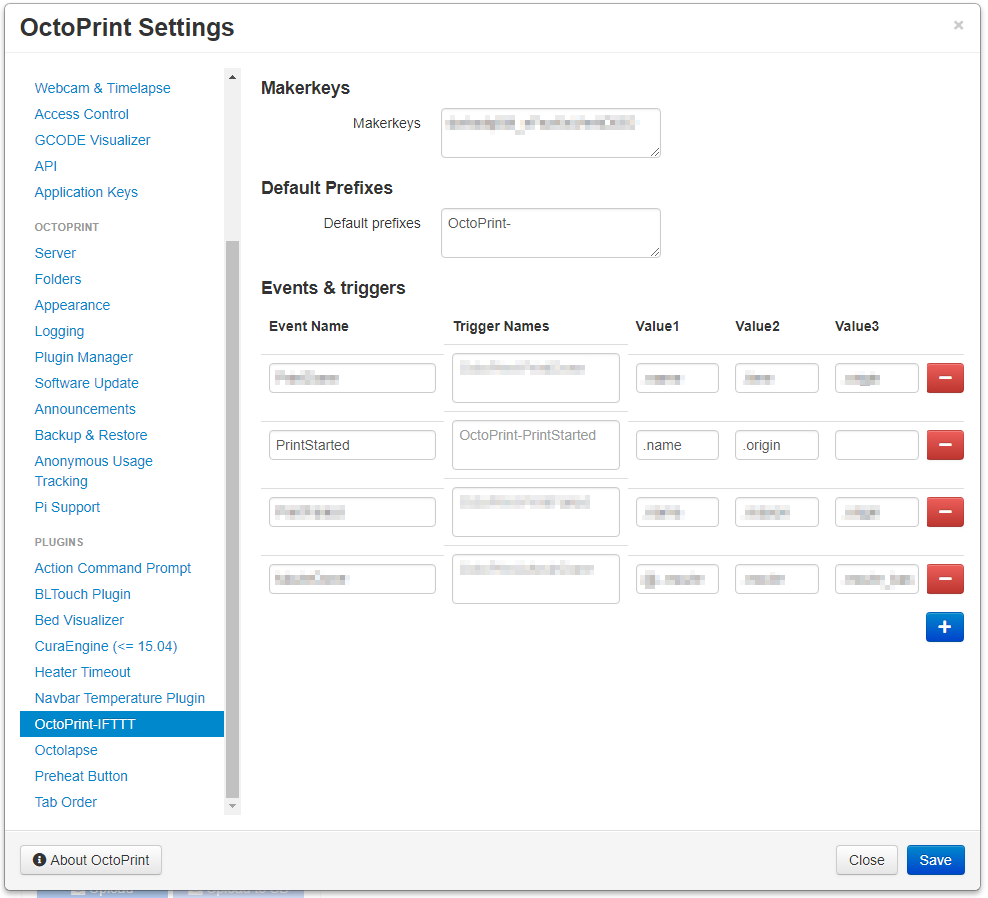
For whatever reason, the combination of my Logitech C922, the colors of my various rolls of IC3D ABS filament, and my nearby beer-stein lamp resulted in all of my videos looking really washed out. White filament almost appeared to be glowing and was so bright, it was devoid of features. Bright green filament looked practically pastel, and my red filament wound up looking pretty pink. So the first thing that I did was configure OctoPrint-IFTTT to call IFTTT’s Webhook with OctoPrint’s PrintStarted event and then tied it to the trigger I had set up to automate turning off my beloved beer-stein lamp.
Making it a bit darker in the room when my 3D printer is active improved the filament from looking to be so washed out and I was mostly happy with the results. I think ultimately I probably need to do a bit of research and experimentation to find the best lighting for these time-lapse videos, but I’m pretty excited that I can automate that solution to be triggered by my 3D printer’s activity.
Publish the Time Lapse Videos Automatically
After studying the supported OctoPrint events, I knew what I wanted to take a look at next: the MovieDone event. On the surface, it seemed like it’d be a simple task to trigger IFTTT to post my time-lapse videos to Twitter using IFTTT, but in the initial releases of OctoPrint-IFTTT, that wasn’t possible. The file’s path and name was just being passed as a string on to the IFTTT actions and not the actual file content.
I reached out to the developer, tjjfvi on GitHub, and submitted a feature request. The developer was gracious enough to offer me a few tips and in the process we found that (for what I’d been looking) IFTTT was expecting to be passed a URL where the file was accessible. We came up with a solution that’d allow IFTTT to pull it directly from my OctoPrint server, but that’d involve exposing my OctoPrint server to the Internet and that seemed like not the greatest of ideas.
However, by the end of the day, the developer had put out a beta version using the file.io file-sharing. If asked, the OctoPrint-IFTTT would upload the file to file.io, which returned a URL that could then be sent on to IFTTT for performing whatever action you wanted done. Unfortunately, I couldn’t find any actions in IFTTT that’d upload video clips to either my Twitter account or blog’s Facebook Page. Ultimately, I wound up adding IFTTT’s competitor, Zapier, into the mix as well. In the end, what I built seemed convoluted, but it worked!
Brian’s Time-Lapse Sharing Automation
- OctoPrint-IFTTT creates a webhook to IFTTT at the completion of creating a time-lapse video and triggers activity that uploads the video to a particular folder in my Google Drive account.
- Zapier monitors Google Drive and when a new file is uploaded to the specified folder, it is uploaded to my YouTube channel.
- Using IFTTT, I created two new actions to share the YouTube video’s URL to both Twitter and Facebook.
What’d I think?
I was–and still am–pretty excited to have achieved a goal that I’d had in my head for quite a while. But in this particular case, most of the value wound up being found in the travel–not in the actual destination. I knew that automating the sharing of these videos would be formulaic, but I wound up being turned off by what showed up in my social media feed. I also didn’t quite appreciate how convoluted the automation wound up being. I was reliant on far too many different services working independently of each other in the hopes of accomplishing my task.
In the end, a somewhat convoluted process to generate a formulaic result seemed like a bad combination to me. However, I did decide to go ahead and keep the initial step that results in the time-lapse being uploaded to Google Drive. Having the time-lapse videos up on Google Drive would make sharing them to social media quite a bit simpler.
What’s Next?
To be honest, I don’t know! Regardless of the fact that I wasn’t a huge fan of how it turned out, I’m still pretty in shock that one of the more meaningful goals was achieved. I probably would appreciate adding a couple new IFTTT applets to send me a Pushover notificationon my mobile devices when a print finishes or failed. I think maybe it’d be neat just to keep a Google Spreadsheet to log all the different prints I’ve done and how long they took. What sort of functionality would you like to see triggered in IFTTT by your 3D printer?