
Over a decade ago, I decided to build my very first DIY NAS. I wanted to build something with a small form factor because I was steadily running out of room on my desk. In addition to wanting something small, I wanted it to be low power and relatively quiet while it stored backups from all of our computers. My needs from my DIY NAS have grown over the past thirteen years, but I’m very dialed in to my requirements from back when I started this journey.

My first NAS had a total of 8TB of storage capacity (4x2TB HDDs). Over the years, it has amused me to watch as hard drives eclipse that first NAS’s total capacity. 8TB NVMe SSDs even exist today–but not necessarily at prices where I’d be interested them, at least not yet.
After learning that Topton was selling a Pocket NAS Mini PC and doing a smidge of research, I realized that I could rebuild a tiny version of my very first NAS, except that this NAS would be much smaller, consume way less power, have faster networking, would fit comfortably in my backpack, and it’d be less expensive than what I spent building my first NAS–especially if you adjusted for inflation!
Affiliate Disclaimer: Some of the links on this website are affiliate links, meaning, at no additional cost to you, I may earn a commission if you click through and make a purchase. I only recommend products that I believe will add value for my audience. Please understand that I have experience with all of these companies' products, and I recommend them because they are helpful and useful, not because of these small commissions.
Pocket NAS Mini PC
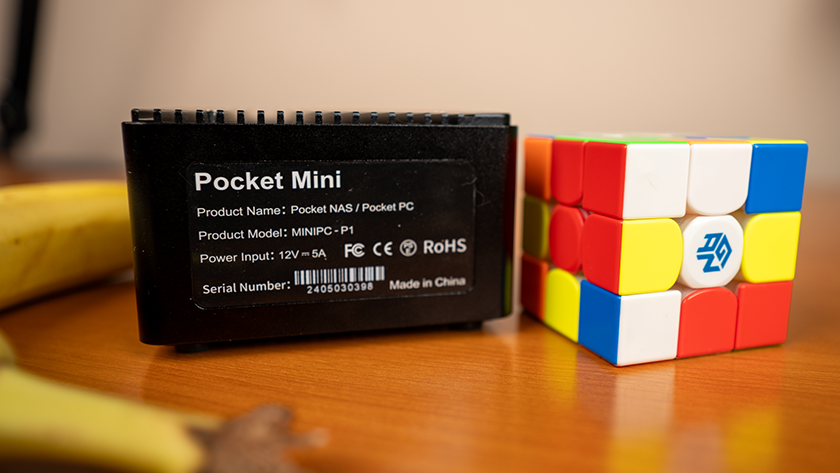
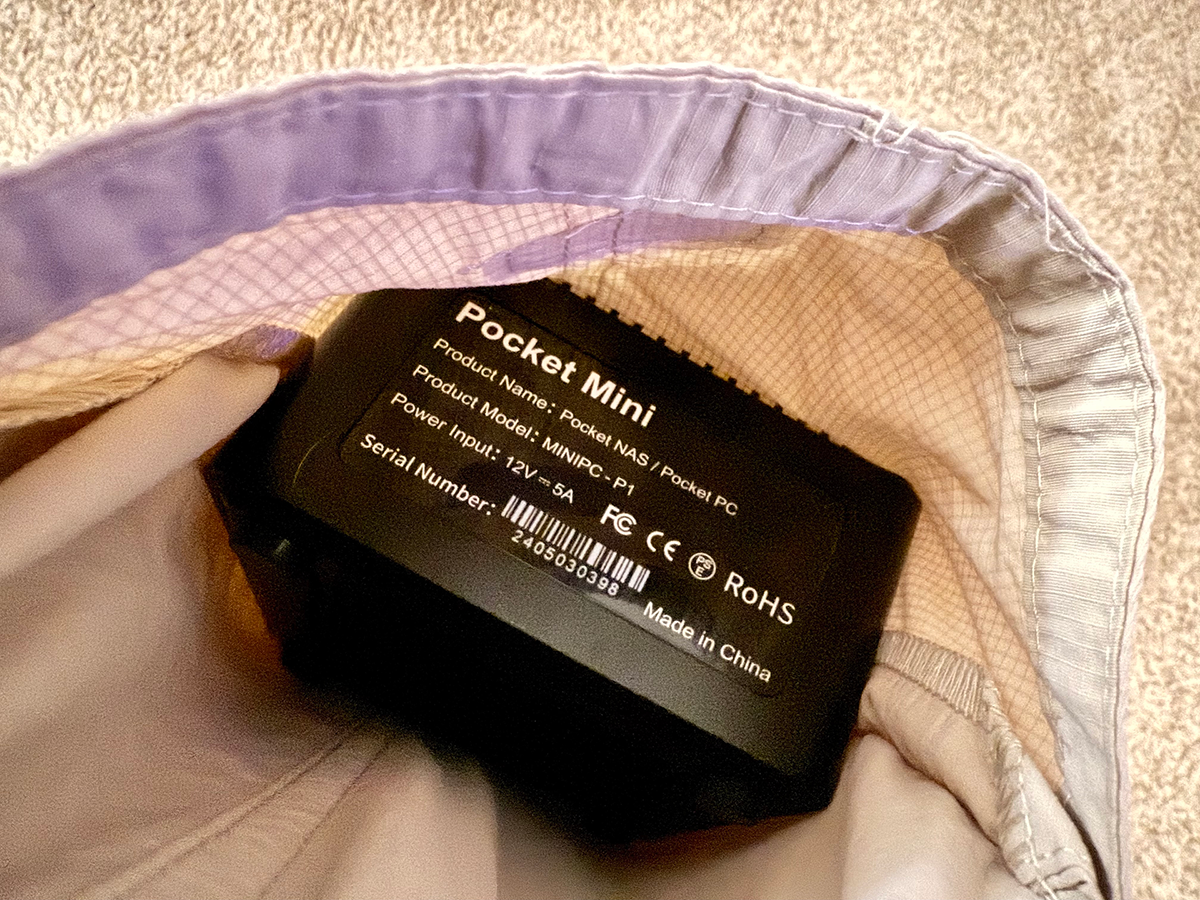
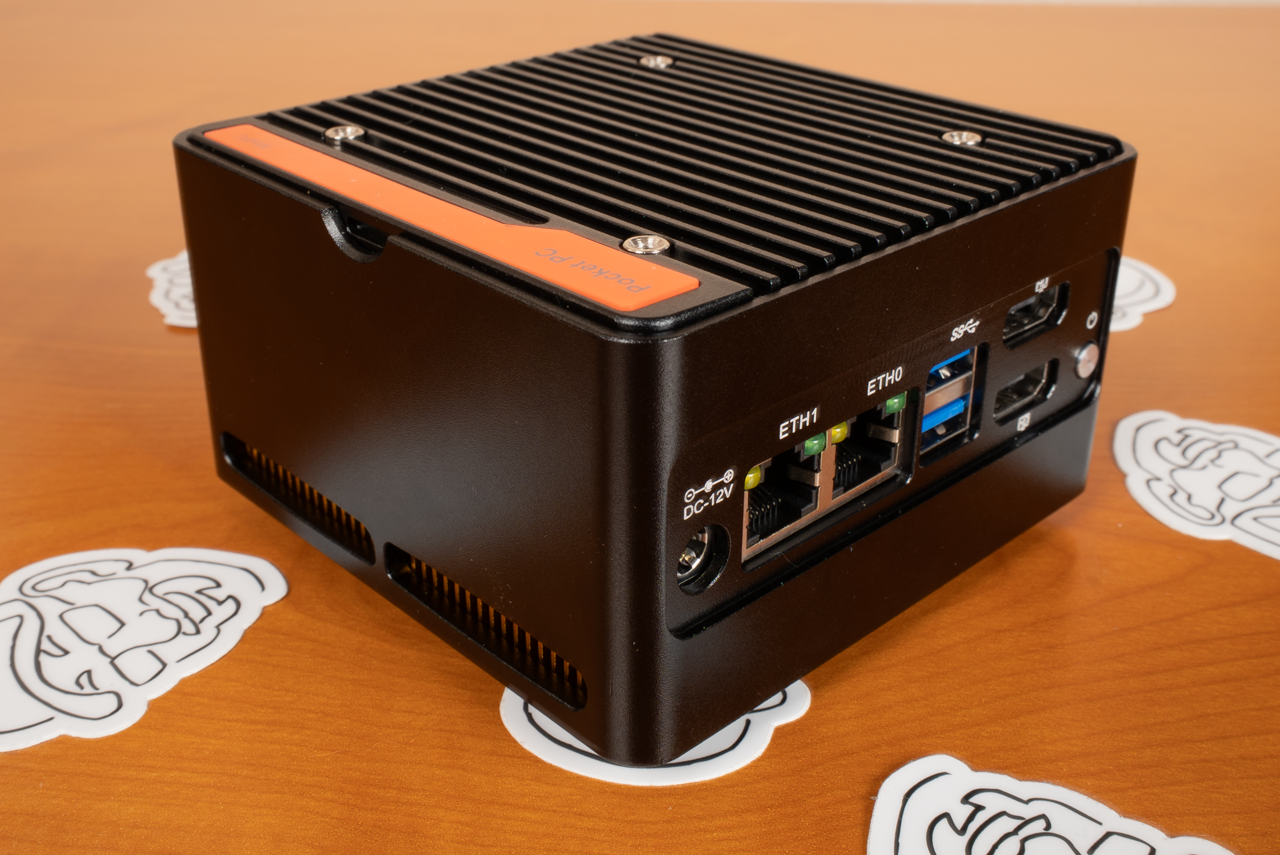
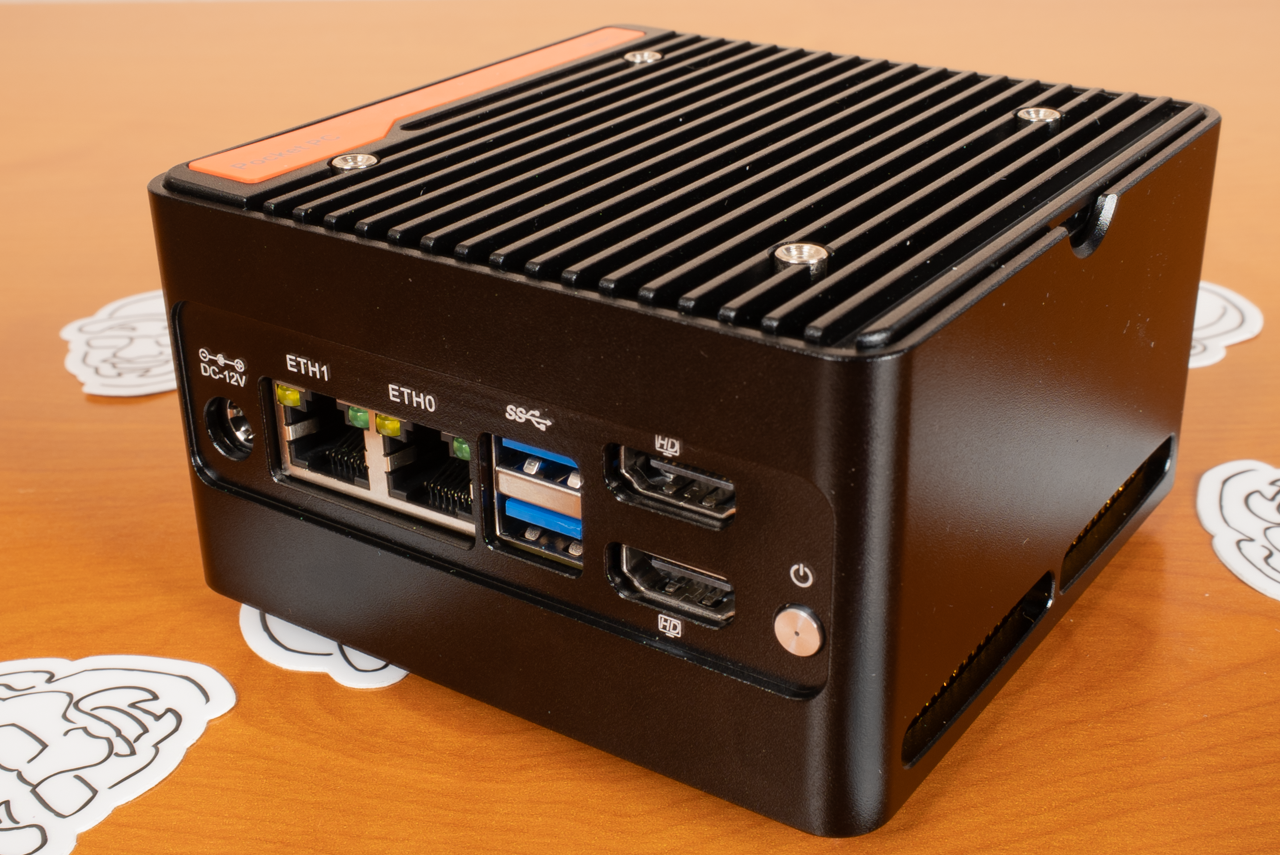
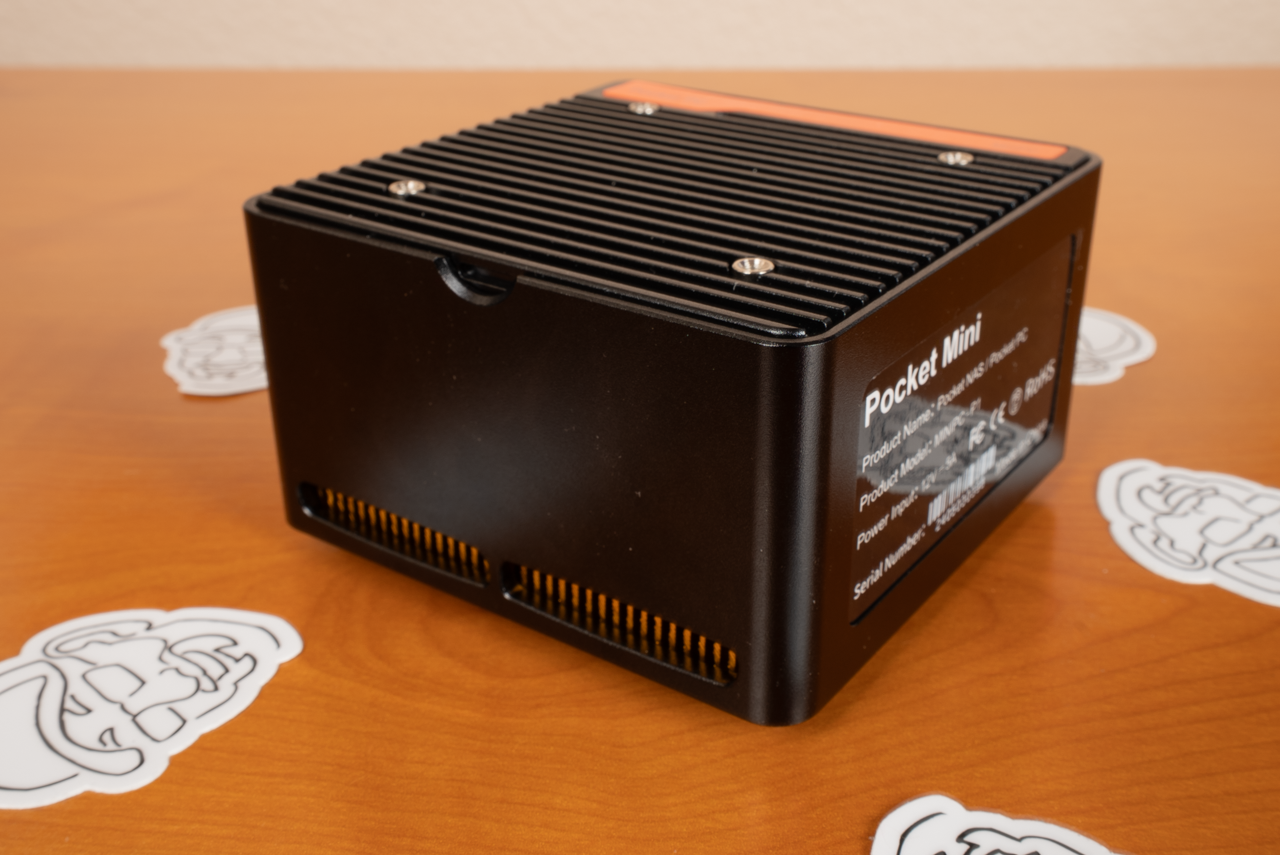
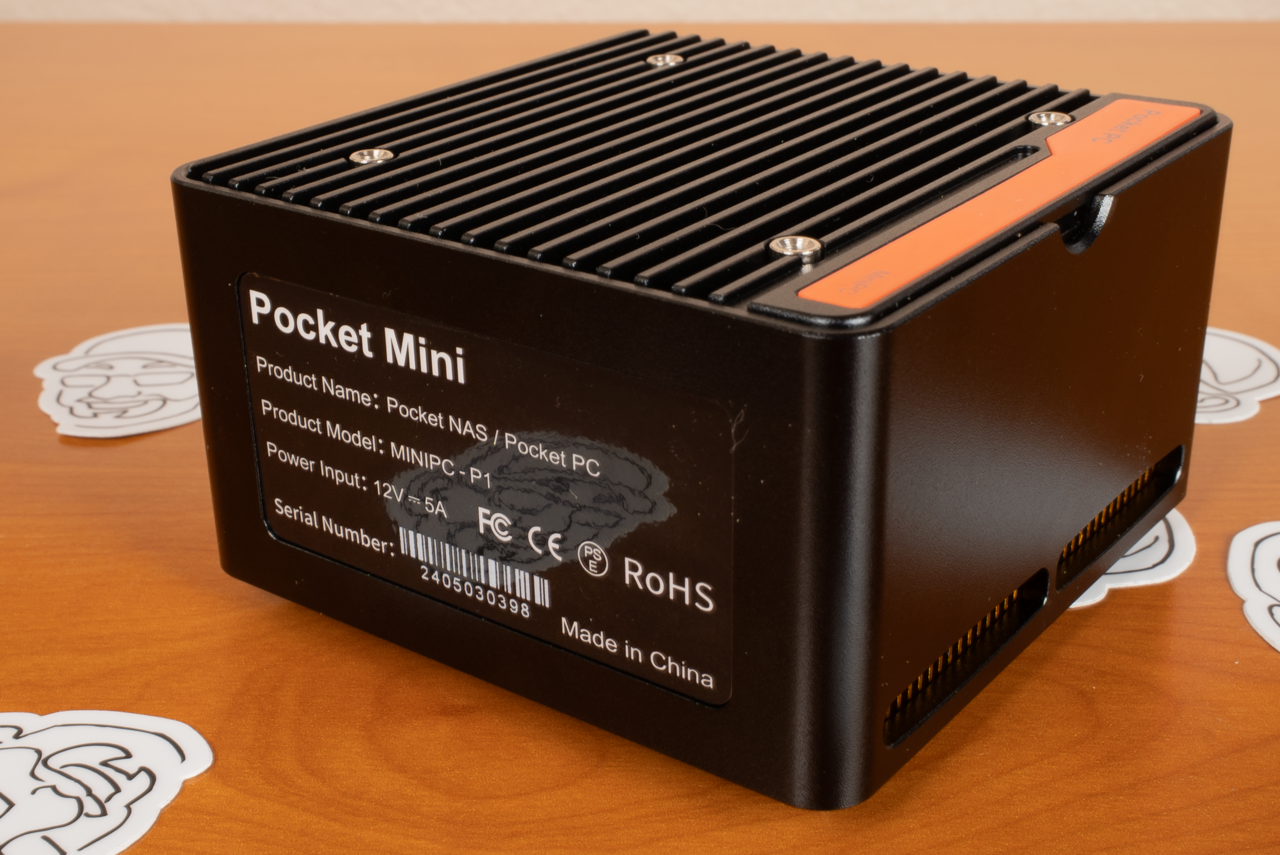
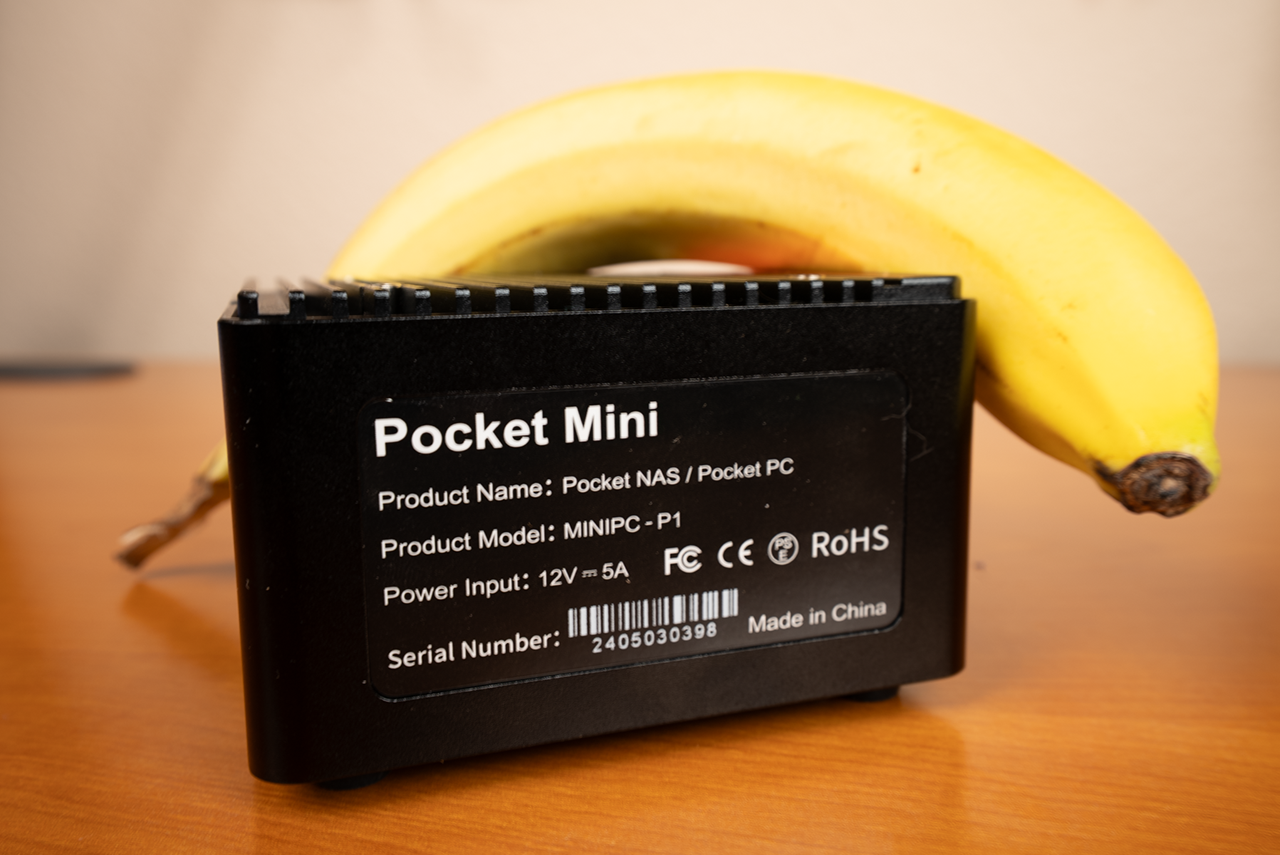
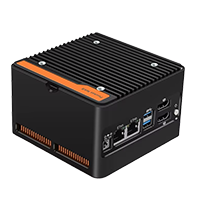 On paper Topton’s Pocket NAS Mini PC is really fascinating to me. The case itself seems miniscule at 100mm by 100mm by 58.5mm. The case is constructed of aluminum, with the top cover acting as a heat sink for the four M.2 NVMe slots (more on those later). And it is literally pocket-sized! It took some squeezing, but I was able to cram it into the pocket of my favorite pair of cargo shorts! Carrying it around in that pocket was awkward as heck, but the very fact it fit into my shorts pocket was pretty amazing to me.
Here are my other favorite features of the Pocket NAS Mini PC:
- Various CPU Options: Intel N100, Intel N150, Intel Core i3-N305, and Intel Core i3-N355
- 1x DDR5 SODIMM Slot
- 4x M.2 NVME 2280 (each at PCIe 3.0 x1)
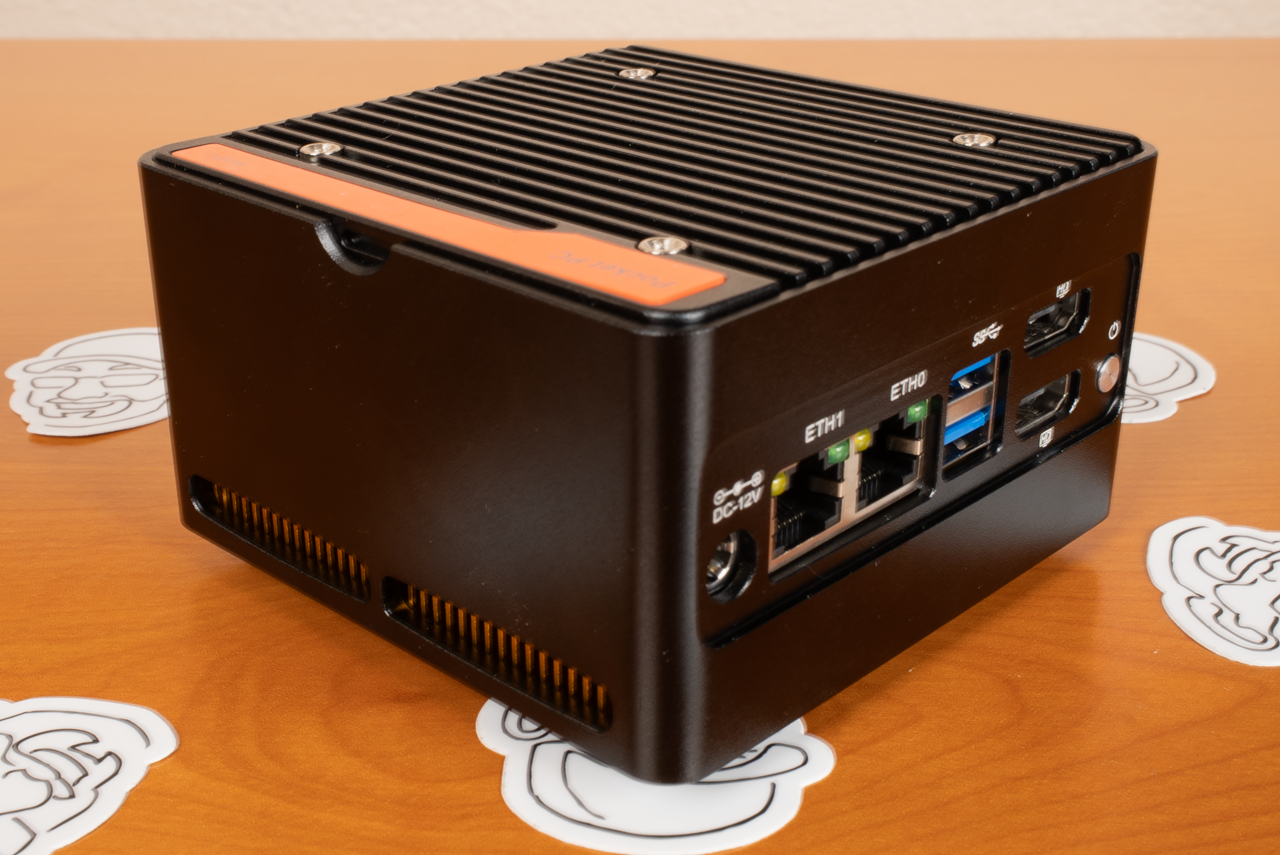
- Dual Intel i226-V 2.5Gbps NICs
- 100mm X 100mm x 58.5mm (~0.58L)
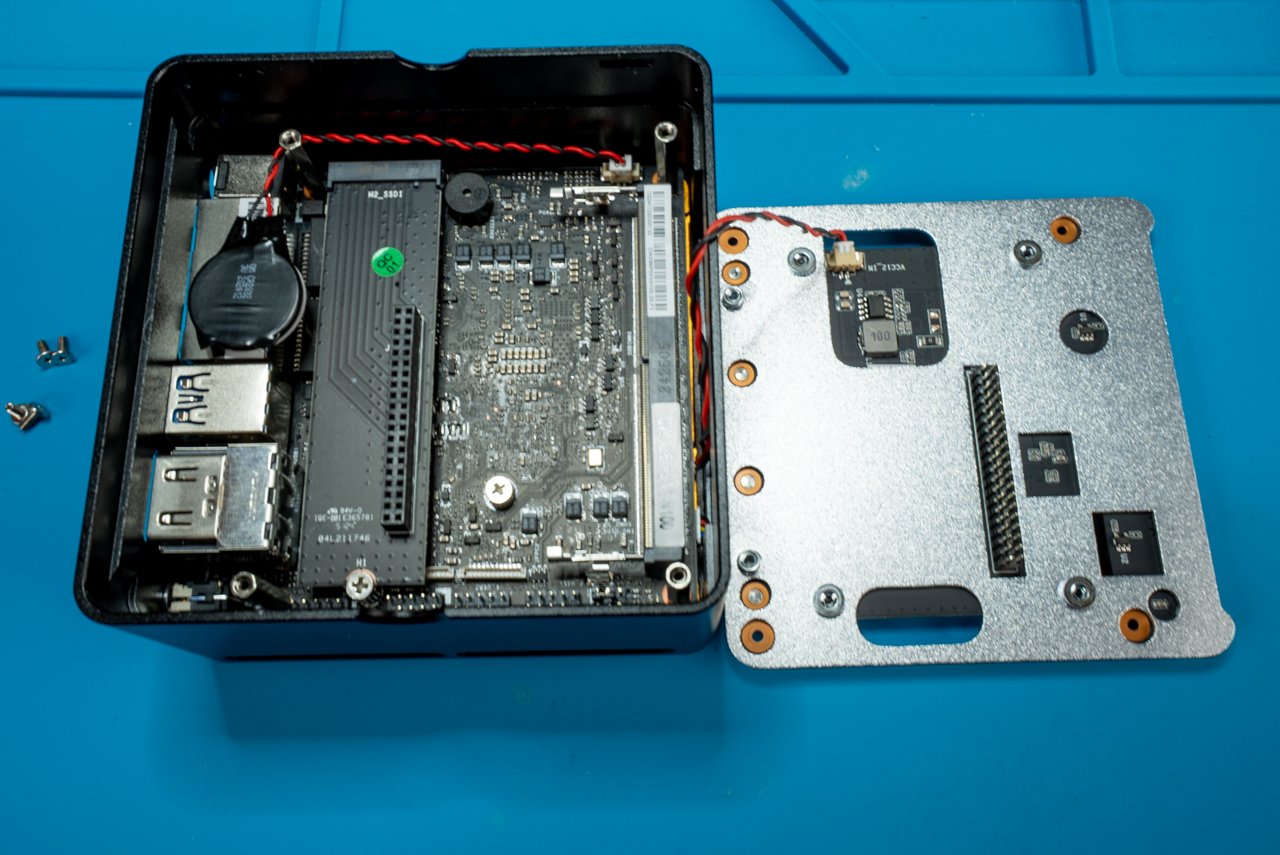
As is the case with the other CPUs related to the N100, there are only 9 PCIe lanes supported by the CPU. As a result, compromises had to be made in the Pocket NAS. Its X86-P5 motherboard has a single M.2 NVME (x4) slot which is broken out by a daughterboard into four M.2 NVME (x1) slots. Because most NVMe SSDs are x4 devices, this represents a potential bottleneck. Each of the Pocket NAS Mini PC’s four M.2 slots are still capable of throughput measuring nearly 1GB/s, which is still quite speedy! When considering this compromise, I think it’s important to clarify that the primary bottleneck of serving files is almost always going to be the speed of your network.
RAM
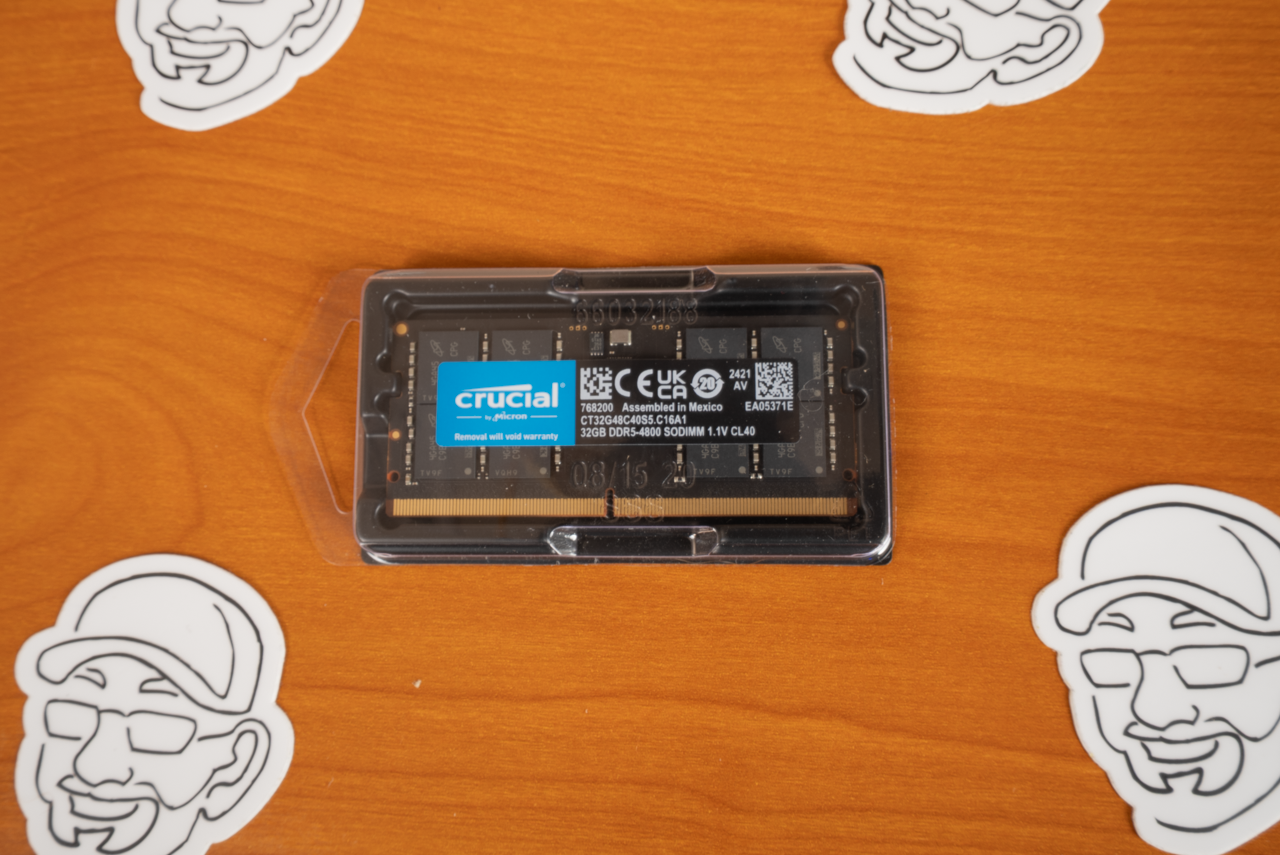
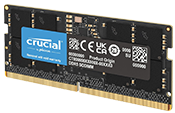 Because I’ve been selling a lot of the Topton N18 N100 Mini-ITX NAS motherboards (6xSATA3, 2xM.2, 2x2.5Gbps, 1x10Gbps) on eBay, I’ve had a need to have some extra DDR5 RAM. I went ahead and bought a a 64GB kit of 2x32GB Crucial DDR5 SODIMM. I put one of the kits’ 32GB DDR5 SODIMMs in the Pocket NAS and the other SODIMM went into my cache of spare parts. Unless you also want a leftover 32GB DDR5 SODIMM, ordering a single 32GB DDR5 SODIMM is probably a better idea for you!
For what I envisioned this little NAS could be used for, 32GB could be excessive. If you’re on a budget, dialing back a 16GB DDR5 SODIMM is a reasonable cost savings (~$20).
Storage
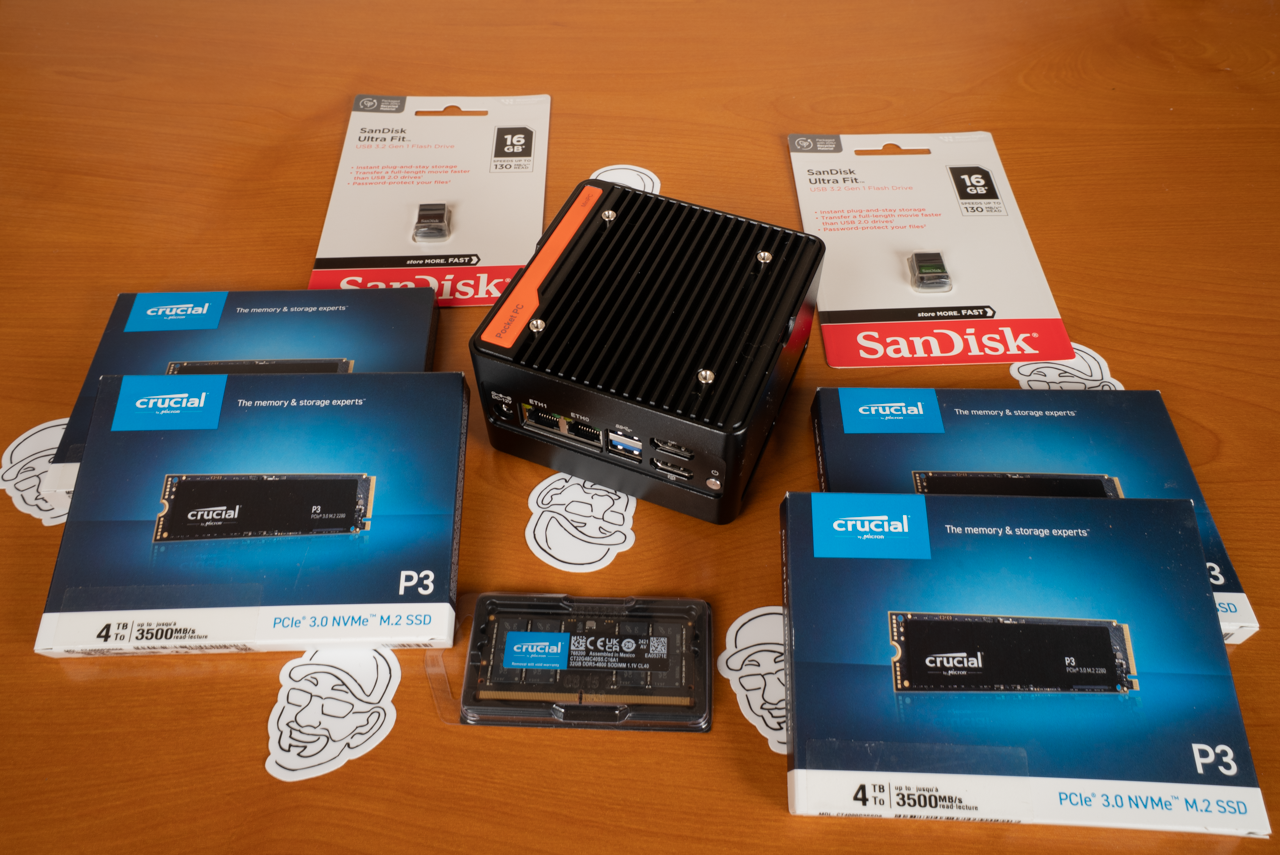
Storage for the Pocket NAS was the biggest challenge for two reasons: limited number of slots (4x M.2 NVMe 2280) and the price of the drives that go into the M.2 slots. I’ve been wanting to build an all-SSD NAS for a long time, but the cost of storage has always been prohibitive.
Boot Drive
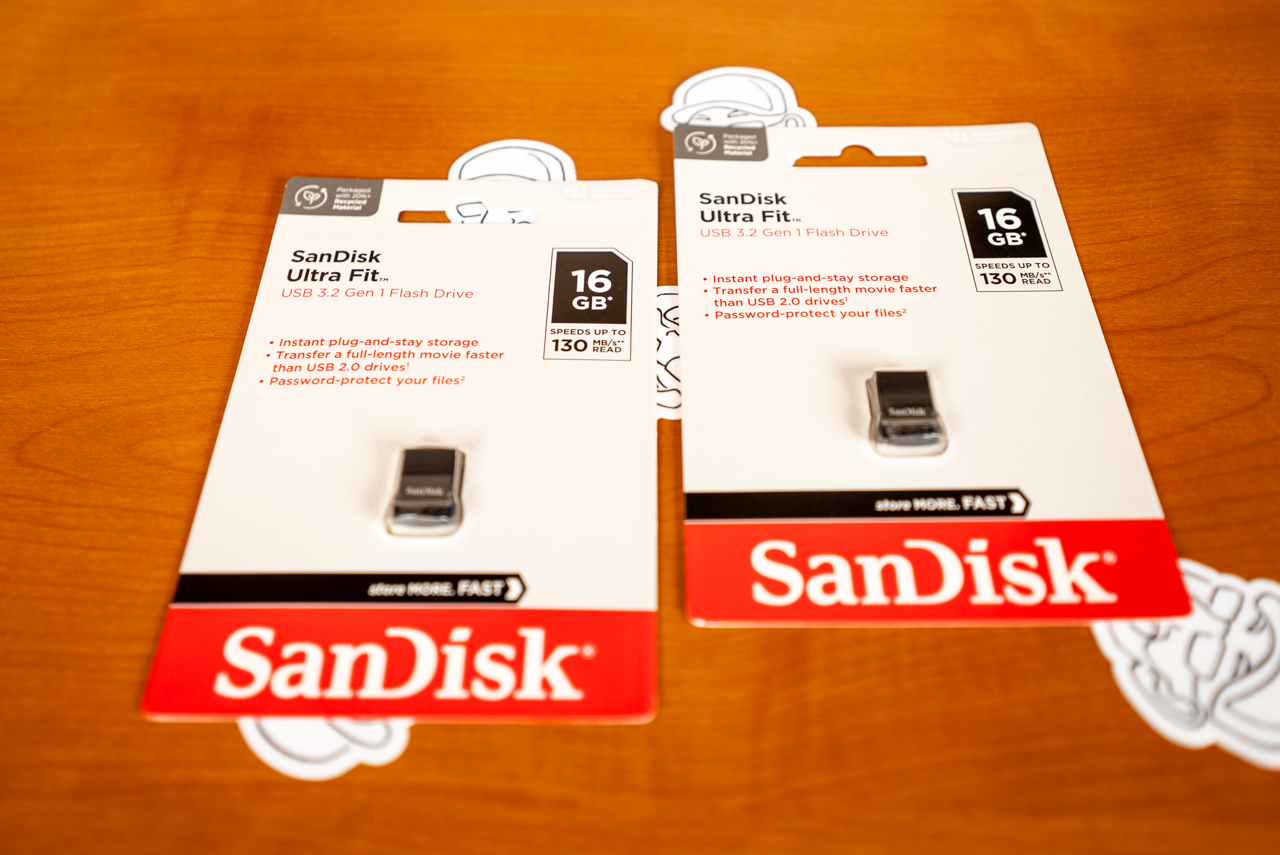
 To maximize the amount of storage that I could squeeze into the Pocket NAS, I reverted back to a behavior from my very first DIY NAS and I bought a pair of SanDisk Ultra Fit 16GB USB drives. I simply couldn’t justify wasting one of the four M.2 NVME 2280 slots on the boot drive.
However, I did consider a few other options before making this decision:
- A USB to M.2 NVMe adapter and a small, inexpensive NVMe drive.
- Modifying the TrueNAS installation script to create a small partition for TrueNAS on one of the NVMe drives.
- Considered other storage appliance options (Unraid) which are designed to run off a USB flash drive.
Ultimately, I decided that the durability risk of using USB flash drives was simply worth the reward of being able to use all four of the Pocket NAS’ M.2 slots for user storage.
User Storage
 My goal for this Pocket NAS was to build something equivalent, but hopefully better, than my very first NAS in terms of cost and storage capacity. I had a certain dollar figure in mind when I started shopping and quickly learned that my budget from my first NAS allowed me to buy much larger drives than the 2TB HDDs I put in my NAS back in 2012!
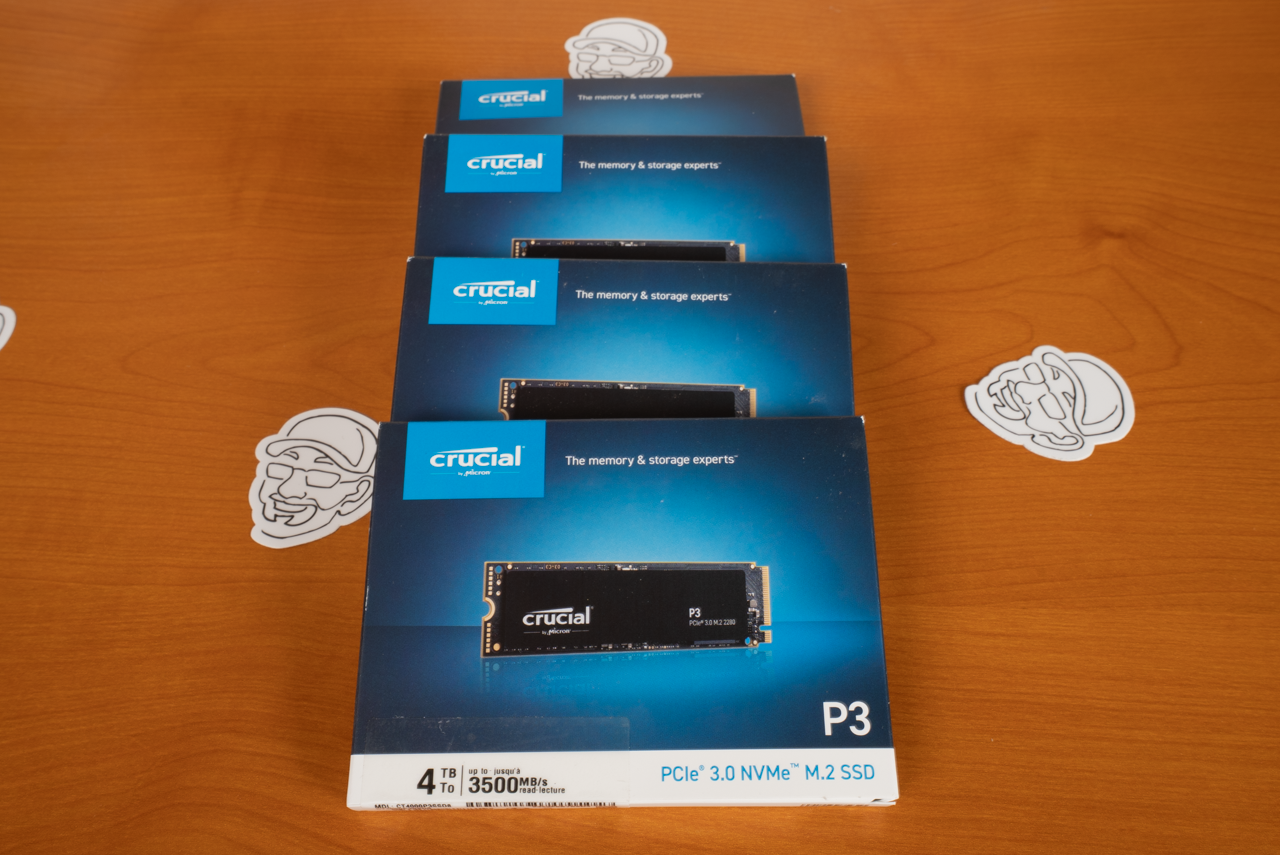
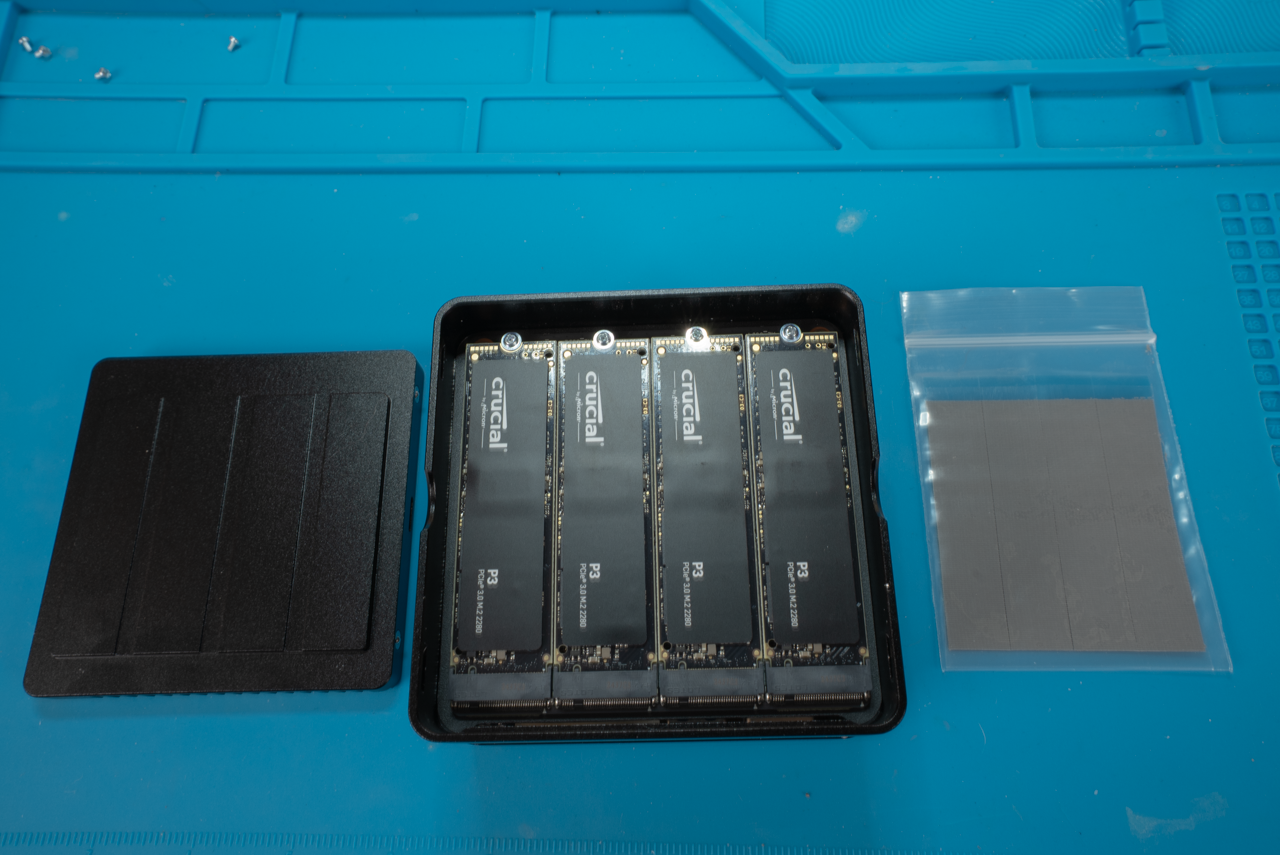
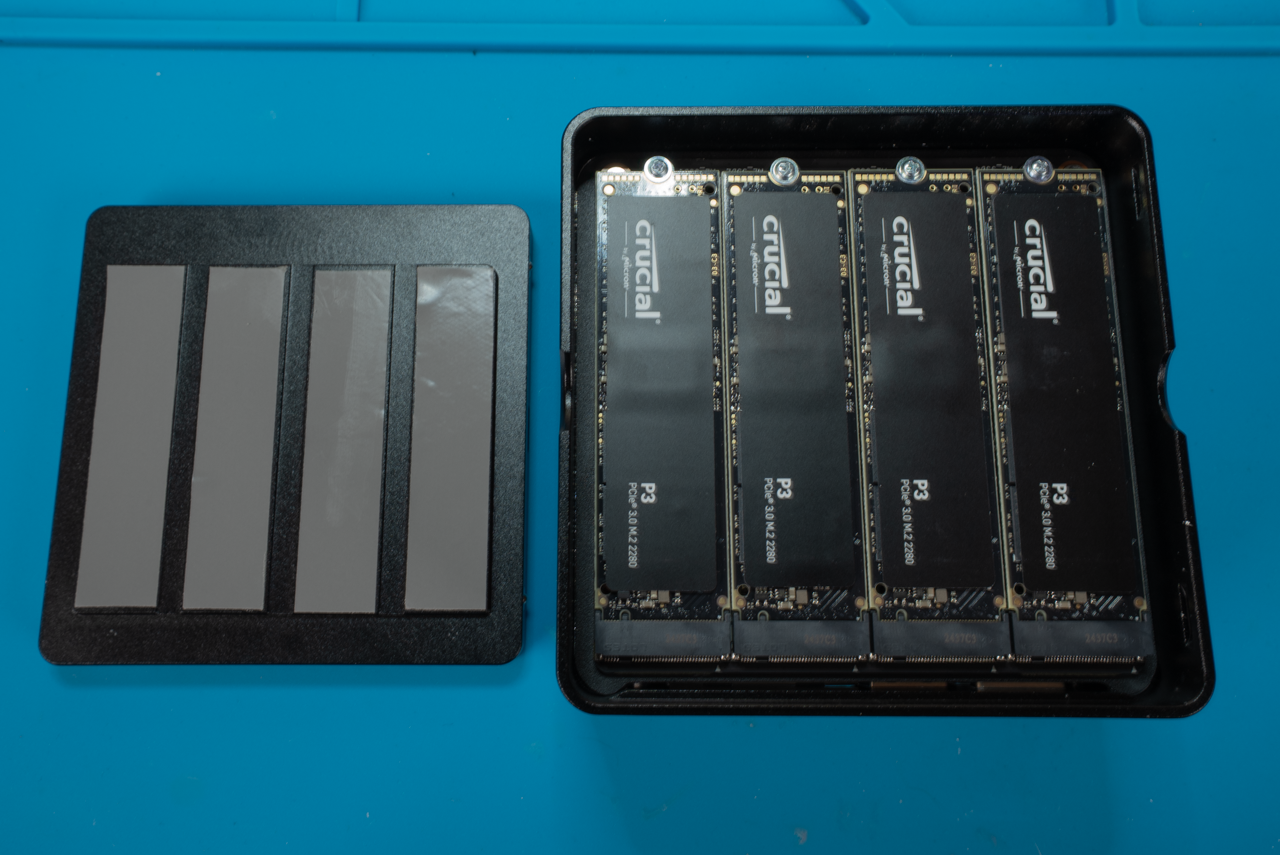
I ended up purchasing four Crucial P3 4TB NVMe SSDs. My memory is a bit hazy, but I recall spending about $1300-$1500 on my very first NAS, and my budget back then was around $200 per hard drive drive. The fact that I’m able to buy twice as much SSD storage for nearly the same price that I paid 13 years ago for hard drives is pretty incredible. And if you factor in thirteen years’ worth of inflation, my actual drive budget should’ve been about $273 per drive!


TrueNAS SCALE
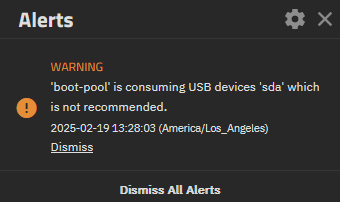
Picking TrueNAS SCALE for the Pocket NAS is going to be controversial for some. It’s important to recognize that the TrueNAS SCALE hardware guide clearly states that the minimum hardware requirement for a boot device is a 16 GB SSD boot device.
The reasoning for this is sound. Once upon a time, TrueNAS was designed to run from a USB drive, but that time is now in our rearview mirror. The flash chips used in USB flash drives simply aren’t durable enough to stand up to what TrueNAS SCALE writes to the boot drive today. By using a USB flash drive, I understand that the flash drive will eventually fail and will need to be replaced. The absolutely worst possible outcome of that scenario is reconfiguring everything in TrueNAS from scratch after replacing the defective drive.
This worst-case scenario is an acceptable risk to me. It is a risk which can be mitigated by:
- Routinely backing up the TrueNAS configuration database.
- Creating a mirrored pool of USB flash drives.
In the event of a complete failure of the boot pool, recovering from that failure will be straightforward: install the same version of TrueNAS on a replacement flash drive, login to the freshly installed TrueNAS SCALE, import the pool(s), restore the configuration database backup, and reboot!
In my opinion, the weight of all of TrueNAS SCALE’s benefits and the benefits of an additional M.2 slot for storage far exceed the potential consequences of losing the boot pool. For those that may not agree, here’s are a few alternatives to consider:
- Sacrifice an M.2 Slot for an inexpensive M.2 NVMe SSD that’s 16GB or larger.
- Use an actual USB SSD, like this Orico B5PLUS-256GB USB SSD.
- Pick an alternative to TrueNAS which is intended to run off a USB flash drive.
Putting it all Together and Installing TrueNAS SCALE
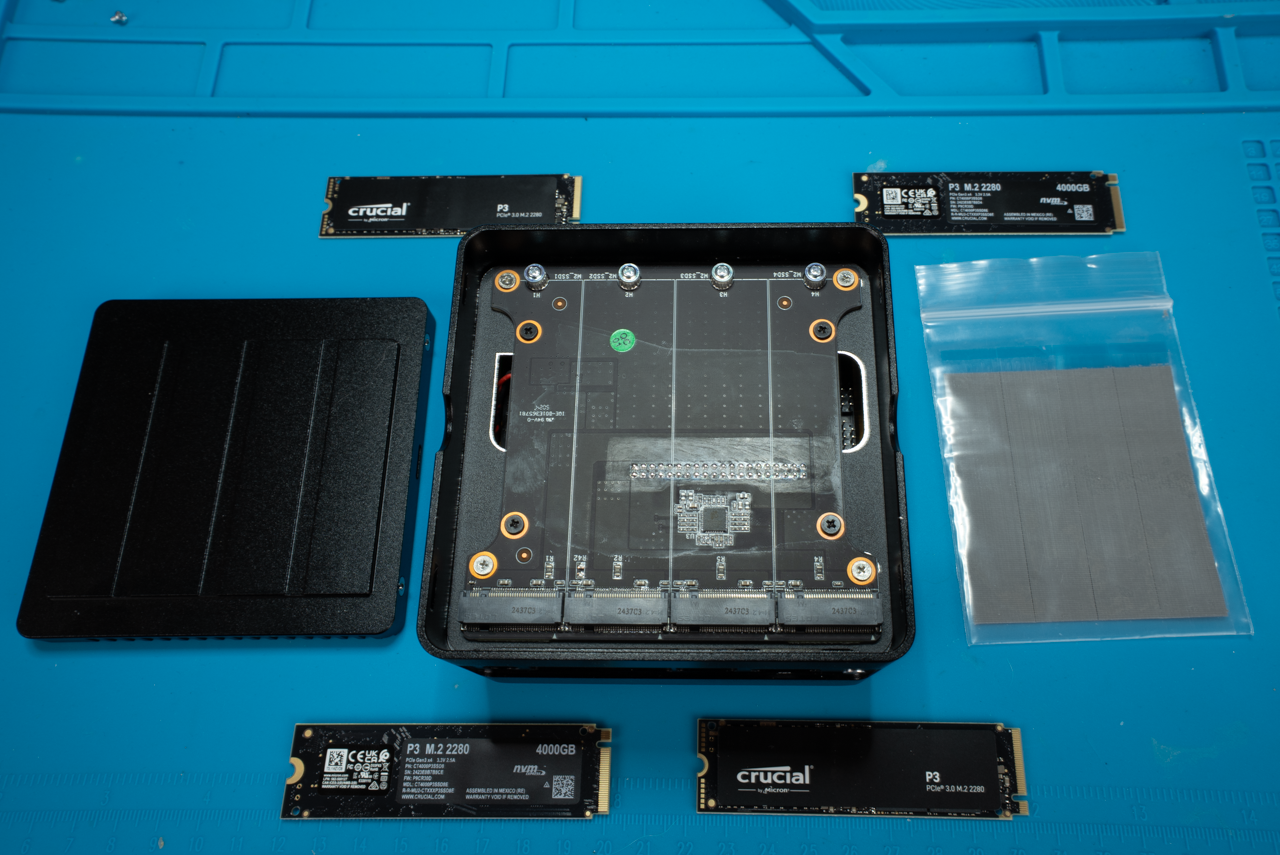
When I first ordered the Pocket NAS, I wanted to completely disassemble it to take pictures of it. But after taking the M.2 daughterboard out of it, I lost interest in seeing the rest of the components after it wasn’t totally obvious how I could remove the motherboard.
![]()
Prior to installing TrueNAS, I let Memtest86+ run for 24+ hours, primarily just to test the RAM but also to confirm that the machine would boot from USB like I would need it to later.
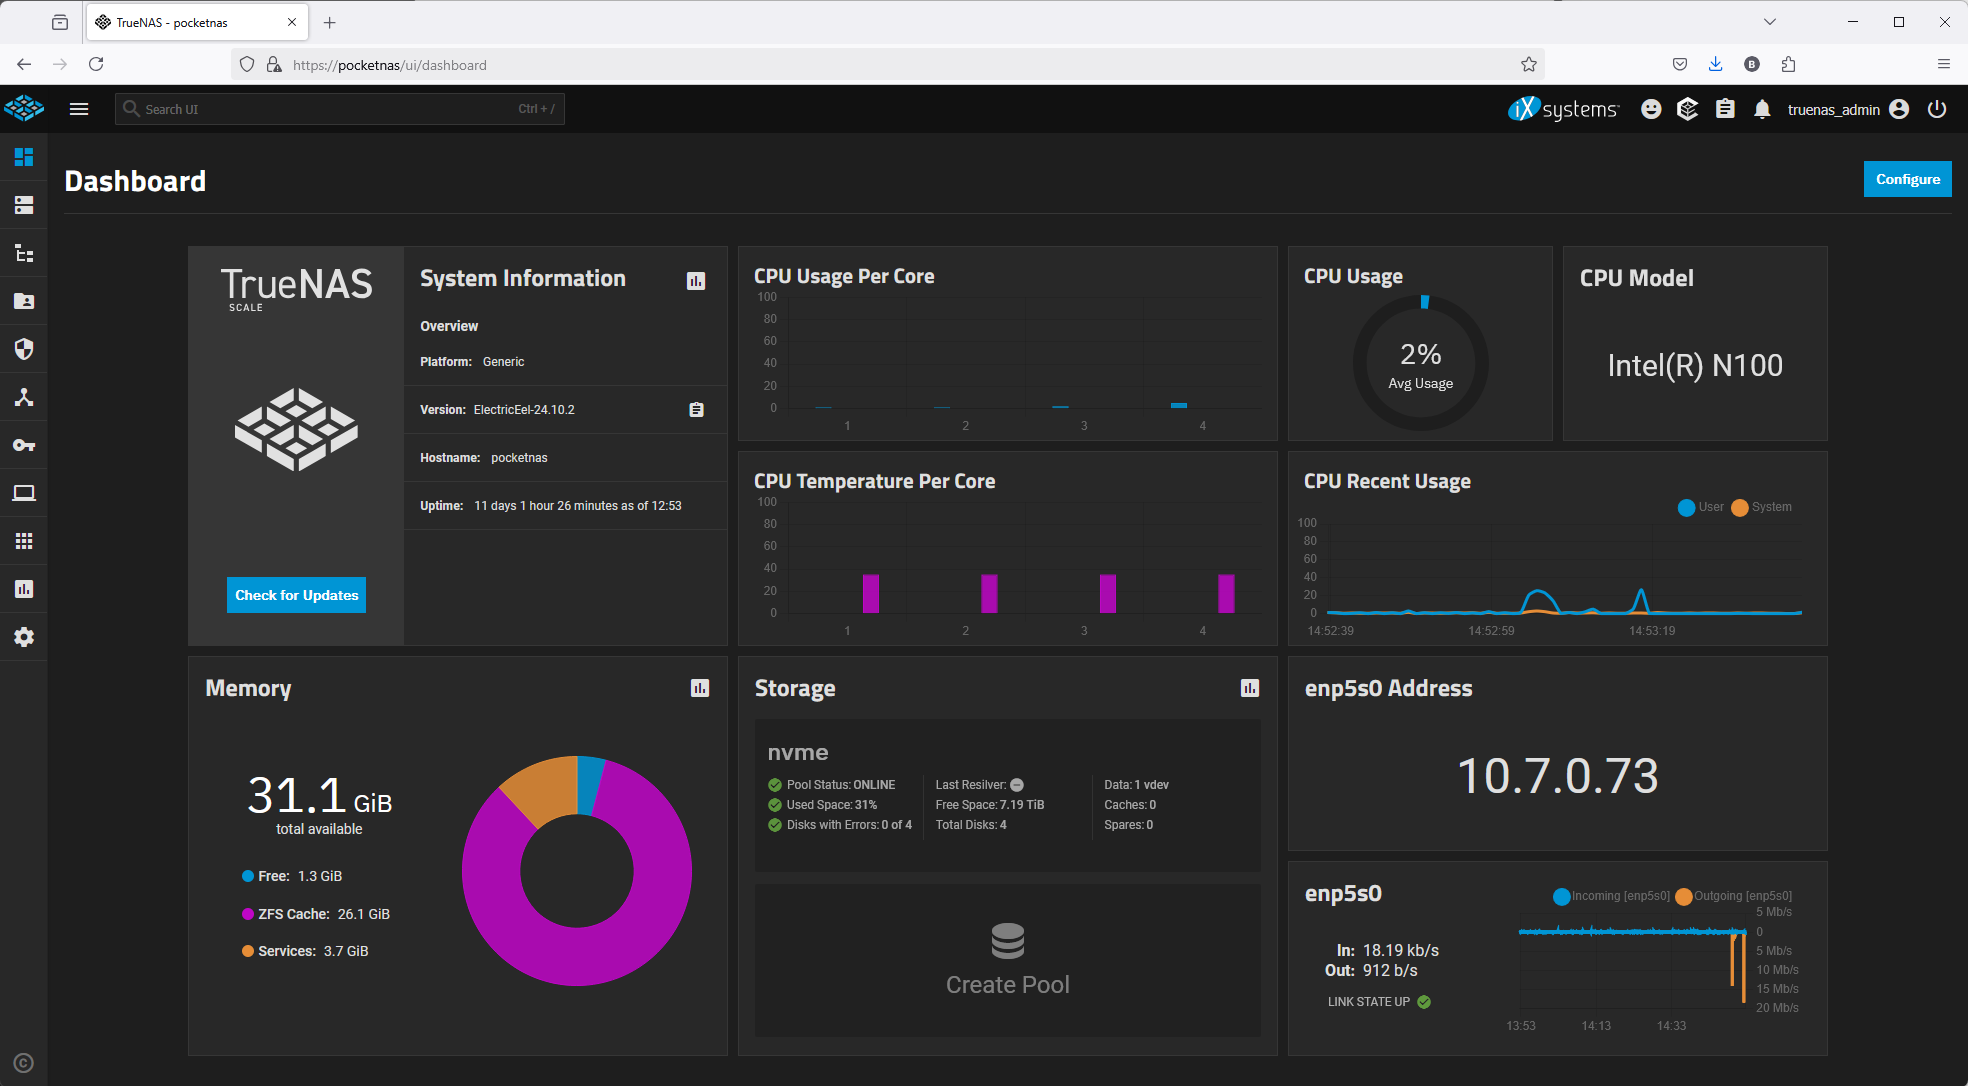
I installed TrueNAS SCALE on its USB drive, created a 4-disk RAIDZ1 pool, and copied my media collection to the new NAS. That file transfer hummed along at or near 2.16 Gbps for the entire duration (~5–6 hours) of the file transfer.
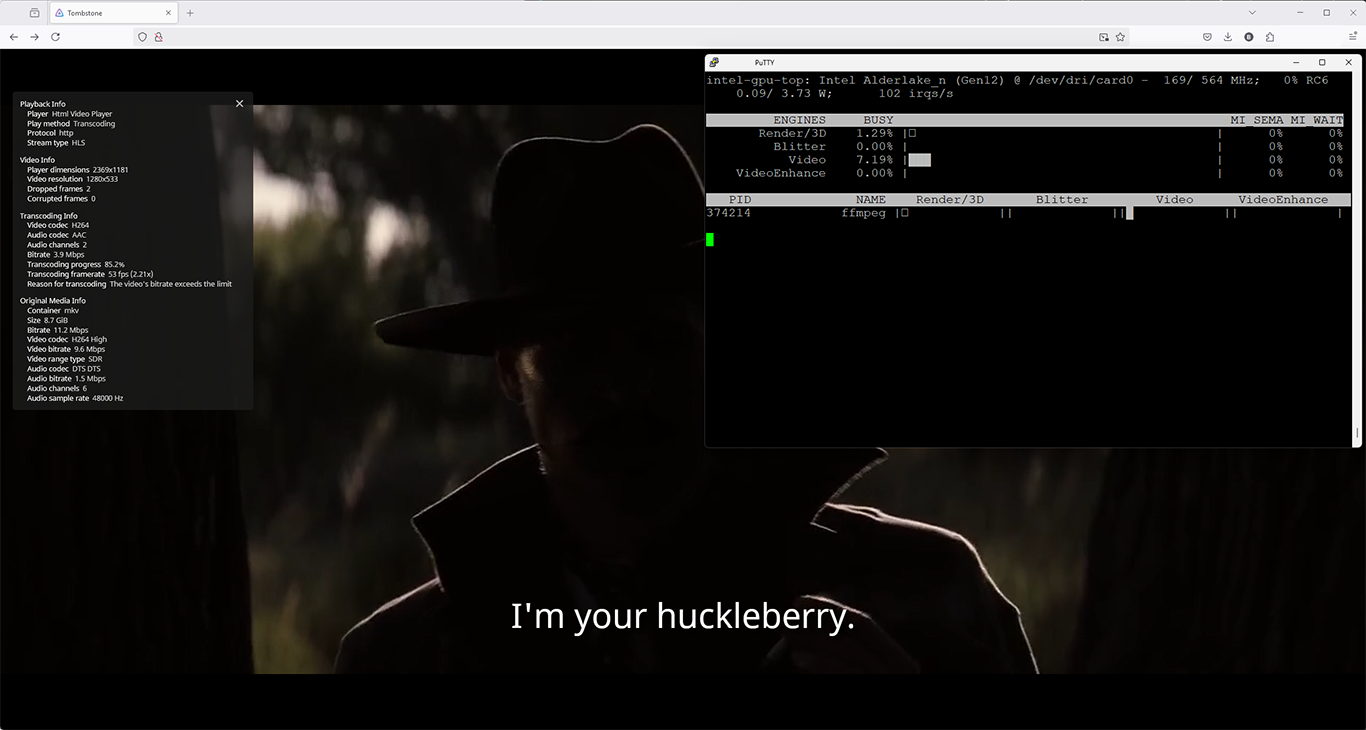
Out of curiosity, I installed Jellyfin from the TrueNAS app catalog. After adding my media collection to Jellyfin’s libraries, I enabled hardware encoding inside Jellyfin:
- Enabled Intel QuickSync hardware acceleration.
- Set the QSV Device to
/dev/dri/renderD128 - Checked
Enable Intel Low-Power H.264 hardware encoder. - Checked
Enable Intel Low-Power HEVC hardware encoder.
I started streaming some of my favorite samples from my media collection and kept an eye on intel_gpu_top to ensure the transcoding was being handled by the N100’s iGPU.
Unsurpsingly, everything worked excactly as I expected. It’s a bit of a boring thing for me to write, but I think it’s an important thing to share for other prospective DIY NAS builders.
Benchmarks
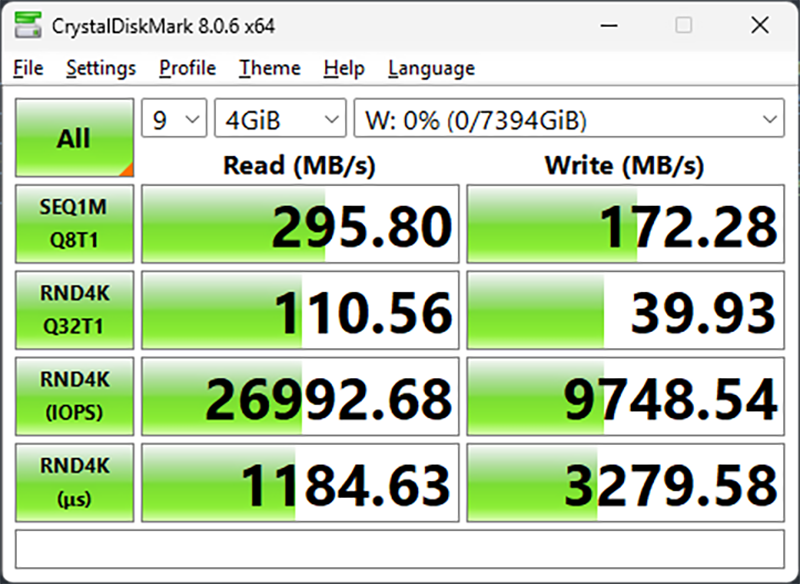
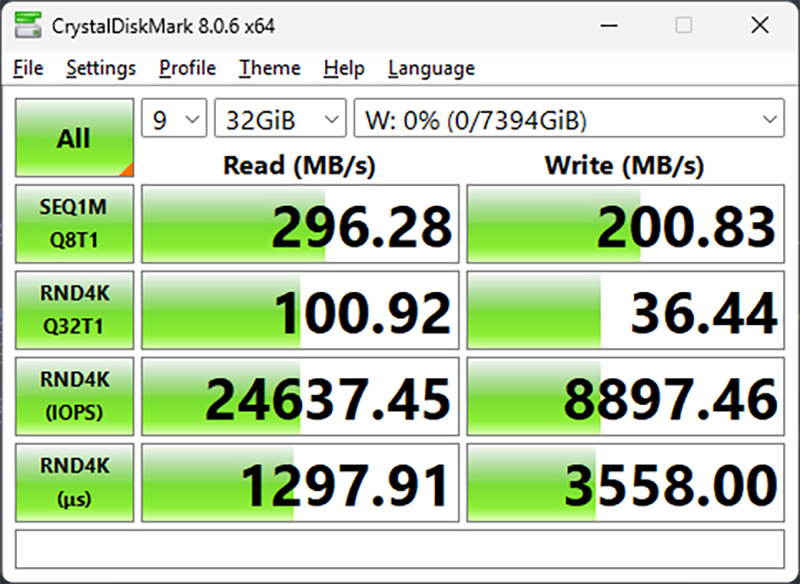
There are a few things that I like to measure when evaluating a DIY NAS. Because a NAS’s primary function is serving up files, I like to measure the throughput to a network share as well as the local filesystem’s performance. I used fio to measure the pool’s throughput from the console of the pocket NAS. And I used a Samba share mapped to a drive in Windows and benchmarked the throughput to that share with CrystalDiskMark.
| Tool | Test Size |
Random Write IOPS |
Random Read IOPS |
Sequential Write (MB/s) |
Sequential Read (MB/s) |
|---|---|---|---|---|---|
| FIO | 4G | 31130 | 53882 | 1109 | 3266M |
| FIO | 32G | 24540 | 48500 | 633 | 1375 |
| CrystalDiskMark | 4GiB | 9748.54 | 26992.68 | 172.28 | 295.80 |
| CrystalDiskMark | 32GiB | 8897.46 | 24637.45 | 200.83 | 296.28 |
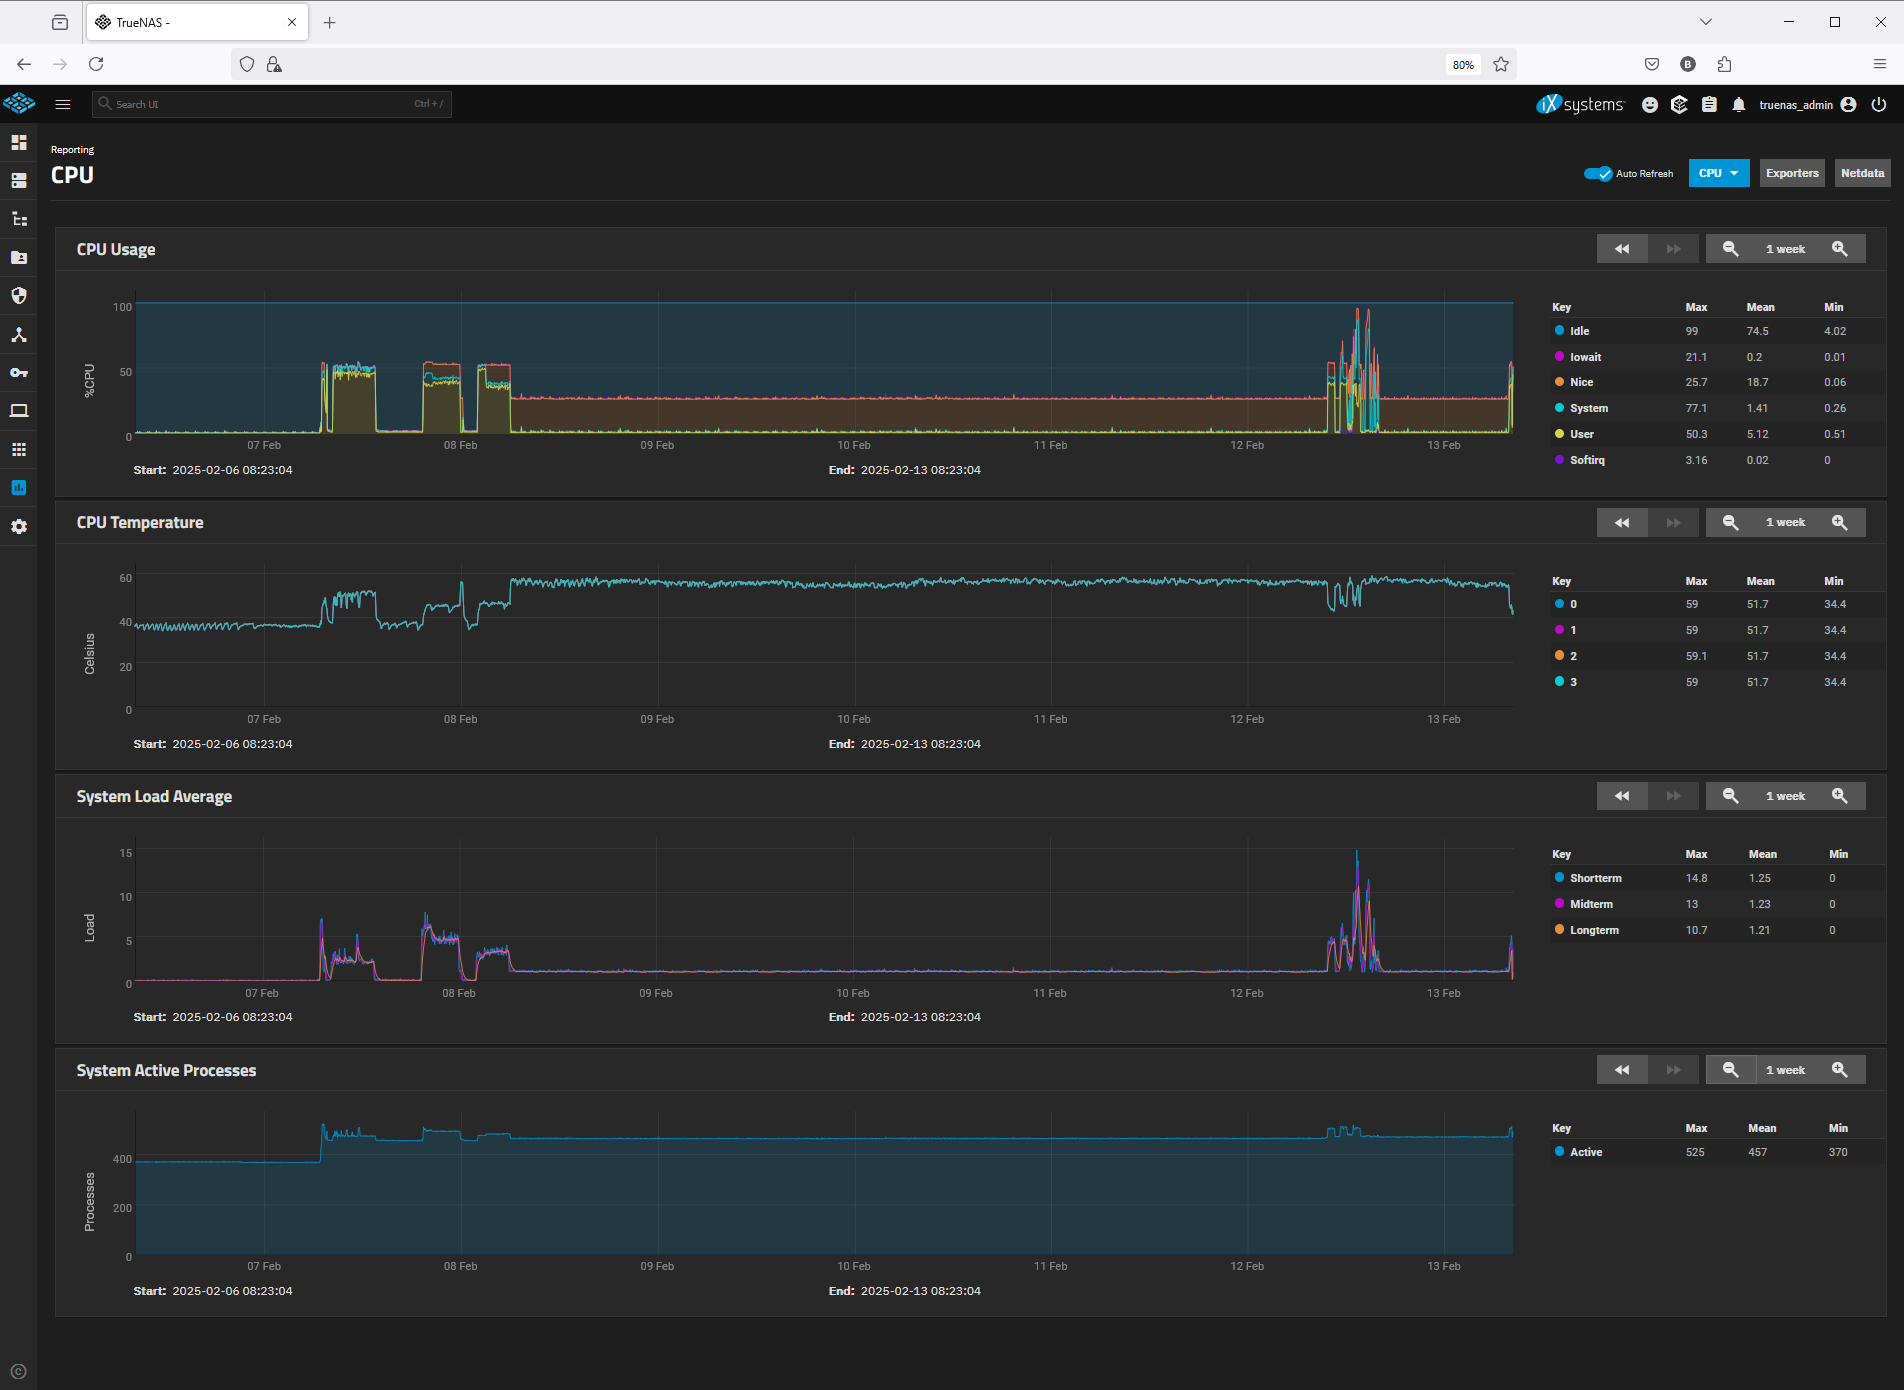
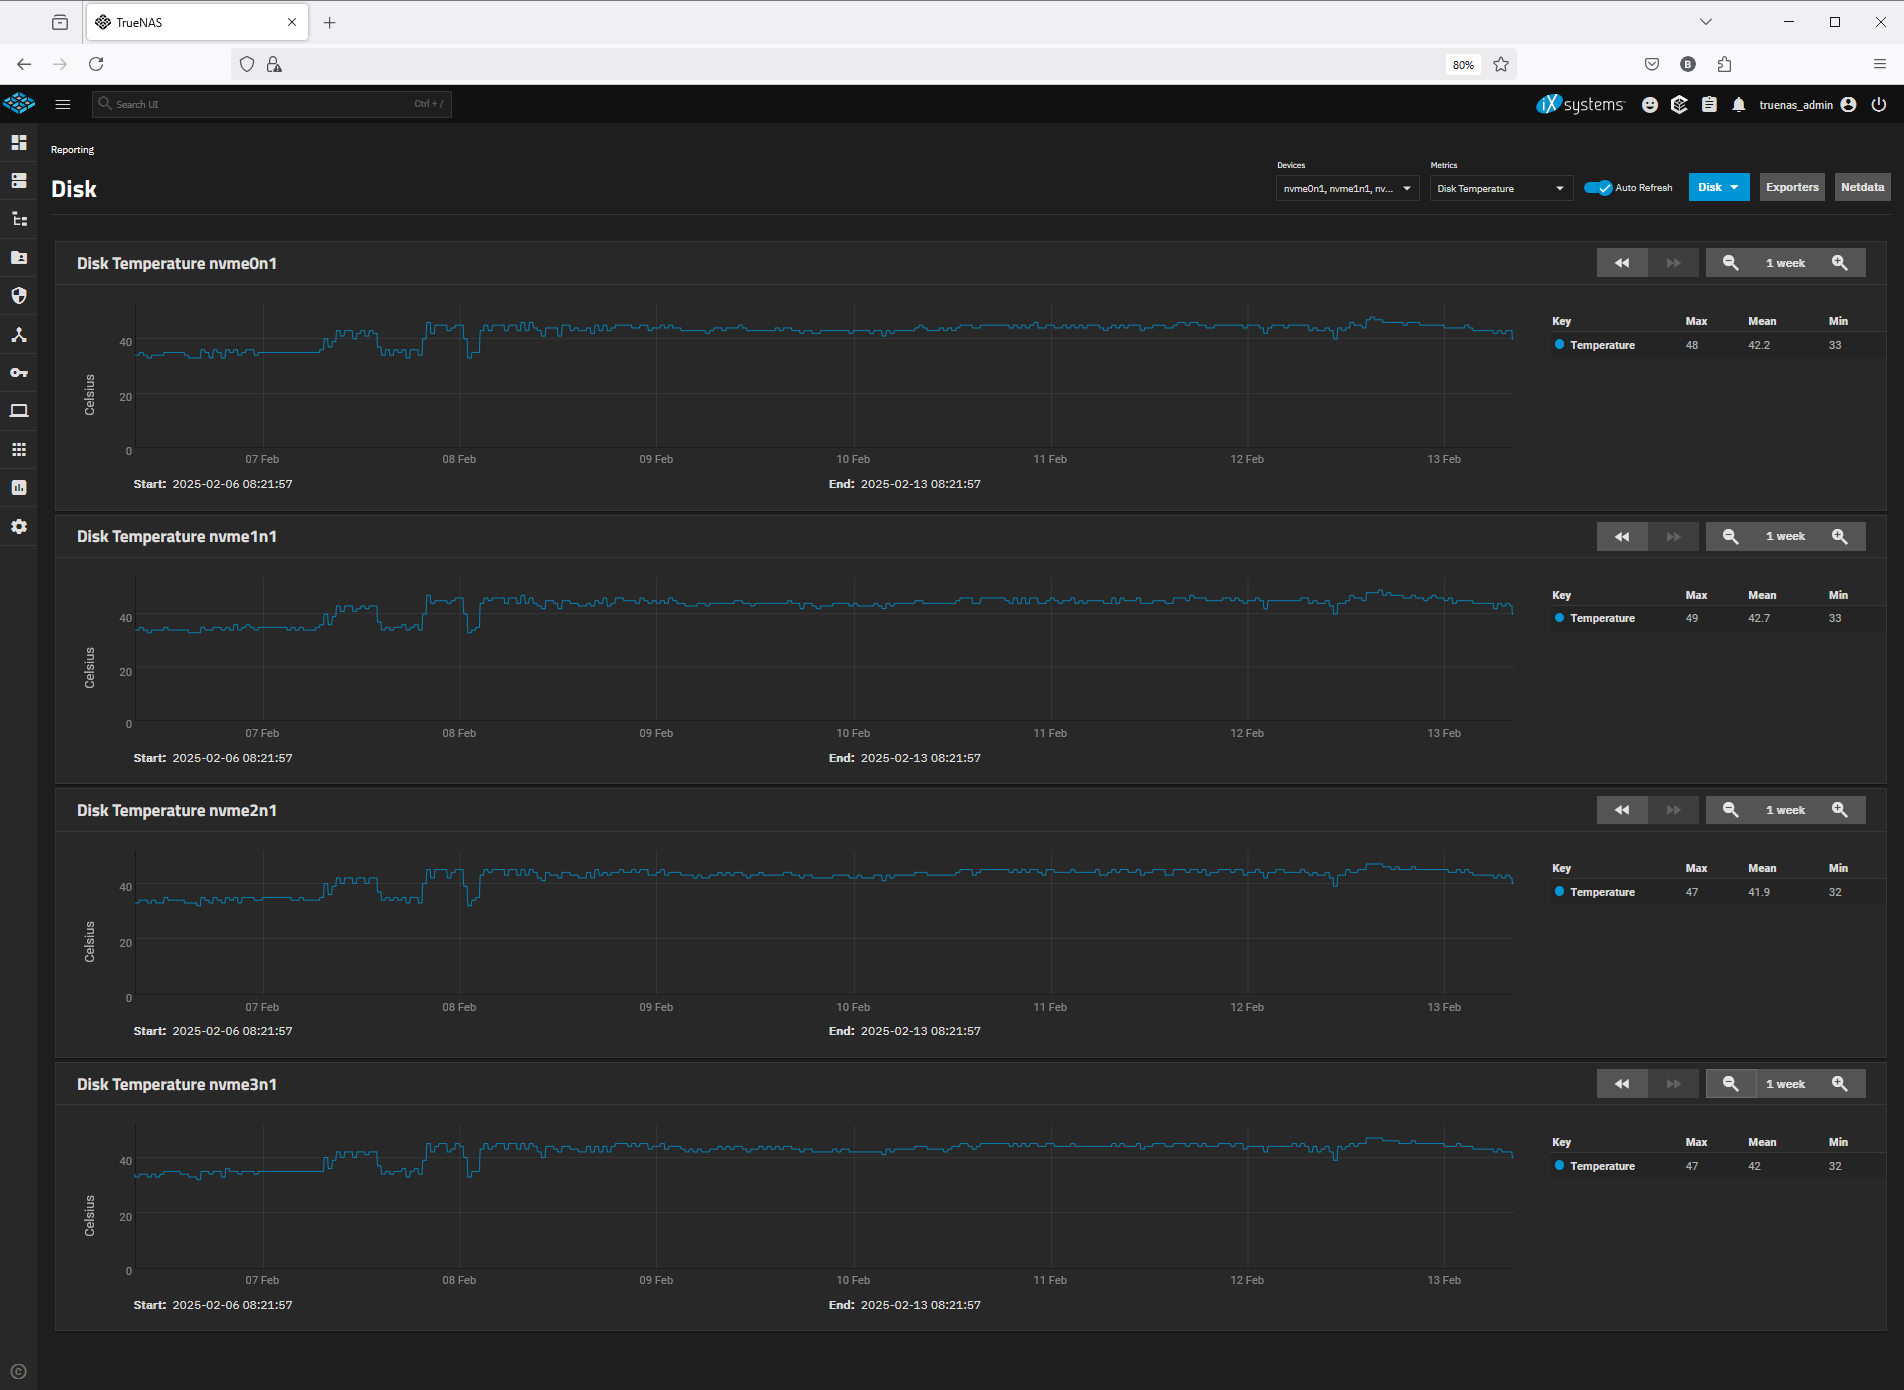
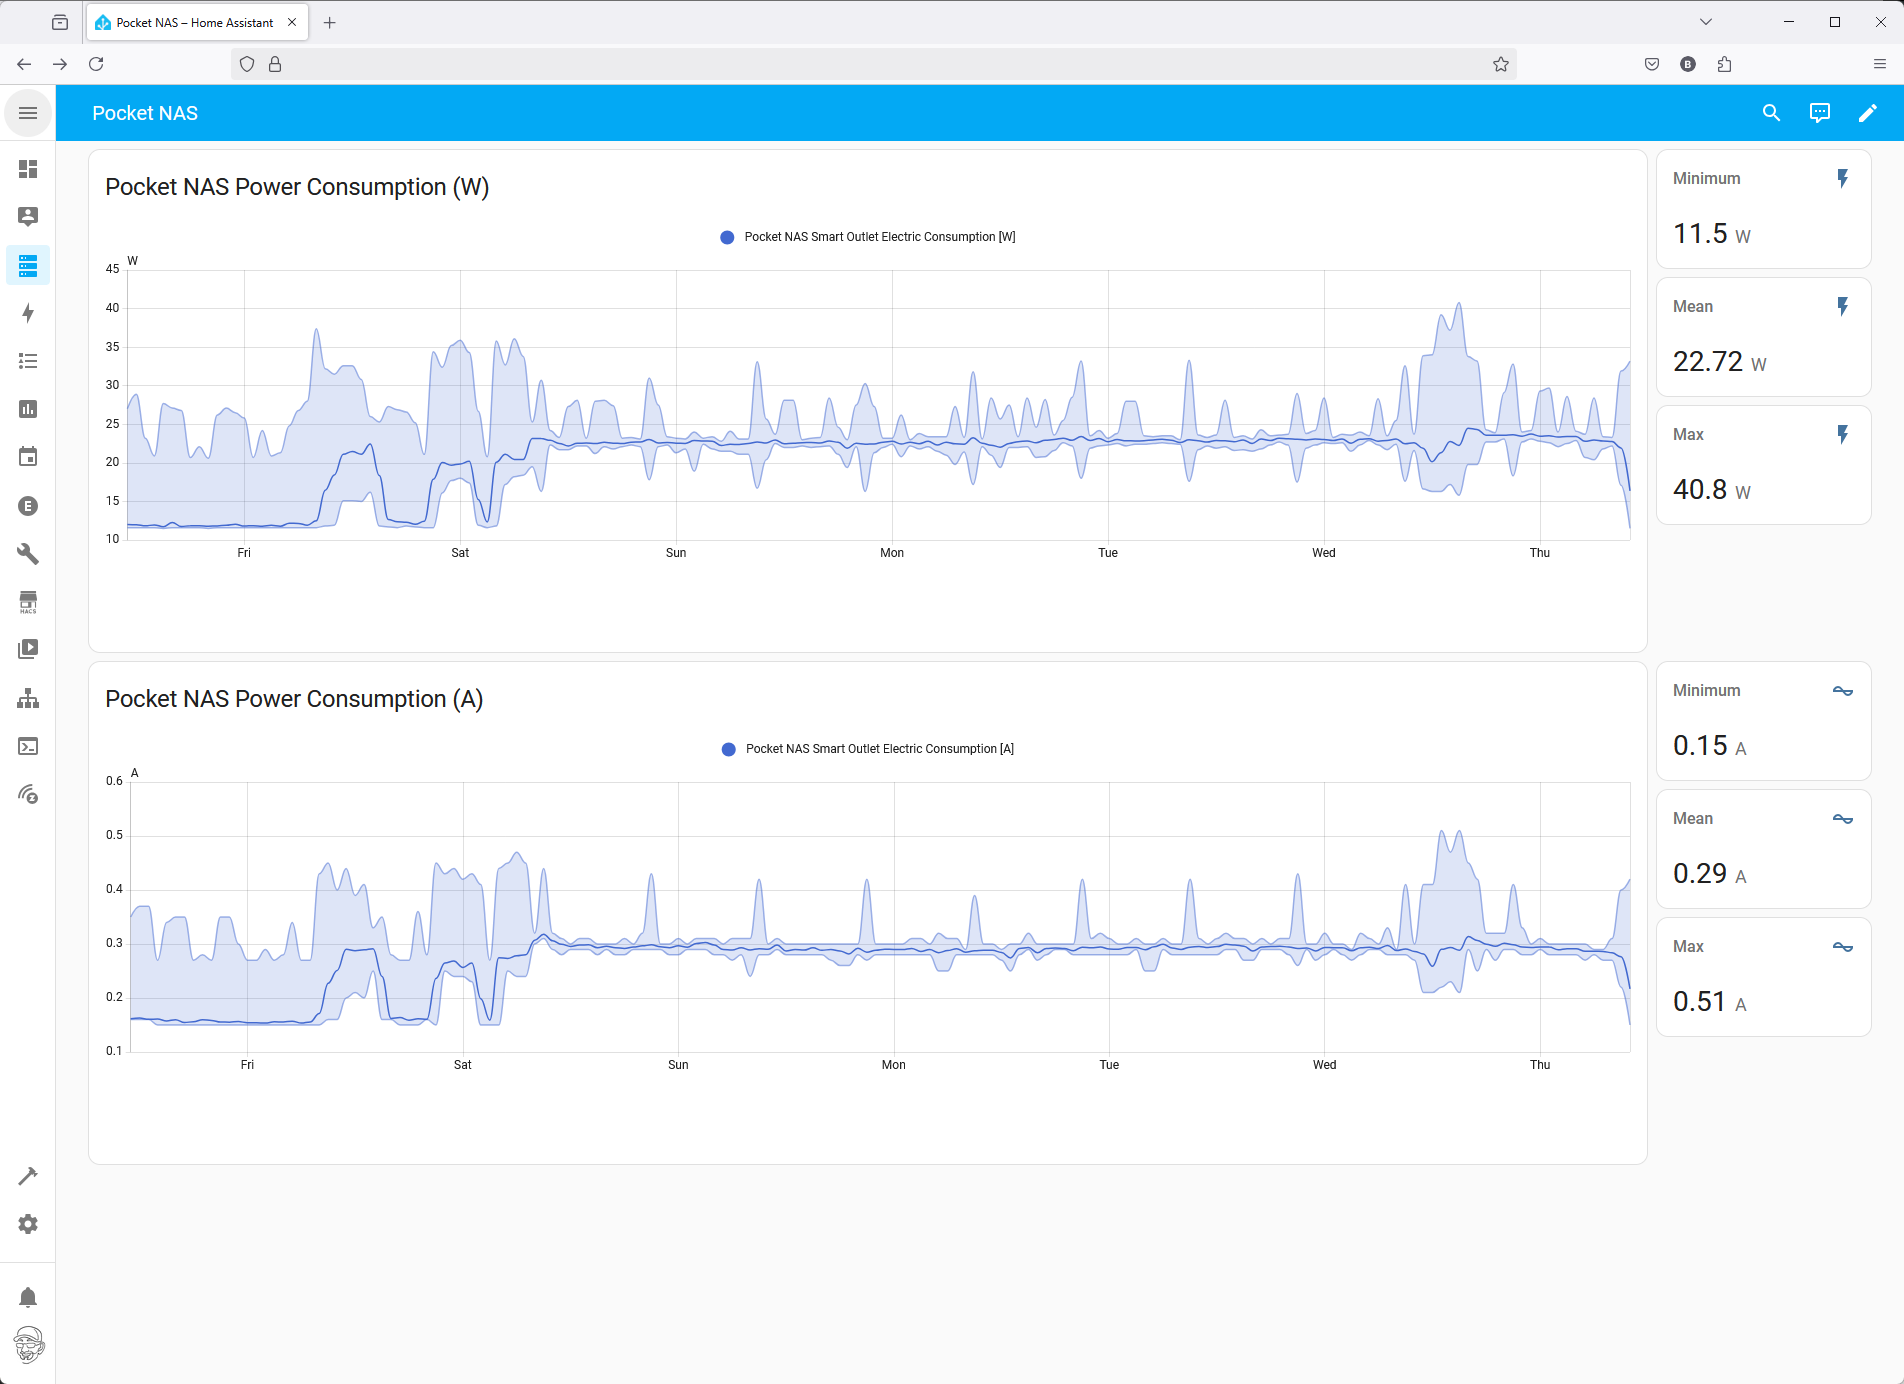
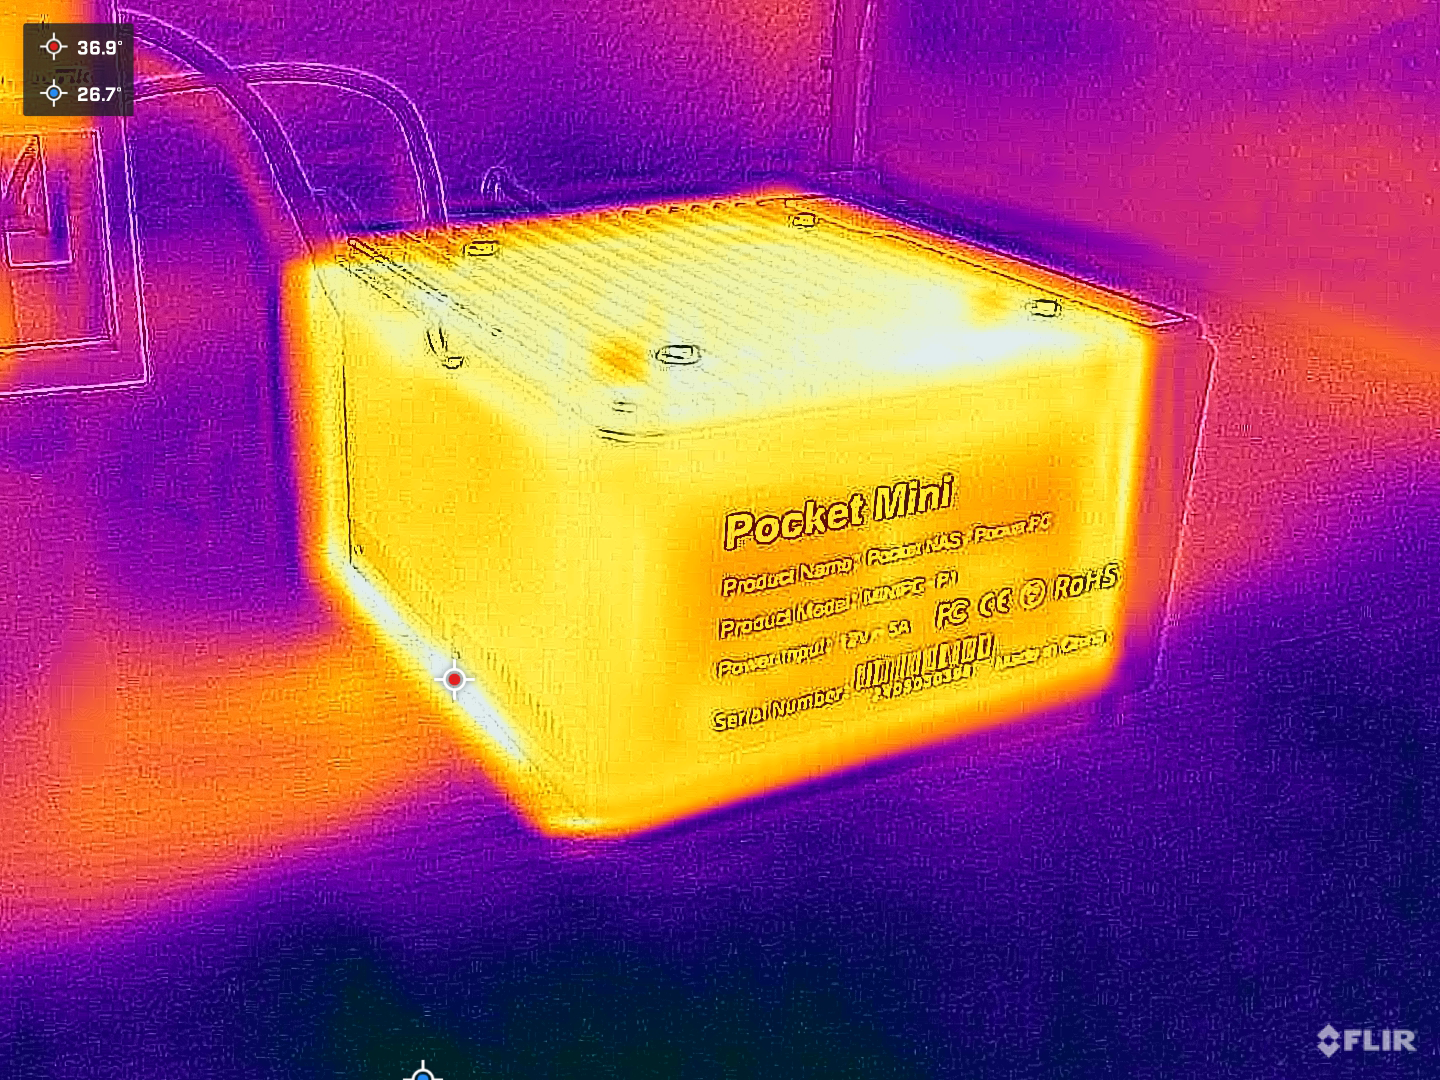
Power consumption is another important factor when I’m building a DIY NAS, but that’s primarily because of the power required to spin the platters inside the hard drives. I fully expected this Pocket NAS to hardly use any power. The amount of power consumed is also directly related to another concern of mine: heat. When I first saw the Pocket NAS Mini PC, I wondered how well its aluminum chassis would dissipate the heat generated by the CPU and NVMe SSDs.
As expected, the power consumed was pretty minimal. During the week that I copied all of my media collection over to the Pocket NAS and then binge-watched a couple different TV series, the peak power consumed was about 41 watts; the average was around 23 watts. During that same time, the NVMe drives’ temperatures were all pretty steady, reaching a peak of about 48C° and averaging right around 42 degrees.

Brian’s thoughts on the Pocket NAS Mini PC
I like this Pocket NAS Mini PC a lot, even if it doesn’t quite fit my personal needs. It is very small, but you’d still need a big pocket to squeeze it into, and its power brick is still fairly sizable. The Pocket NAS Mini PC doesn’t use that much power (a max of ~41W), so perhaps the right USB-C to barrel jack adapter would permit it to work with a GaN PD USB-C power adapter? This would work nicely with other things one carries in their backpack, wouldn’t it?
The bigger problem–at least for me–is the price of NVMe SSDs. I have too much data to store and can’t quite squeeze it onto 3–4 NVMe SSDs. To a lesser extent, the fact that each of the M.2 slots are bottlenecked at PCIe 3.0 x1 speeds is also a tiny concern. It’s good to keep in mind that bottleneck is quite unimportant for serving files on the network because the available bandwidth for each M.2 drive is .985GB/s (7.88gbps). That particular bottleneck is still more than three times faster than the 2.5gbps network interface.
Ultimately, I think this Pocket NAS Mini PC is quite fantastic despite these very minor complaints. I am amazed that I built an all-flash version of my very first DIY NAS! Compared to my very first NAS, this Pocket NAS Mini PC wound up being a fraction of the size, has more storage capacity, has more processing capability, much higher-performing storage, better networking, and it was less expensive than what I built 12 years ago.
We’re at a point where I think an all-flash NAS is a viable option for many people who are realizing they may need a NAS. If I were rebuilding my very first NAS today and my storage needs weren’t as outrageous, the Pocket NAS Mini PC is practically ideal for what I originally needed out of a DIY NAS!
What’s Next?
Immediately after learning about the Pocket NAS Mini PC, I asked myself, “I wonder if I can just buy the motherboard, M.2 daughterboard, and power supply?” and it turns out that you can!
This X85-P5 development board was immediately fascinating to me, and I bought a couple in the event that I liked the Pocket NAS Mini PC, too. I’ve got a few ideas rattling around in my head that I think are really interesting:
- Designing my own 3D-printed case.
- The additional potential storage options available on the motherboard (2x 12-pin SATA ports and an M.2 E-key slot).
- Building an even better DIY NAS than I did with the Pocket NAS Mini PC.
All of these will hopefully be the topic of future blogs. However, if you’re impatient, then you might want to consider becoming a patron of me on Patreon. I share lots of behind-the-scenes content with my Patrons as I’m working on future blogs and often discuss them in the patrons-only channels of our Discord server.
What do you all think? Are you interested in building an all-flash DIY NAS? Does the Pocket NAS Mini PC meet your needs? Or are you more interested in what might get created from the X86-P5 Development Board? Let everyone know what you think in the comments!