Update 12/1/12: I made some minor revisions and improvements and described it at the changes in the Update section of this article.
Over the years, I have owned a number of “sporty cars”: a 1992 Mitsubishi Eclipse GSX, a 2004 Mazda RX-8 and most recently a 2002 Chevrolet Corvette Z06, which I drive today. I am also apologetically geeky. Over the years, I’ve wanted to be able to use various computing devices (Palm Pilots, Laptops, Smartphones, etc.) to display and capture data from my cars’ computers (ECU).
On each of my cars, this possibility existed. But it usually involved hardware, up to and including an entire replacement of the car’s computing system. Depending on the vehicle, I found that the hardware was generally expensive, difficult to use, not quite what I had in mind, and most of all a ton of labor to get set up.
Things began to change in 1996 when the ODB2 standard was adopted for all cars sold in the United States. A common universal interface made this data much more accessible and inexpensive for everyone to access. Combined with the explosion of mobile computing (smartphones, tablets, netbooks, cheap laptops, etc.) the functionality has really improved over the last 10 years.
This article is ultimately very similar to what I talked about in my Ultimate Car Dock series (part 1, part 2) however this article’s purpose is to use your Android smart phone purposefully for displaying and logging information from the car’s ECU.
Objective
To create and automate a Car Dock profile, which automatically opens an app to both display data read from the ECU and capture it to a log file and then sync that log file up to a cloud-based storage service like DropBox
Requirements
Hardware
- Phone Holder/Mount: I have written a bit about the different kinds of phone mounts that I have experimented with over the years. Hopefully this is a good starting point for shopping for your own phone mount. The holder certainly is not required but I definitely recommend one. At the very least, get a friend to hold your phone and keep his or her eyes on it for you when the vehicle is moving.
- Android Smart Phone: Just about any “modern” Android phone will do here the important features are going to be Bluetooth and a nice display.
- Bluetooth ODB2 Adapter: There are options available here: very inexpensive Bluetooth ODB2 adapters are readily available on eBay if you go this route. What you will want to search for is ‘ELM 327’. From what I have read and experienced, these are a mixed bag. I had one myself that worked most of the time, but whenever I really wanted to use it, I had to wrestle with my phone in order to get it to pair up. For my phone, I wound up going with the PLX KIWI Bluetooth based off of a recommendation from another friend and the fact that the location of the ODB2 port on the Z06 was a little inconvenient for the size and shape of my ELM 327.
Software
- Tasker: As I have raved about in a number of my articles, Tasker is my favorite Android app of all time. In order to create this Gearhead-themed Car Dock profile, I will rely on Tasker’s functionality to determine when the phone is in the car, enable Bluetooth and launch the ODB2 app.
- Torque: Of all the ODB2 apps available on the Google Play Store, Torque seems to stand above the rest. I have used it for quite some time and it definitely has the options to display and log the data the way I want.
- DropSync: The DropSync application can function as a Tasker Plugin. For the purpose of this blog, I have selected the free version of this particular app and I will work around the limitations of the free app.
Installation and Configuration
The next step is to mount your phone’s car dock and your Bluetooth ODB2 adapter, I covered my installation in an earlier article. Your installation will vary depending on your vehicle and your mounting hardware
Torque
Setting up Torque is probably easiest if the majority of it is done from your vehicle with it turned on. This will make sure all of the data that is being read from the sensors will be populated in Torque and give you a good idea of what is or is not available from your ECU.
Getting Started
First, head on over to the Getting Started page on the Torque WIKI to get Torque paired up with your ODB2 Reader.
Setting up your Torque Dashboard
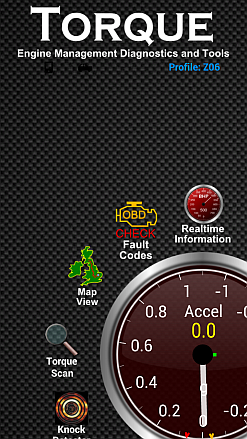
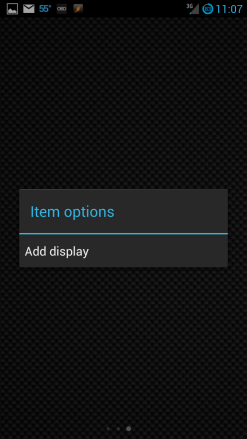
- Select the Realtime Information and it’ll take a dashboard of pre-set gauges. Press and hold on an empty part of the dashboard and it’ll bring up a menu.
- Select “Add Display”
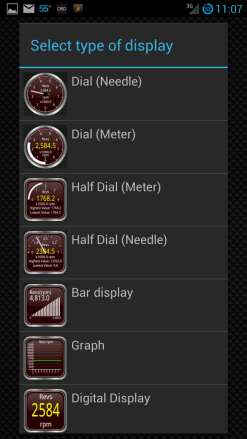
- From the options available, select the gauge style you want to add.
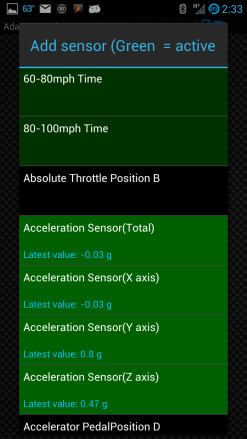
- Choose a sensor with the gauge. Items highlighted in green are things that are available. Keep in mind that some of the sensors are on your phone.
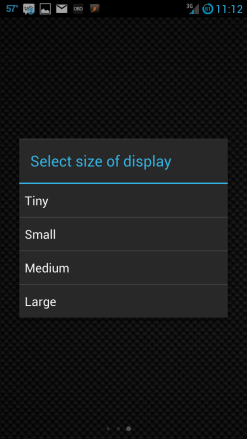
- Select the size of the display.
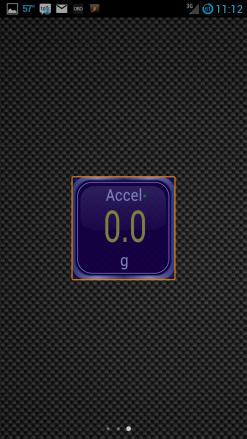
- Move the gauge to the position on the dashboard you want it at.
- Repeat steps 2 through 6 until you’ve filled up your available dashboards with all the gauges you want.
Configuring Torque Data Logging Options
- Use the back button to exit back to the Main Torque screen
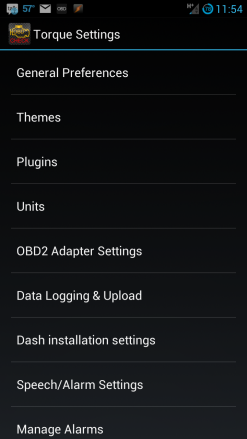
- Hit your menu button and select “Settings”
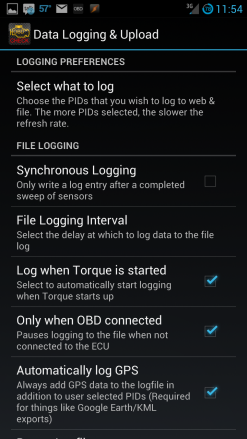
- Scroll down and choose “Data Logging & Upload”
- Hit Select What to log
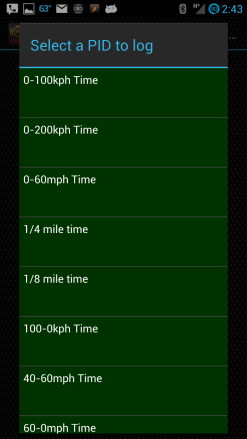
- Hit the Menu button and select “Add PID” to log
- Scroll through the list of available sensors to choose to data log.
- Repeat steps 5 and 6 for as many sensors you want written to your log.
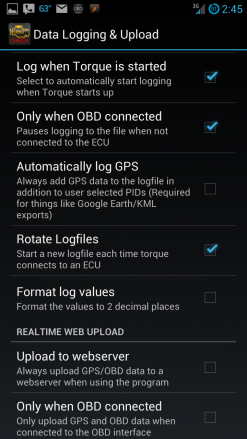
- Make sure the following boxes are selected:
- Log when Torque is started
- Only when ODB connected
- Rotate Log Files
Other Torque Settings
- Under General Preferences, select the “Startup in Dashboard” option
DropSync
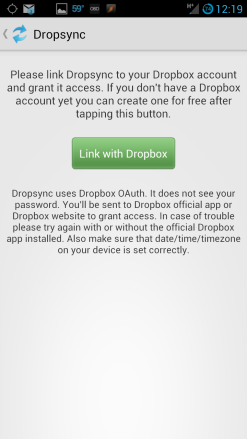
- Open DropSync and click the “Link with Dropbox” button
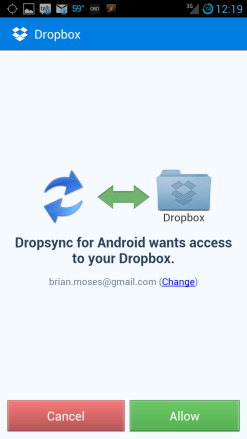
- Select “Allow” when Dropbox prompts you asking about permissions
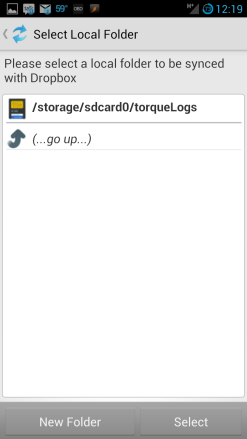
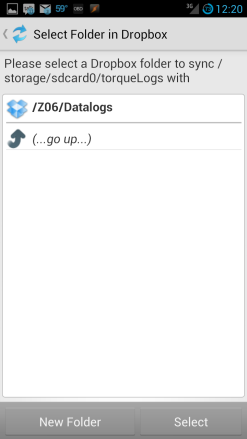
- Select the local folder where Torque is saving its logs (/storage/sdcard0/torqueLogs on my phone)
- Select the DropBox folder to sync the logs to
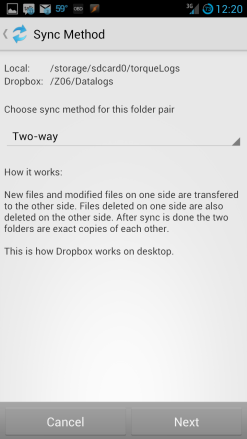
- Make sure Two-way is displayed for the sync method and hit “Next”
-
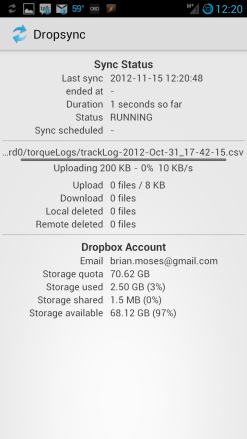
Select “Done,” and DropSync will begin syncing
Note: The free version of DropSync will only sync up one folder on your phone with one DropBox folder, plus it will not transmit any files over 5mb. Based off the size of the Torque log files that I have created since starting work on this blog, I think the free version will work for this purpose.
Tasker
We have configured Torque to automatically open up in its Dashboard and also to start a new data log once it connects to the ECU. Additionally, we have used DropSync to pair up the local Torque logs folder with a folder up on your DropBox account.
What we need to do at this point is to use Tasker to perform the following: detect when your phone is in the Car, then open the Torque application to begin the displaying and logging the data from your ECU, and finally determine to force sync your data logs folder.
- Open Tasker and select the “Profiles” tab.
- Click the Plus button to create a new Profile
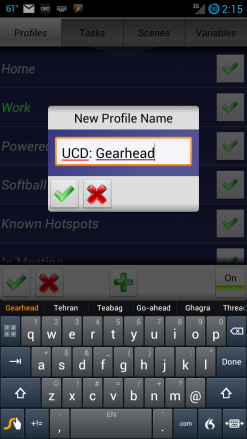
- Name your profile and hit the green check.
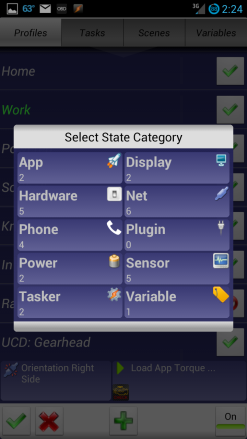
- In the First Context menu select, “State”
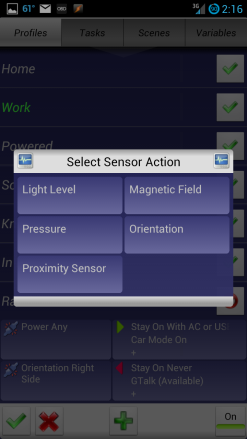
- Select “Sensor”
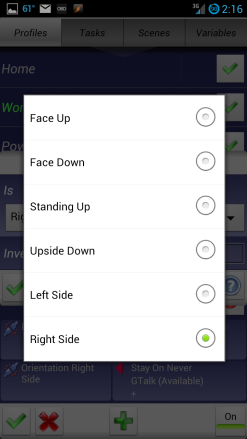
- Select “Orientation,” then select the orientation that your phone will be in in its car dock.
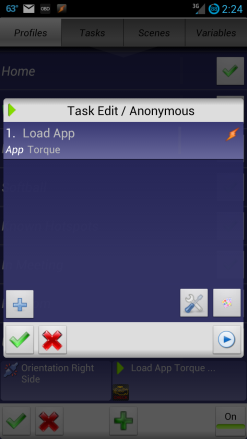
- Select “New Task,” leave the Name empty and hit the Green Check icon
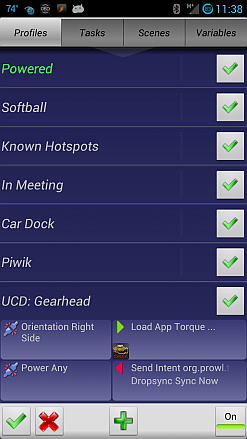
- Underneath “App,” use the Load App and select “Torque” from the list of apps. Hit the green check to get back to the Profiles screen.
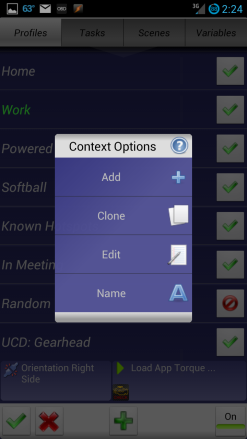
- Briefly touch where it says “Orientation: Right Side” to bring up the Context Options menu.
- Select “Add”
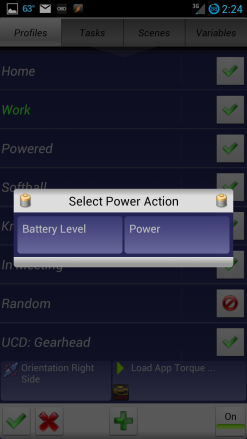
- Select “State”
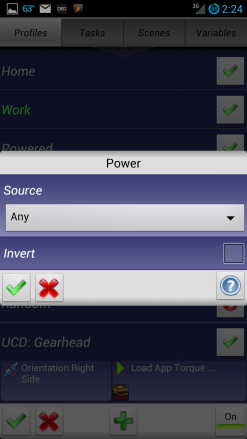
- Select “Power,” change the source to “Any” and hit the Green Check icon.
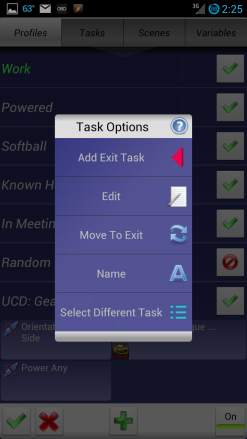
- Briefly touch where it says “Load App Torque…” to bring up the Task Options menu
- Select “Add Exit Task”, choose “New Task,” leave the name empty and hit the Green Check
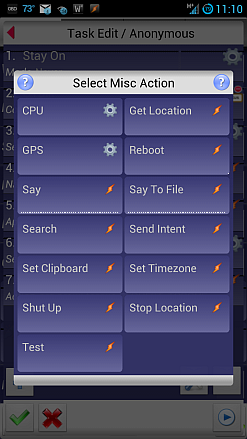
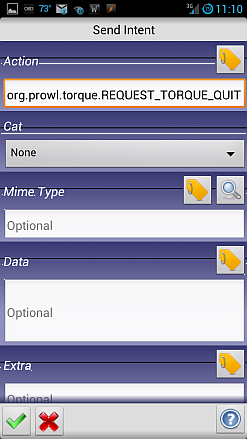
- Add a new task, select “Misc,” then “Send Intent,” and type the following where it says “Action”: org.prowl.torque.REQUEST_TORQUE_QUIT
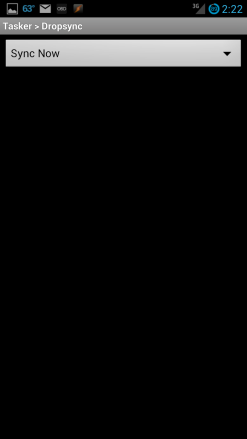
- Add an additional task, select “Plugin”, pick “DropSync”, hit the “Edit Configuration” button and select “Sync Now” from the dropdown; use your back button to move back to the Dropsync Tasker configuration and hit the Green Check
Demonstration
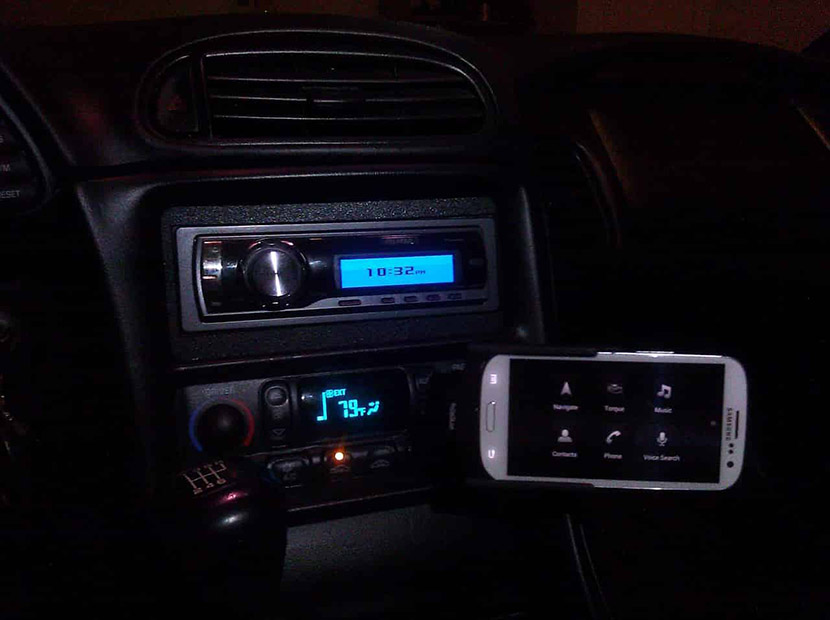
Here is a video I took of this in action. It was recorded at night in pretty poor lighting, so the video is a little out of focus and hard to see. However, you will see me put the phone into the car dock, it opens the Torque app which starts up in the dashboard with the gauges that I had selected. Because they wind up slightly out of focus, here’s the gauges I had selected:
- Top Row: Throttle Position, Coolant Temperature, Timing Advance, Voltage
- Bottom Row: Intake Temperature, Intake Pressure, O2 (Left), O2 (Right)
You cannot make it out from the video, but at the very end after removing the phone from the car mount, the DropSync synchronization functionality got kicked off and pushed all of the new log files up to my DropBox account.
Final Thoughts
At first, working with Torque seemed a little persnickety; every now and then when it starts up, the screen flickers a little bit (like you see in the video). Plus, I had some difficulty getting the app to quit nicely when undocking. I took some of these quirks to the Torque support forum and the developer was extremely responsive and helped me work around the ones that were bothering me the most.
I also wound up including some of the other features of my earlier car dock blogs into this profile plus one new one:
- Turn on my phone’s WiFi hotspot (new)
- Update my GTalk Status and custom Message
- Disable the screen timeout
While I really like how easy DropSync was to get working and I love that the Free version is functional enough to do what I wanted it to for this blog, this app got me searching around the market and I found there are lots of other similar apps that cost less than DropSync Pro. Primarily, I’ve been looking at FolderSync, which supports multiple cloud storage services than just DropBox and it is half the price of DropSync pro. I have been using FolderSync’s paid version now for awhile and I am pretty pleased.
If you have any comments, questions, or improvements or if you would like to share how you are using your Android phone in the car, please share your thoughts with us in the comments below.
Updates
12/01/12: Thanks to the help of the developer responsible for Torque, I have been able to address one of my gripes about working with Torque. I could not find a reliable method when exiting the Torque app to exit the application. Tasker’s Kill App action did not seem to put the kibosh on Torque the way that I would have wanted it to. Fortunately for us, the developer created a quit Intent that allows me to force the app to quit. I have updated the blog above to add steps on how I did that.

