
 I have had an Arduino Leonardo clone for months (years?!) but I’ve never gotten around to playing with it. In fact the Arduino has been around so long that I originally thought that my tinkering and experimentation was going to be old news to most people. However, I got enough enjoyment out of my first couple “projects” that I decided to publish a blog in the hopes that there are a few people out there like me who’ve been curious but haven’t quite gotten started yet.
Arduino is an open-source electronics platform based on easy-to-use hardware and software. It’s intended for anyone making interactive projects. Each Arduino has a series of inputs and outputs, into which you can plug a whole host of different sensors, LEDs, LCD displays, actuators, motors, relays, etc… etc… Behind the hardware, Arduino has an open source integrated development environment (IDE) where you can write code and upload it to the Arduino to put that hardware to use.
Part of my hesitation was based largely on ignorance. Over the years, I’ve skimmed over many Arduino-related blogs where people do some pretty neat stuff with their Arduinos. Based on that light reading, I made the incorrect assumption that it’d be complicated to work with the hardware and software in order emulate these examples and create a project on my own. My own understanding of electronics is crude at best and while I occasionally enjoy tinkering with programming, I usually find it to be a bit fr,ustrating. I was very pleased to find out that my assumption was pretty poor. My ignorance or lack of ability in the realms of electronics components and software development didn’t wind up being significant obstacles at all. I was able to install the Arduino IDE, hook up my Arduino Leonardo-clone, and load a sketch to the Arduino that made the onboard LED flash in minutes.
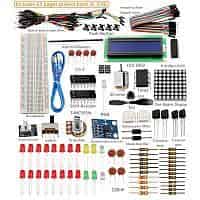 In order to get started, I looked around for some sort of collection of electronics to match up with my Arduino Leonardo. I found the Sunfounder Project Super Starter Kit on Amazon.com which fit the bill. The kit mentions the Arduino UNO R3 in its description but all of the components should work just fine with the Leonardo. The kit contained a variety of components, including: a bundle of LEDs, resistors, push buttons, switches, LCD display, a motor, a breadboard, male-to-male jumper wires, female-to-male jumper wires, and many other things that I’m not mentioning. The kit also contained a CD and manual with a bunch of different examples that you could follow in order to get started. I skimmed through the manual; there are a few things in there I’d like to try just to see how I can use these different components.
Similarly, we’ve had a bunch of luck finding individual components from eBay, where they can be found at much lower prices. For example, we found Pyroelectic Infrared (PIR) Motion Sensors for as low as $.82 where we’ve found them as high as $9.99 a piece from different Arduino-themed vendors. The biggest drawback of ordering from eBay is that many of the inexpensive components are going to get shipped to you directly from China. I am not a patient guy, which is why I went with the Sunfounder Project Super Starter Kit and Amazon Prime had it on my doorstep 2 days after ordering it.
A breadboard was included in the Sunfounder Project Super Starter Kit and from the various Arduino How-Tos that I’d skimmed across, I comprehended its purpose but not exactly how it worked. Thankfully I got a crash course in its purpose from a friend and then found this How to use a Breadboard guide which cemented the material we covered in my crash course. After that, I was off to the races.
S.O.S
I started off with the Arduino Getting Started guide for Windows and had the onboard LED blinking on my Arduino Leonardo in minutes. Applying what I learned from the tutorial, I expanded it to create an ever-so-slightly more complicated version of my own, that blinks S.O.S.:
void setup() {
  // initialize digital pin 13 as an output.
  pinMode(13, OUTPUT);
}

int FlashLED(int pin, int duration, int qty, int postflashdelay){
  for (int signal = 1; signal <= qty; signal++){
    digitalWrite(pin, HIGH);
    delay(duration);
    digitalWrite(pin, LOW);
    delay(duration);
  }
  delay(postflashdelay);
}

void loop() {
  // Pause for 3 seconds at the beginning/between loops
  delay(3000);
  // DOT DOT DOT
   FlashLED(13, 500, 3, 750);
  // DASH DASH DASH
   FlashLED(13, 1500, 3, 750);
  // DOT DOT DOT
   FlashLED(13, 500, 3, 750);
}
And here’s that sketch in action:
For Loops and Knight Rider
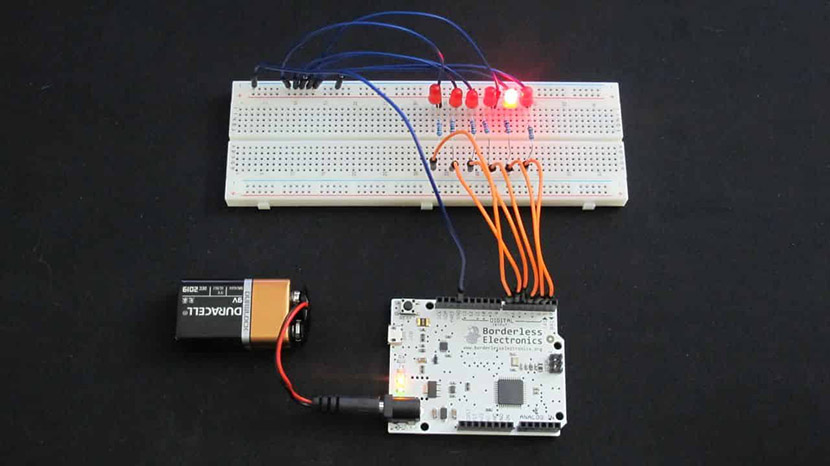
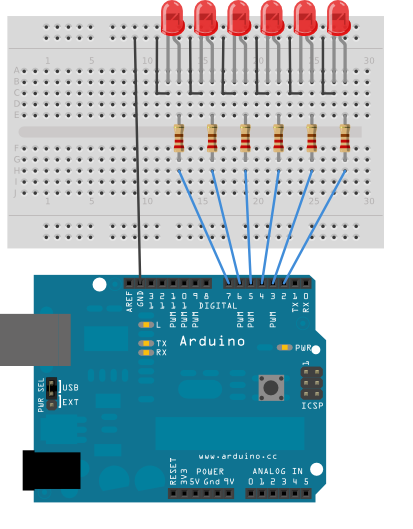
<img src = “/images/2015/arduino/intro/forLoop_bb_small.png” align=”right” style”padding:5px”>That tiny little taste for the Arduino and its IDE had me wanting more. I was excited to play with some of the actual electronic components from my starter kit. In doing some Googling to use as a reference when writing the S.O.S. sketch, I came across something on the Arduino website that I knew was exactly what I wanted to take a look at next. The Arduino For Loop tutorial had my fullest attention at the mention of Knight Rider. Using the excellent diagram provided, I used the breadboard, LEDs, resistors and cabling to replicate that diagram and loaded the tutorial’s code onto my Arduino.


I experienced a couple little hiccups – I had the polarity wrong on the LEDs (the shorter leg is the ground!) and I had wired up one resistor incorrectly. But once I tackled those, the Arduino came to life replicating K.I.T.T.’s iconic Larson scanner, much to my delight:
What’s Next?
I tinkered a little bit; I wrote my own sketch and I built something from scratch using somebody else’s design. Moving forward, I expect to start building things of my own design and coding them to do something a little bit more complicated than light up a few LEDs. Before I got started with my Arduino, I was a little intimidated by both, but now that I’ve gotten these two tiny projects behind me, I’m excited about all the uses I can dream up for an Arduino to fill.
I’m especially enthused now that I’ve been bitten by the home automation bug. I think that the sky is the limit for the uses I could get out of the Arduino and the very similar ESP8266. I’ve already brainstormed a few things I could do with an Arduino. My most unique idea so far is to find a way to tap into the door sensor that’s already on my back door, a PIR motion sensor, and automate a method to send a notification to my Nexus 6 so that I know when one of our dogs is wanting to be let outside. This is why I’m most excited about the Arduino: nobody’s going to make exactly the home automation devices that I’m wanting the most, so instead why not make them myself?
For those of you more experienced with the Arduino, what kind(s) of things have you used yours for? Please share your experiences in the comments below!
Warning
From this blog, you can see that I’m using an Arduino Leonardo from Borderless Electronics. Please do not think that my use is any kind of endorsement for this company. In fact, STAY AWAY!!! I’ve since supported another crowdsourced effort of Borderless Electronics, the BE MAKER! KIT plus FREE lessons on electronics, from Zero to Internet of Things and it has not gone well. The organizer, Harold Timmis, appears to be incompetent, a crook, or most likely both. The campaign has drawn out for years instead of the months originally promised, and better equipment is available at a much better price now. Harold claims that this is the fault of his supplier, but he’s also failed to provide the lessons or other materials that were part of the crowd-funded project that were his alleged specialty. I highly doubt that any of us (4,299 funders for $248,116) will ever see the perks that we paid for or a refund of our money, but at the very least I thought I’d warn you.
I love the Arduino Leonardo, but if you want to buy your own it’s best to find another seller other than Borderless Electronics or smARtMAKER, Inc.. Do you have a recommendation on where to find an inexpensive Arduino? Please share it in the comments below.