It’s been a little over two years since we built a Network Cupboard for my house, wiring up every room except the dining room with CAT5e, and using Gigabit switches/routers behind my Verizon FiOS. At the time, I was a relatively new home owner and I was excited to put my geeky mark on the property. The project started out simple: I wanted a dedicated drop in the living room so that I didn’t have to use slower WiFi on my Playstation 3, but it quickly escalated from there.
Having one DIY project under my belt emboldened me to start taking on others, which included a makeover of my garage which has been moving along in spurts. When I recently painted the garage, including the ceiling, I was trying to stream music from my cell phone and using a bluetooth speaker. As I moved around the garage, it caused me to realize that my WiFi coverage was very spotty in most parts of the garage. I wound up using WiFi Analyzer on my phone to find the best spot and parked my phone there while I worked on painting.
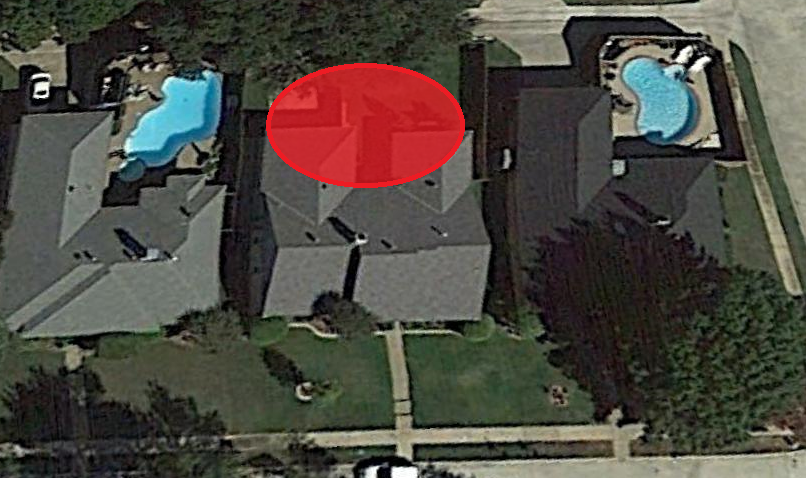 This started me thinking about how many other places on our property had poor WiFi coverage. The bathroom of our master bedroom had very little coverage and the backyard was pretty spotty as well. It was important to me that I find a way to improve coverage in at least two of those areas, if not all three. However, considering that the garage and master bathroom were essentially on opposite ends of the house, I assumed that it was probably going to be a bit difficult to get coverage to both without spending some really significant dollars.
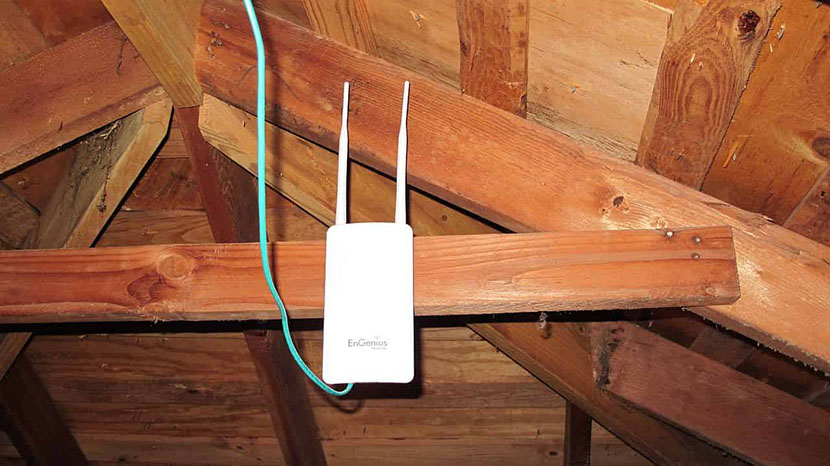
My first idea was to buy a WiFi Access Point and mount it to a wall in the garage, close to the ceiling. But Pat pointed something out to me; there wasn’t going to be any convenient power up at the top of the wall that I was considering. This got my brain working and immediately thinking about extension cables and how I didn’t want to muck up the walls I’d just spent the time and energy into painting. In order to save the walls, I decided that I’d put the access point up in the attic, towards the back of the house and closest to the backyard as possible. To solve the problem of getting power to wherever we mounted the access point, I decided that instead of using extension cables or hiring an electrician to install an outlet, I’d play with something I’d only read about so far, power over Ethernet (PoE).
Affiliate Disclaimer: Some of the links on this website are affiliate links, meaning, at no additional cost to you, I may earn a commission if you click through and make a purchase. I only recommend products that I believe will add value for my audience. Please understand that I have experience with all of these companies' products, and I recommend them because they are helpful and useful, not because of these small commissions.
EnGenius ENS202EXT Review
For my access point, I decided on purchasing the EnGenius ENS202EXT (specs) which ticked off most of my important criteria:
- Relatively inexpensive: Preferably under $100
- Rated for Outdoor use: Since it was going up in the attic, I wanted it to be durable.
- Power over Ethernet: The PoE used in the EnGenius ENS202EXT is proprietary, which is a bit disappointing. I wish I’d been a bit more careful in my shopping and picked something that used established standards. This may have been a disappointment, but it was far from any kind of deal breaker for me.
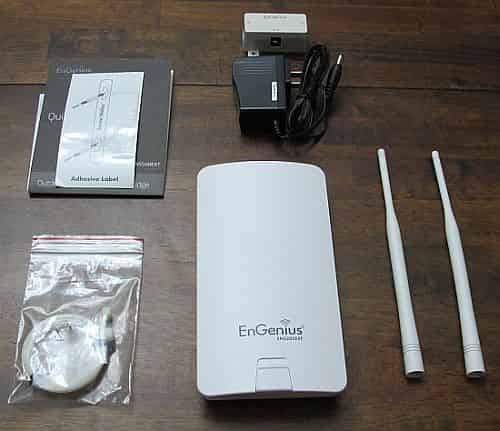
The EnGenius ENS202EXT provides its power by using a proprietary power injector. You connect your network into the LAN side, hook the power adapter up to the injector, and then connect the other end of the injector (labeled: PoE) into the access point. Because of its price and my experience with consumer-level networking equipment, I assumed I’d need to power cycle it occasionally. So we wound up wiring it directly into the patch panel, that way a power cycle was never further away than disconnecting/reconnecting the right cable on the patch panel instead of digging around looking for the power adapter behind the patch panel.
All of the cabling went pretty well. We continued the same cabling convention on the front of my patch panel; purple cables were the drops for the workstations, red cables were used for the network gear (FiOS router, OpenWRT router, switches, and EnGenius ENS202EXT) and finally a green cable was used for the proprietary PoE injector. The color convention will hopefully help me avoid plugging the hot side of that injector back into my other network equipment and potentially frying a switch or router.
It was a little astonishing to me, but the actual act of cabling and installing the router was a snap. I had to do a little bit of traversing the rafters in the attic, but it wasn’t too much effort. All told, I was up in the attic no more than 30 minutes.
The frustrating and time-consuming part came when setting up the EnGenius ENS202EXT. We were astonished when we discovered that its default settings uses a static IP address. In my mind, the default setting on a piece of equipment like this would be to use DHCP. Just about every use-case scenario that I can think of it would be added to an existing network where the default static IP (192.168.1.1) would likely already be in use by another device. Which is exactly what happened on my network; the minute we plugged in the EnGenius ENS202EXT we had all sorts of problems because both it and my FiOS router had grabbed the same IP address. In my opinion, the way the configuration interface is laid out is pretty poor too. I found using it to be pretty counter-intuitive and early on and wound up losing a bunch of changes only because they did not get committed. By the time I sorted out the problems with the static IP and the poor interface, I’d spent more time configuring the device from my chair than we spent physically installing it, which also included having to push my Corvette out of the garage due to a dead battery. I’d assumed that we’d spend way more time on the physical labor, boy was I wrong!
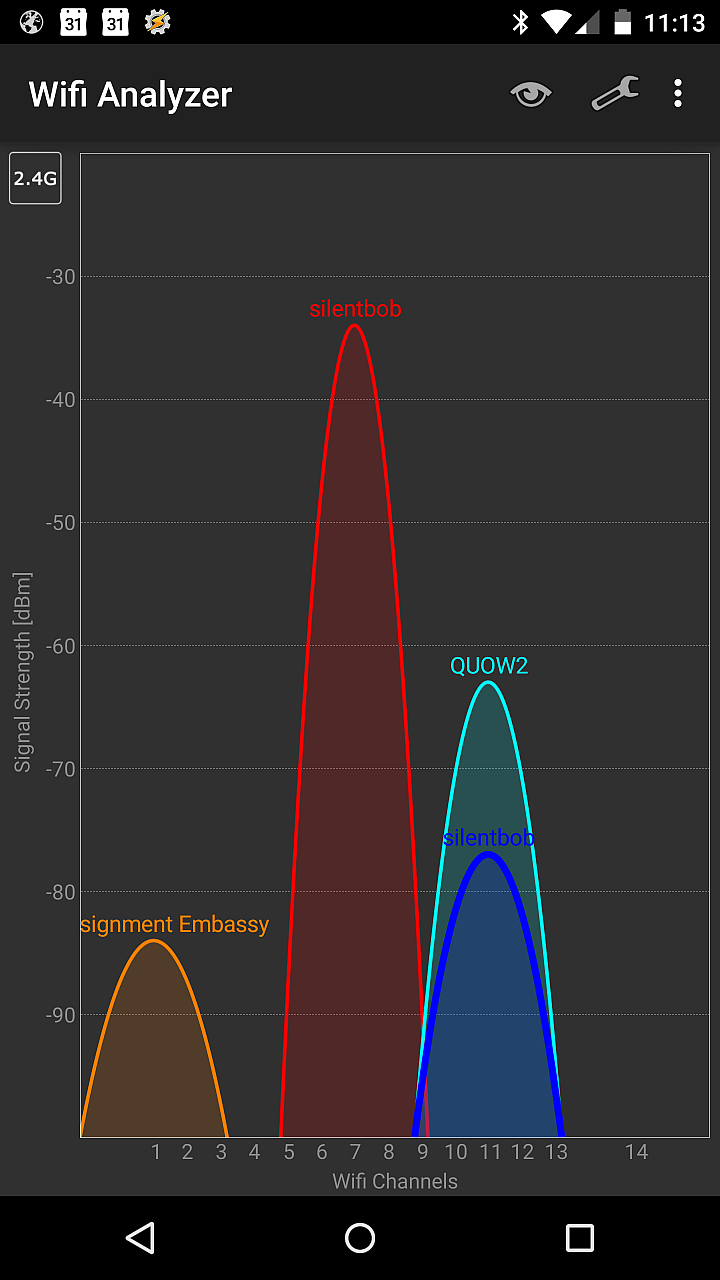
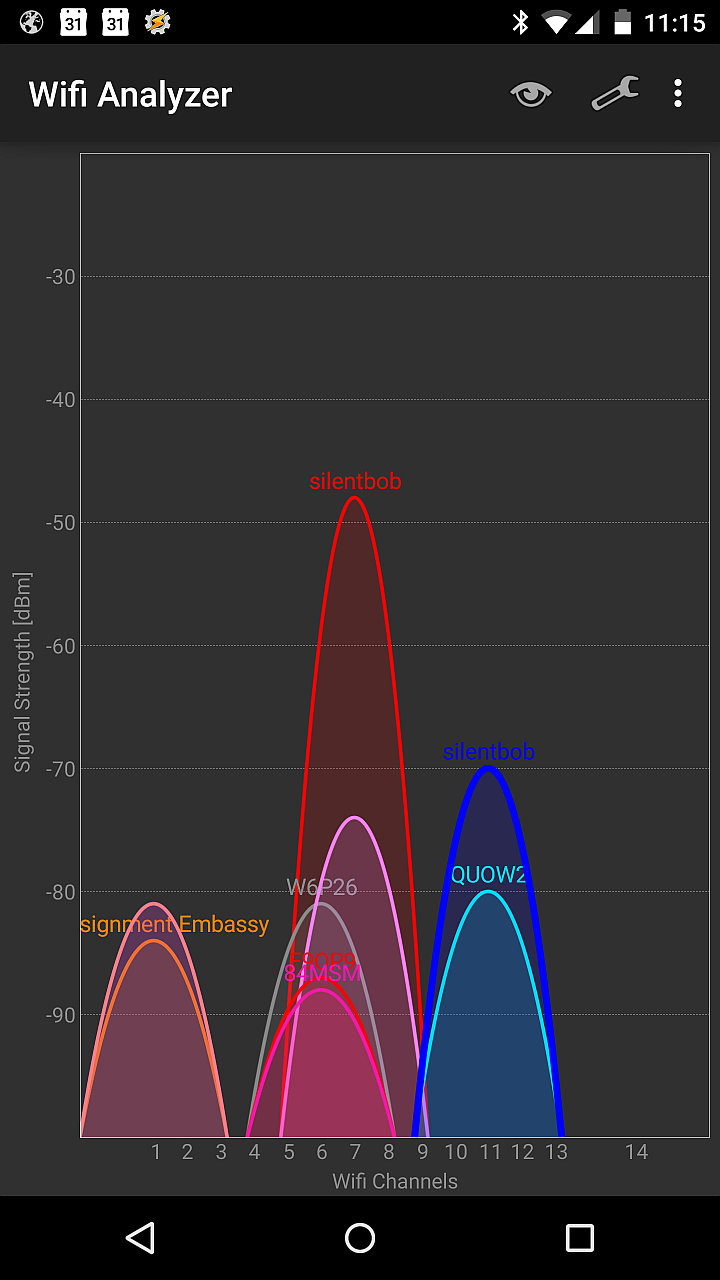
In the end, I wound up naming the access point the same as my other WiFi, which I call “silentbob” (Thanks, Kevin Smith). I configured the access point with all the same security settings. However, I moved it down a channel so there’s very little (if any) overlap with my other access point. The “new” silentbob wound up on channel 7 and the legacy silentbob stayed on channel 11.


 <a href = "/images/2015/wifiap/injector_mounted.jpg" title="Extending WiFi" alt=""PoE" Injector mounted in DIY network rack"><img src = "/images/2015/wifiap/thumbs/thumb_injector_mounted.jpg" title="Extending WiFi" alt=""PoE" Injector mounted in DIY network rack"></a>
<a href = "/images/2015/wifiap/injector_cabled.jpg" title="Extending WiFi" alt=""PoE" Injector mounted and cabled"><img src = "/images/2015/wifiap/thumbs/thumb_injector_cabled.jpg" title="Extending WiFi" alt=""PoE" Injector mounted and cabled"></a>
<a href = "/images/2015/wifiap/injector_mounted.jpg" title="Extending WiFi" alt=""PoE" Injector mounted in DIY network rack"><img src = "/images/2015/wifiap/thumbs/thumb_injector_mounted.jpg" title="Extending WiFi" alt=""PoE" Injector mounted in DIY network rack"></a>
<a href = "/images/2015/wifiap/injector_cabled.jpg" title="Extending WiFi" alt=""PoE" Injector mounted and cabled"><img src = "/images/2015/wifiap/thumbs/thumb_injector_cabled.jpg" title="Extending WiFi" alt=""PoE" Injector mounted and cabled"></a>
 <a href = "/images/2015/wifiap/Pockethernet_Power.png" title="Extending WiFi" alt="Pockethernet Tester reflects "PoE" carrying 10v"><img src = "/images/2015/wifiap/thumbs/thumb_Pockethernet_Power.png" title="Extending WiFi" alt="Pockethernet Tester reflects "PoE" carrying 10v"></a>

Conclusion
I’m a little surprised and a little aggravated that the hardest part of this project was the software on the not-so-“EnGenius” Access Point. Had that been a little bit more well thought out, this project would’ve been a snap. Using the Wifi Analyzer, I walked around the troublesome spots that I had hoped to add coverage to: the garage, backyard and the master bedroom’s bathroom. Here are the results:
 |
 |
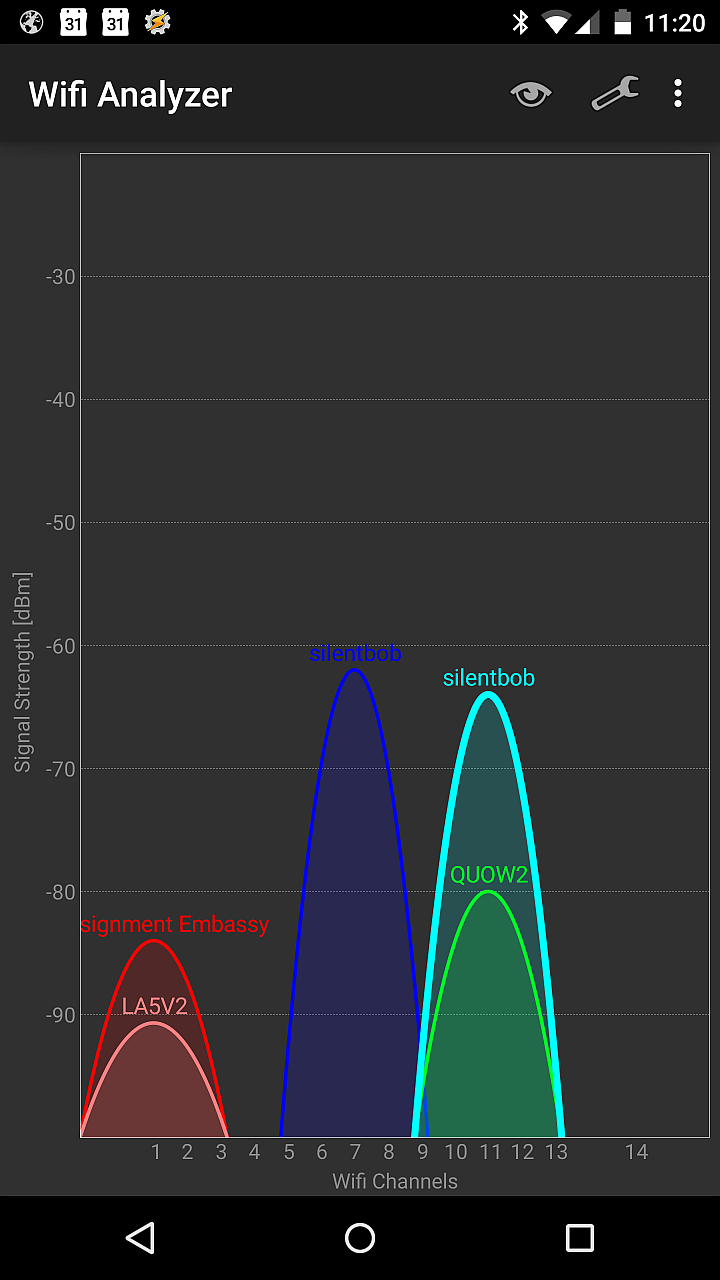 |
In the garage and the backyard, WiFi coverage from the new access point is dramatically better than on the legacy access point. Coverage in the bathroom is more or less exactly the same, but I’m pretty impressed since it’s going through the garage’s exterior, across the backyard, and then into the master bedroom. It’s as strong in there as my other access point, which is just down the hall towards the center of the house in the living room.
Overall, I’m pretty pleased with the results. I’m especially pleased what a great opportunity this project was to play with my new Pockethernet for validation of the cabling. My only significant disappointment is realizing how full my switches and hubs have become already. The next time I need to add network hardware, I may actually have to buy a bigger switch! Have you guys done anything similar to extend your WiFi coverage? Please share your solutions and experiences down in the comments below!